
Last updated on 31st May 2020| 3639
Introduction
Working through this beginners guide to the Linux command line (BASH) you will be up and running utilising powerful techniques, tips and tricks to make your life easier in no time. The following pages are intended to give you a solid foundation in how to use the terminal, to get the computer to do useful work for you. You won’t be a Unix guru at the end but you will be well on your way and armed with the right knowledge and skills to get you there if that’s what you want (which you should because that will make you even more awesome).
Here you will learn the Linux command line (Bash) with our 13 part beginners tutorial. It contains clear descriptions, command outlines, examples, shortcuts and best practice. At first, the Linux command line may seem daunting, complex and scary. It is actually quite simple and intuitive (once you understand what is going on that is), and once you work through the following sections you will understand what is going on.
Unix likes to take the approach of giving you a set of building blocks and then letting you put them together. This allows us to build things to suit our needs. With a bit of creativity and logical thinking, mixed in with an appreciation of how the blocks work, we can assemble tools to do virtually anything we want. The aim is to be lazy. Why should we do anything we can get the computer to do for us? The only reason I can think of is that you don’t know how (but after working through these pages you will know how, so then there won’t be a good reason).
A question that may have crossed your mind is “Why should I bother learning the command line? The Graphical User Interface is much easier and I can already do most of what I need there.” To a certain extent you would be right, and by no means am I suggesting you should ditch the GUI. Some tasks are best suited to a GUI, word processing and video editing are great examples. At the same time, some tasks are more suited to the command line, data manipulation (reporting) and file management are some good examples. Some tasks will be just as easy in either environment. Think of the command line as another tool you can add to your belt. As always, pick the best tool for the job.
outline
This Linux tutorial is divided into 13 sections. In general I recommend you work through them in order but if you’ve come here just to learn about a specific topic then feel free to just go straight to that one.
You can now jump into section 1 and get started or keep reading below to learn a little more about this tutorial.
- The Command Line – What is it, how does it work and how do I get to one.
- Basic Navigation – An introduction to the Linux directory system and how to get around it.
- More About Files – Find out some interesting characteristics of files and directories in a Linux environment.
- Manual Pages – Learn how to make the most of the Linux commands you are learning.
- File Manipulation – How to make, remove, rename, copy and move files and directories.
- Vi Text Editor – Discover a powerful Linux based text editor.
- Wildcards – Also referred to as globbing, this is a means to refer to several files in one go.
- Permissions – Learn to identify and change the permissions of files and directories and what the consequences of these are.
- Filters – An introduction to various commands that allow us to mangle data in interesting and useful ways.
- Grep and Regular Expressions – Master a powerful pattern matching language that is useful for analysing and processing data.
- Piping and Redirection – Join commands together in powerful combinations.
- Process Management – See what is currently running on your Linux system and what state the system is in, learn how to kill programs that have hung and put jobs in the background.
- Scripting – Be happy. Get the computer to do tedious and repetitive tasks for you.
- Cheat Sheet – A quick reference for the main points covered in this tutorial.
structure
The best way to learn the Linux command line is as a series of small, easy to manage steps. This tutorial is organised as such, with each section building upon the knowledge and skills learned in the previous sections. If you work through them in order, read them fully (there is a fair bit of material but it is important for getting a proper understanding) and practice on the command line as you go I believe you should have a fairly pleasant and smooth journey to Linux command line mastery. 99 times out of 100 when a student has troubles with this stuff I find that it is not that they are incapable but that they were lazy and didn’t read the material fully.
Each section is structured in the following format:
- An introduction outlining what you will learn in that section.
- Detailed material including extensive examples.
- A summary of programs covered in that section and the most important concepts.
- A set of activities to help you solidify your knowledge and skills.
Think of the activities not as tutorial questions (such as you may get in a class at school) but as direction on where to explore in the Linux environment to benefit from your new knowledge and skills. Treat the activities as a starting point for exploration. The further you take it, the better you will do. (How well you do and how far you go depends on how unlazy you are.)

Get Best linux Training with Dedicated lab Environment
- Instructor-led Sessions
- Real-life Case Studies
- Assignments
This site is also designed to work well on tablets. I know a lot of students like to be at their computer doing work and have their tablet next to them with reference material on it. If that is you then this site works quite well with that set up. Another good approach is to have your browser on one half of the screen of your computer and a terminal on the other half so you can try out the examples as you go.
Some general house rules
- I’ll refer to Linux in the following pages, whenever I do, assume I’m actually saying Unix/ Linux. Linux is an offshoot of Unix and behaves pretty much exactly the same.
- Whenever you see <something>, what this means is that you are to replace this with something useful. Replace the whole thing (including the < and >). If you see something such as <n> then it usually means replace this with a number.
- Whenever you see [something] this usually means that this something is optional. When you run the command you may put in the something or leave it out.
Problem solving and creative thinking
If you wish to succeed with the Linux command line then there are two things you need, Problem solving and Creative thinking. Here are some basic pointers to help you along the way.
- Explore and experiment. Remember, you’re learning about a set of building blocks and with them you can build almost anything. The examples you will find are intended to be an illustration of how they work, not the only thing you can do with them. I encourage you to tweak the examples and see how they behave. This will give you a much better understanding on how they work. You will have a lot of questions along the way along the lines of “What if….?” and “Can I …?” to which I say, “Give it a go and see what happens.” The worst you can really get is an error message. In which case you read the error message to understand why it didn’t work, then have another go. Don’t hold back!
- Read carefully and don’t skip over the fine details. I can’t stress this enough. The fine details are important and are often the difference between your command working and not working. If something isn’t working then re-read the material carefully and re look over what you have typed in to make sure you haven’t make a silly little typo.
So the general approach is:
- Create an hypothesis.
- Run your command to test this hypothesis.
- Observe the output. If it is what you were expecting, great. If not then continue.
- Analyse the output and adjust your understanding accordingly.
- Rinse and repeat till you get what you are after.
Learn more about Problem Solving Skills.
Obtainting linux
Learning Linux is like riding a bike, you can only become proficient by actually doing. So before getting started, make sure you have access to a terminal. Luckily, you have several options available to you here.
- If you are on a Mac then you are in luck, you already have a terminal.
- Another option is to run Linux. Linux is completely free and there are many good distros out there. Some I would recommend include Ubuntu (which is quite popular and easy to use) and OpenSuSe (My personal favourite). If you take this approach then there are a few ways you can go.
- If you have a spare machine then you can just install it on that.
- You can create a dual boot system (ie both Windows and Linux are installed on the computer, you choose which to run when you boot up.). Most modern Linux distros will handle creating this for you when you install it (resizing existing windows partitions as well). Do back up any important files before doing this method though (I’ve never seen it fail but better to be safe).
- You can run Linux in a virtual machine. VirtualBox is a nice tool to use for this and it’s totally free too.
- You may also have access to a machine remotely either at work or uni. If you do then remotely logging into these to access a terminal is an option as well.
What you’ll learn
- A little history of the command line
- How to access the command line from your own computer
- How to perform some basic file manipulation
- A few other useful commands
- How to chain commands together to make more powerful tools
- The best way to use administrator powers
What you’ll need:
A computer running Ubuntu or some other version of Linux
Every Linux system includes a command line of one sort or another. This tutorial includes some specfic steps for Ubuntu 18.04 but most of the content should work regardless of your Linux distribution.
A brief history lesson
During the formative years of the computer industry, one of the early operating systems was called Unix. It was designed to run as a multi-user system on mainframe computers, with users connecting to it remotely via individual terminals. These terminals were pretty basic by modern standards: just a keyboard and screen, with no power to run programs locally. Instead they would just send keystrokes to the server and display any data they received on the screen. There was no mouse, no fancy graphics, not even any choice of colour. Everything was sent as text, and received as text. Obviously, therefore, any programs that ran on the mainframe had to produce text as an output and accept text as an input.
Compared with graphics, text is very light on resources. Even on machines from the 1970s, running hundreds of terminals across glacially slow network connections (by today’s standards), users were still able to interact with programs quickly and efficiently. The commands were also kept very terse to reduce the number of keystrokes needed, speeding up people’s use of the terminal even more. This speed and efficiency is one reason why this text interface is still widely used today.
When logged into a Unix mainframe via a terminal users still had to manage the sort of file management tasks that you might now perform with a mouse and a couple of windows. Whether creating files, renaming them, putting them into subdirectories or moving them around on disk, users in the 70s could do everything entirely with a textual interface.
Each of these tasks required its own program or command: one to change directories (cd), another to list their contents (ls), a third to rename or move files (mv), and so on. In order to coordinate the execution of each of these programs, the user would connect to one single master program that could then be used to launch any of the others. By wrapping the user’s commands this “shell” program, as it was known, could provide common capabilities to any of them, such as the ability to pass data from one command straight into another, or to use special wildcard characters to work with lots of similarly named files at once. Users could even write simple code (called “shell scripts”) which could be used to automate long series of shell commands in order to make complex tasks easier. The original Unix shell program was just called sh, but it has been extended and superceded over the years, so on a modern Linux system you’re most likely to be using a shell called bash. Don’t worry too much about which shell you have, all the content in this tutorial will work on just about all of them.
Linux is a sort-of-descendent of Unix. The core part of Linux is designed to behave similarly to a Unix system, such that most of the old shells and other text-based programs run on it quite happily. In theory you could even hook up one of those old 1970s terminals to a modern Linux box, and access the shell through that. But these days it’s far more common to use a software terminal: that same old Unix-style text interface, but running in a window alongside your graphical programs. Let’s see how you can do that yourself!
Opening a terminal
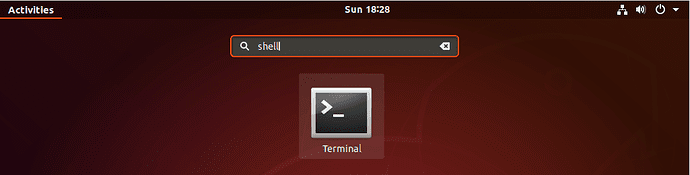
On a Ubuntu 18.04 system you can find a launcher for the terminal by clicking on the Activities item at the top left of the screen, then typing the first few letters of “terminal”, “command”, “prompt” or “shell”. Yes, the developers have set up the launcher with all the most common synonyms, so you should have no problems finding it.
Other versions of Linux, or other flavours of Ubuntu, will usually have a terminal launcher located in the same place as your other application launchers. It might be hidden away in a submenu or you might have to search for it from within your launcher, but it’s likely to be there somewhere.
If you can’t find a launcher, or if you just want a faster way to bring up the terminal, most Linux systems use the same default keyboard shortcut to start it: Ctrl-Alt-T.
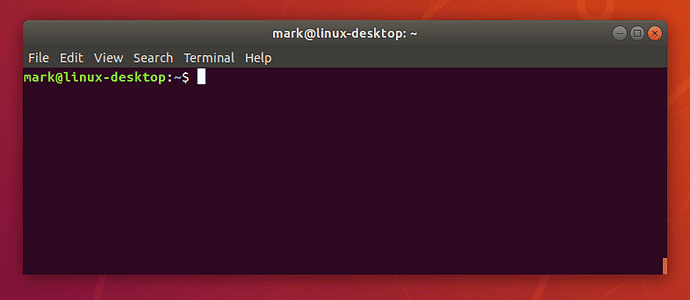
However you launch your terminal, you should end up with a rather dull looking window with an odd bit of text at the top, much like the image below. Depending on your Linux system the colours may not be the same, and the text will likely say something different, but the general layout of a window with a large (mostly empty) text area should be similar.
Let’s run our first command. Cick the mouse into the window to make sure that’s where your keystrokes will go, then type the following command, all in lower case, before pressing the Enter or Return key to run it.
pwd
You should see a directory path printed out (probably something like /home/YOUR_USERNAME), then another copy of that odd bit of text.
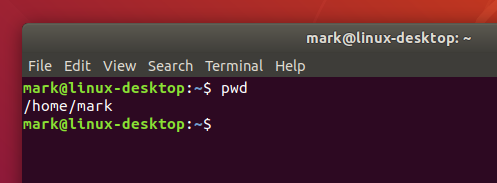
There are a couple of basics to understand here, before we get into the detail of what the command actually did. First is that when you type a command it appears on the same line as the odd text. That text is there to tell you the computer is ready to accept a command, it’s the computer’s way of prompting you. In fact it’s usually referred to as the prompt, and you might sometimes see instructions that say “bring up a prompt”, “open a command prompt”, “at the bash prompt” or similar. They’re all just different ways of asking you to open a terminal to get to a shell.
On the subject of synonyms, another way of looking at the prompt is to say that there’s a line in the terminal into which you type commands. A command line, if you will. Again, if you see mention of “command line”, including in the title of this very tutorial, it’s just another way of talking about a shell running in a terminal.
The second thing to understand is that when you run a command any output it produces will usually be printed directly in the terminal, then you’ll be shown another prompt once it’s finished. Some commands can output a lot of text, others will operate silently and won’t output anything at all. Don’t be alarmed if you run a command and another prompt immediately appears, as that usually means the command succeeded. If you think back to the slow network connections of our 1970s terminals, those early programmers decided that if everything went okay they may as well save a few precious bytes of data transfer by not saying anything at all.
A sense of location
Now to the command itself. pwd is an abbreviation of ‘print working directory’. All it does is print out the shell’s current working directory. But what’s a working directory?
One important concept to understand is that the shell has a notion of a default location in which any file operations will take place. This is its working directory. If you try to create new files or directories, view existing files, or even delete them, the shell will assume you’re looking for them in the current working directory unless you take steps to specify otherwise. So it’s quite important to keep an idea of what directory the shell is “in” at any given time, after all, deleting files from the wrong directory could be disastrous. If you’re ever in any doubt, the pwd command will tell you exactly what the current working directory is.
You can change the working directory using the cd command, an abbreviation for ‘change directory’. Try typing the following:
- cd /
- pwd
Note that the directory separator is a forward slash (“/”), not the backslash that you may be used to from Windows or DOS systems
Now your working directory is “/”. If you’re coming from a Windows background you’re probably used to each drive having its own letter, with your main hard drive typically being “C:”. Unix-like systems don’t split up the drives like that. Instead they have a single unified file system, and individual drives can be attached (“mounted”) to whatever location in the file system makes most sense. The “/” directory, often referred to as the root directory, is the base of that unified file system. From there everything else branches out to form a tree of directories and subdirectories.

Learn Hands-On Practical linux Certification Course By MNC Trainers
Weekday / Weekend BatchesSee Batch DetailsToo many roots
Beware: although the “/” directory is sometimes referred to as the root directory, the word “root” has another meaning. root is also the name that has been used for the superuser since the early days of Unix. The superuser, as the name suggests, has more powers than a normal user, so can easily wreak havoc with a badly typed command. We’ll look at the superuser account more in section 7. For now you only have to know that the word “root” has multiple meanings in the Linux world, so context is important.
From the root directory, the following command will move you into the “home” directory (which is an immediate subdirectory of “/”):
- cd home
- pwd
To go up to the parent directory, in this case back to “/”, use the special syntax of two dots (..) when changing directory (note the space between cd and .., unlike in DOS you can’t just type cd.. as one command):
- cd ..
- pwd
Typing cd on its own is a quick shortcut to get back to your home directory:
- cd
- pwd
You can also use .. more than once if you have to move up through multiple levels of parent directories:
- cd ../..
- pwd
Notice that in the previous example we described a route to take through the directories. The path we used means “starting from the working directory, move to the parent / from that new location move to the parent again”. So if we wanted to go straight from our home directory to the “etc” directory (which is directly inside the root of the file system), we could use this approach:
- cd
- pwd
- cd ../../etc
- pwd
Relative and absolute paths
Most of the examples we’ve looked at so far use relative paths. That is, the place you end up at depends on your current working directory. Consider trying to cd into the “etc” folder. If you’re already in the root directory that will work fine:
- cd /
- pwd
- cd etc
- pwd
But what if you’re in your home directory?
- cd
- pwd
- cd etc
- pwd
You’ll see an error saying “No such file or directory” before you even get to run the last pwd. Changing directory by specifying the directory name, or using .. will have different effects depending on where you start from. The path only makes sense relative to your working directory.
But we have seen two commands that are absolute. No matter what your current working directory is, they’ll have the same effect. The first is when you run cd on its own to go straight to your home directory. The second is when you used cd / to switch to the root directory. In fact any path that starts with a forward slash is an absolute path. You can think of it as saying “switch to the root directory, then follow the route from there”. That gives us a much easier way to switch to the etc directory, no matter where we currently are in the file system:
- cd
- pwd
- cd /etc
- pwd
It also gives us another way to get back to your home directory, and even to the folders within it. Suppose you want to go straight to your “Desktop” folder from anywhere on the disk (note the upper-case “D”). In the following command you’ll need to replace USERNAME with your own username, the whoami command will remind you of your username, in case you’re not sure:
- whoami
- cd /home/USERNAME/Desktop
- pwd
There’s one other handy shortcut which works as an absolute path. As you’ve seen, using “/” at the start of your path means “starting from the root directory”. Using the tilde character (“~”) at the start of your path similarly means “starting from my home directory”.
- cd ~
- pwd
- cd ~/Desktop
- pwd
Now that odd text in the prompt might make a bit of sense. Have you noticed it changing as you move around the file system? On a Ubuntu system it shows your username, your computer’s network name and the current working directory. But if you’re somewhere inside your home directory, it will use “~” as an abbreviation. Let’s wander around the file system a little, and keep an eye on the prompt as you do so:
- cd
- cd /
- cd ~/Desktop
- cd /etc
- cd /var/log
- cd ..
- cd
You must be bored with just moving around the file system by now, but a good understanding of absolute and relative paths will be invaluable as we move on to create some new folders and files!
Creating folders and files
In this section we’re going to create some real files to work with. To avoid accidentally trampling over any of your real files, we’re going to start by creating a new directory, well away from your home folder, which will serve as a safer environment in which to experiment:
- mkdir /tmp/tutorial
- cd /tmp/tutorial
Notice the use of an absolute path, to make sure that we create the tutorial directory inside /tmp. Without the forward slash at the start the mkdir command would try to find a tmp directory inside the current working directory, then try to create a tutorial directory inside that. If it couldn’t find a tmp directory the command would fail.
In case you hadn’t guessed, mkdir is short for ‘make directory’. Now that we’re safely inside our test area (double check with pwd if you’re not certain), let’s create a few subdirectories:
- mkdir dir1 dir2 dir3
There’s something a little different about that command. So far we’ve only seen commands that work on their own (cd, pwd) or that have a single item afterwards (cd /, cd ~/Desktop). But this time we’ve added three things after the mkdir command. Those things are referred to as parameters or arguments, and different commands can accept different numbers of arguments. The mkdir command expects at least one argument, whereas the cd command can work with zero or one, but no more. See what happens when you try to pass the wrong number of parameters to a command:
- mkdir
- cd /etc ~/Desktop
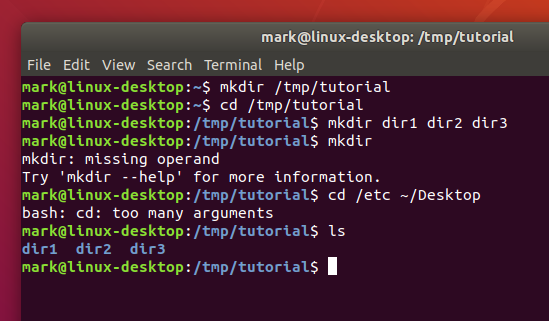
Back to our new directories. The command above will have created three new subdirectories inside our folder. Let’s take a look at them with the ls (list) command:
- ls
If you’ve followed the last few commands, your terminal should be looking something like this:
Notice that mkdir created all the folders in one directory. It didn’t create dir3 inside dir2 inside dir1, or any other nested structure. But sometimes it’s handy to be able to do exactly that, and mkdir does have a way:
- mkdir -p dir4/dir5/dir6
- ls
This time you’ll see that only dir4 has been added to the list, because dir5 is inside it, and dir6 is inside that. Later we’ll install a useful tool to visualise the structure, but you’ve already got enough knowledge to confirm it:
- cd dir4
- ls
- cd dir5
- ls
- cd ../..
The “-p” that we used is called an option or a switch (in this case it means “create the parent directories, too”). Options are used to modify the way in which a command operates, allowing a single command to behave in a variety of different ways. Unfortunately, due to quirks of history and human nature, options can take different forms in different commands. You’ll often see them as single characters preceded by a hyphen (as in this case), or as longer words preceded by two hyphens. The single character form allows for multiple options to be combined, though not all commands will accept that. And to confuse matters further, some commands don’t clearly identify their options at all, whether or not something is an option is dictated purely by the order of the arguments! You don’t need to worry about all the possibilities, just know that options exist and they can take several different forms. For example the following all mean exactly the same thing:
- # Don’t type these in, they’re just here for demonstrative purposes
- mkdir –parents –verbose dir4/dir5
- mkdir -p –verbose dir4/dir5
- mkdir -p -v dir4/dir5
- mkdir -pv dir4/dir5
Now we know how to create multiple directories just by passing them as separare arguments to the mkdir command. But suppose we want to create a directory with a space in the name? Let’s give it a go:
- mkdir another folder
- ls
You probably didn’t even need to type that one in to guess what would happen: two new folders, one called another and the other called folder. If you want to work with spaces in directory or file names, you need to escape them. Don’t worry, nobody’s breaking out of prison; escaping is a computing term that refers to using special codes to tell the computer to treat particular characters differently to normal. Enter the following commands to try out different ways to create folders with spaces in the name:
- mkdir “folder 1”
- mkdir ‘folder 2’
- mkdir folder\ 3
- mkdir “folder 4” “folder 5”
- mkdir -p “folder 6″/”folder 7”
- ls
Although the command line can be used to work with files and folders with spaces in their names, the need to escape them with quote marks or backslashes makes things a little more difficult. You can often tell a person who uses the command line a lot just from their file names: they’ll tend to stick to letters and numbers, and use underscores (“_”) or hyphens (“-“) instead of spaces.
Creating files using redirection
Our demonstration folder is starting to look rather full of directories, but is somewhat lacking in files. Let’s remedy that by redirecting the output from a command so that, instead of being printed to the screen, it ends up in a new file. First, remind yourself what the ls command is currently showing:
- ls
Suppose we wanted to capture the output of that command as a text file that we can look at or manipulate further. All we need to do is to add the greater-than character (“>”) to the end of our command line, followed by the name of the file to write to:
- ls > output.txt
This time there’s nothing printed to the screen, because the output is being redirected to our file instead. If you just run ls on its own you should see that the output.txt file has been created. We can use the cat command to look at its content:
- cat output.txt
Okay, so it’s not exactly what was displayed on the screen previously, but it contains all the same data, and it’s in a more useful format for further processing. Let’s look at another command, echo:
- echo “This is a test”
Yes, echo just prints its arguments back out again (hence the name). But combine it with a redirect, and you’ve got a way to easily create small test files:
- echo “This is a test” > test_1.txt
- echo “This is a second test” > test_2.txt
- echo “This is a third test” > test_3.txt
- ls
You should cat each of these files to theck their contents. But cat is more than just a file viewer – its name comes from ‘concatenate’, meaning “to link together”. If you pass more than one filename to cat it will output each of them, one after the other, as a single block of text:
- cat test_1.txt test_2.txt test_3.txt
Where you want to pass multiple file names to a single command, there are some useful shortcuts that can save you a lot of typing if the files have similar names. A question mark (“?”) can be used to indicate “any single character” within the file name. An asterisk (“*”) can be used to indicate “zero or more characters”. These are sometimes referred to as “wildcard” characters. A couple of examples might help, the following commands all do the same thing:
- cat test_1.txt test_2.txt test_3.txt
- cat test_?.txt
- cat test_*
More escaping required
As you might have guessed, this capability also means that you need to escape file names with ? or * characters in them, too. It’s usually better to avoid any punctuation in file names if you want to manipulate them from the command line.
If you look at the output of ls you’ll notice that the only files or folders that start with “t” are the three test files we’ve just created, so you could even simplify that last command even further to cat t*, meaning “concatenate all the files whose names start with a t and are followed by zero or more other characters”. Let’s use this capability to join all our files together into a single new file, then view it:
- cat t* > combined.txt
- cat combined.txt
What do you think will happen if we run those two commands a second time? Will the computer complain, because the file already exists? Will it append the text to the file, so it contains two copies? Or will it replace it entirely? Give it a try to see what happens, but to avoid typing the commands again you can use the Up Arrow and Down Arrow keys to move back and forth through the history of commands you’ve used. Press the Up Arrow a couple of times to get to the first cat and press Enter to run it, then do the same again to get to the second.
As you can see, the file looks the same. That’s not because it’s been left untouched, but because the shell clears out all the content of the file before it writes the output of your cat command into it. Because of this, you should be extra careful when using redirection to make sure that you don’t accidentally overwrite a file you need. If you do want to append to, rather than replace, the content of the files, double up on the greater-than character:
- cat t* >> combined.txt
- echo “I’ve appended a line!” >> combined.txt
- cat combined.txt
Repeat the first cat a few more times, using the Up Arrow for convenience, and perhaps add a few more arbitrary echo commands, until your text document is so large that it won’t all fit in the terminal at once when you use cat to display it. In order to see the whole file we now need to use a different program, called a pager (because it displays your file one “page” at a time). The standard pager of old was called more, because it puts a line of text at the bottom of each page that says “–More–” to indicate that you haven’t read everything yet. These days there’s a far better pager that you should use instead: because it replaces more, the programmers decided to call it less.
- less combined.txt
When viewing a file through less you can use the Up Arrow, Down Arrow, Page Up, Page Down, Home and End keys to move through your file. Give them a try to see the difference between them. When you’ve finished viewing your file, press q to quit less and return to the command line.
A note about case
Unix systems are case-sensitive, that is, they consider “A.txt” and “a.txt” to be two different files. If you were to run the following lines you would end up with three files:
- echo “Lower case” > a.txt
- echo “Upper case” > A.TXT
- echo “Mixed case” > A.txt
Generally you should try to avoid creating files and folders whose name only varies by case. Not only will it help to avoid confusion, but it will also prevent problems when working with different operating systems. Windows, for example, is case-insensitive, so it would treat all three of the file names above as being a single file, potentially causing data loss or other problems.
You might be tempted to just hit the Caps Lock key and use upper case for all your file names. But the vast majority of shell commands are lower case, so you would end up frequently having to turn it on and off as you type. Most seasoned command line users tend to stick primarily to lower case names for their files and directories so that they rarely have to worry about file name clashes, or which case to use for each letter in the name.
Good naming practice
When you consider both case sensitivity and escaping, a good rule of thumb is to keep your file names all lower case, with only letters, numbers, underscores and hyphens. For files there’s usually also a dot and a few characters on the end to indicate the type of file it is (referred to as the “file extension”). This guideline may seem restrictive, but if you end up using the command line with any frequency you’ll be glad you stuck to this pattern.
Moving and manipulating files
Now that we’ve got a few files, let’s look at the sort of day-to-day tasks you might need to perform on them. In practice you’ll still most likely use a graphical program when you want to move, rename or delete one or two files, but knowing how to do this using the command line can be useful for bulk changes, or when the files are spread amongst different folders. Plus, you’ll learn a few more things about the command line along the way.
Let’s begin by putting our combined.txt file into our dir1 directory, using the mv (move) command:
- mv combined.txt dir1
You can confirm that the job has been done by using ls to see that it’s missing from the working directory, then cd dir1 to change into dir1, ls to see that it’s in there, then cd .. to move the working directory back again. Or you could save a lot of typing by passing a path directly to the ls command to get straight to the confirmation you’re looking for:
- ls dir1
Now suppose it turns out that file shouldn’t be in dir1 after all. Let’s move it back to the working directory. We could cd into dir1 then use mv combined.txt .. to say “move combined.txt into the parent directory”. But we can use another path shortcut to avoid changing directory at all. In the same way that two dots (..) represents the parent directory, so a single dot (.) can be used to represent the current working directory. Because we know there’s only one file in dir1 we can also just use “*” to match any filename in that directory, saving ourselves a few more keystrokes. Our command to move the file back into the working directory therefore becomes this (note the space before the dot, there are two parameters being passed to mv):
- mv dir1/* .
The mv command also lets us move more than one file at a time. If you pass more than two arguments, the last one is taken to be the destination directory and the others are considered to be files (or directories) to move. Let’s use a single command to move combined.txt, all our test_n.txt files and dir3 into dir2. There’s a bit more going on here, but if you look at each argument at a time you should be able to work out what’s happening:
- mv combined.txt test_* dir3 dir2
- ls
- ls dir2
With combined.txt now moved into dir2, what happens if we decide it’s in the wrong place again? Instead of dir2 it should have been put in dir6, which is the one that’s inside dir5, which is in dir4. With what we now know about paths, that’s no problem either:
- mv dir2/combined.txt dir4/dir5/dir6
- ls dir2
- ls dir4/dir5/dir6
Notice how our mv command let us move the file from one directory into another, even though our working directory is something completely different. This is a powerful property of the command line: no matter where in the file system you are, it’s still possible to operate on files and folders in totally different locations.
Since we seem to be using (and moving) that file a lot, perhaps we should keep a copy of it in our working directory. Much as the mv command moves files, so the cp command copies them (again, note the space before the dot):
- cp dir4/dir5/dir6/combined.txt .
- ls dir4/dir5/dir6
- ls
Great! Now let’s create another copy of the file, in our working directory but with a different name. We can use the cp command again, but instead of giving it a directory path as the last argument, we’ll give it a new file name instead:
- cp combined.txt backup_combined.txt
- ls
That’s good, but perhaps the choice of backup name could be better. Why not rename it so that it will always appear next to the original file in a sorted list. The traditional Unix command line handles a rename as though you’re moving the file from one name to another, so our old friend mv is the command to use. In this case you just specify two arguments: the file you want to rename, and the new name you wish to use.
- mv backup_combined.txt combined_backup.txt
- ls
This also works on directories, giving us a way to sort out those difficult ones with spaces in the name that we created earlier. To avoid re-typing each command after the first, use the Up Arrow to pull up the previous command in the history. You can then edit the command before you run it by moving the cursor left and right with the arrow keys, and removing the character to the left with Backspace or the one the cursor is on with Delete. Finally, type the new character in place, and press Enter or Return to run the command once you’re finished. Make sure you change both appearances of the number in each of these lines.
- mv “folder 1” folder_1
- mv “folder 2” folder_2
- mv “folder 3” folder_3
- mv “folder 4” folder_4
- mv “folder 5” folder_5
- mv “folder 6” folder_6
- ls
Deleting files and folders
Warning
In this next section we’re going to start deleting files and folders. To make absolutely certain that you don’t accidentally delete anything in your home folder, use the pwd command to double-check that you’re still in the /tmp/tutorial directory before proceeding.
Now we know how to move, copy and rename files and directories. Given that these are just test files, however, perhaps we don’t really need three different copies of combined.txt after all. Let’s tidy up a bit, using the rm (remove) command:
- rm dir4/dir5/dir6/combined.txt combined_backup.txt
Perhaps we should remove some of those excess directories as well:
- rm folder_*
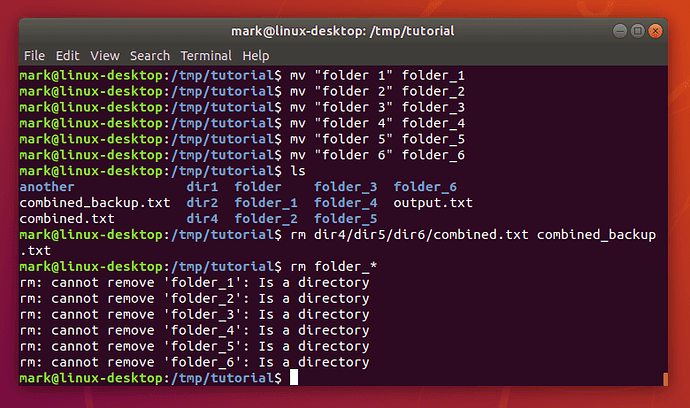
What happened there? Well, it turns out that rm does have one little safety net. Sure, you can use it to delete every single file in a directory with a single command, accidentally wiping out thousands of files in an instant, with no means to recover them. But it won’t let you delete a directory. I suppose that does help prevent you accidentally deleting thousands more files, but it does seem a little petty for such a destructive command to balk at removing an empty directory. Luckily there’s an rmdir (remove directory) command that will do the job for us instead:
- rmdir folder_*

Well that’s a little better, but there’s still an error. If you run ls you’ll see that most of the folders have gone, but folder_6 is still hanging around. As you may recall, folder_6 still has a folder 7 inside it, and rmdir will only delete empty folders. Again, it’s a small safety net to prevent you from accidentally deleting a folder full of files when you didn’t mean to.
In this case, however, we do mean to. The addition of options to our rm or rmdir commands will let us perform dangerous actions without the aid of a safety net! In the case of rmdir we can add a -p switch to tell it to also remove the parent directories. Think of it as the counterpoint to mkdir -p. So if you were to run rmdir -p dir1/dir2/dir3 it would first delete dir3, then dir2, then finally delete dir1. It still follows the normal rmdir rules of only deleting empty directories though, so if there was also a file in dir1, for example, only dir3 and dir2 would get removed.
A more common approach, when you’re really, really, really sure you want to delete a whole directory and anything within it, is to tell rm to work recursively by using the -r switch, in which case it will happily delete folders as well as files. With that in mind, here’s the command to get rid of that pesky folder_6 and the subdirectory within it:
- rm -r folder_6
- ls
Remember: although rm -r is quick and convenient, it’s also dangerous. It’s safest to explicitly delete files to clear out a directory, then cd .. to the parent before using rmdir to remove it.
Important Warning
Unlike graphical interfaces, rm doesn’t move files to a folder called “trash” or similar. Instead it deletes them totally, utterly and irrevocably. You need to be ultra careful with the parameters you use with rm to make sure you’re only deleting the file(s) you intend to. You should take particular care when using wildcards, as it’s easy to accidentally delete more files than you intended. An errant space character in your command can change it completely: rm t* means “delete all the files starting with t”, whereas rm t * means “delete the file t as well as any file whose name consists of zero or more characters, which would be everything in the directory! If you’re at all uncertain use the -i (interactive) option to rm, which will prompt you to confirm the deletion of each file; enter Y to delete it, N to keep it, and press Ctrl-C to stop the operation entirely.
Linux Vs. Windows
In this section, we will compare Linux with another major operating system, Windows. Windows is a group of several OS families and each of its versions GUI (graphical user interface) with a desktop that enables users to view folders and files in this OS. Below here is the table which illustrates the comparison between Windows and Linux.
| Windows OS | Linux OS |
|---|---|
| Windows OS is very easy to use and two of its major design characteristics are simplicity and user-friendliness. | An average user should gain some knowledge on how to use Linux OS. And, to perform day-to-day operations, users need an in-depth understanding of the underlying system. |
| Windows is less reliable when compared with Linux. | Linux is highly secure and reliable. It focuses more on uptime, system security, and process management. |
| Majority of the Windows games, utilities, and programs are commercial. | Majority of the Linux games, utilities, and programs are open source and free. |
| Windows provides online and integrated help systems. Also, there are many books available for all skill levels. | There is massive online support available for Linux. This is through a large community of websites and user forums. |
| Windows OS is usually used by novice users, gamers, and business users who depend on Microsoft software. | Various academic, scientific, and corporate companies of every size use Linux. This OS is used to power servers and development machines at NASA, Twitter, Facebook, Google, and various other top organizations. |
| Windows installation is very easy but it takes time. | Linux OS installation involves complications but this OS can complete complex tasks faster. |
What are the features of Linux?
Over the years, Linux has gained a reputation as a very efficient and fast-performing system. Its features will tell you how effective this operating system is. Now, let’s explore the major features of the Linux OS.
- Portability – This means software can work on various kinds of hardware in the same manner. Here, port means to alter the software and make it adaptable to function on a different system. Linux OS can run on any hardware environment.
- Free Software – Linux can be downloaded free from the Internet. Free updates, no costs per user, no registration fees, and freely available source code if you want to change your system’s behaviour.
- Versatile and Secure – The security model used in Linux depends on the UNIX idea of security, and it is known to be of proven quality. This is the reason why many tasks are executed at night or are automatically scheduled for other calm moments, thus resulting in more availability in case of busier periods and the utilization of hardware in a more balanced way.
- Multi-User System – Linux is a multi-user system. This implies the system’s resources such as application programs, RAM, memory can be accessed by multiple users at the same time.
- Hierarchical File System – A standard file structure is provided by Linux in which user files/files are arranged.
- Multiprogramming – Multiprogramming is supported by Linux. Multiprogramming means there will be a provision for running multiple applications at the same time.
What are the advantages of Linux?
The best assets of Linux when compared with other operating systems are its reliability, price, and the freedom it provides you. Now, it’s time for us to gain some knowledge about the major advantages of Linux OS.
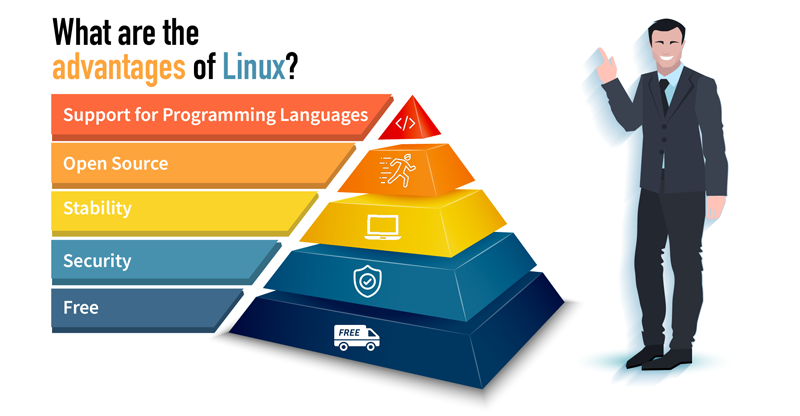
Free
This is one of the major advantages of Linux as you can download most Linux distributions freely from the web. Additionally, the Linux distributions can be downloaded freely and installed legally on any number of computers and can be given freely to other people.
Security
Most viruses which attack an operating system are developed via Active X software framework, and Linux doesn’t have this. The same principle applies to various other viruses like worms, Trojans, or spyware.
Stability
Linux systems are very stable and they won’t freeze up like other systems.
Open Source
You can add new features, delete things that you don’t like, and customize some features. You can do these because the source code is accessible to the public and they can make the relevant change and customize the software according to their requirements.
Support for Programming Languages
Almost all programming languages(Ruby, Perl, Java, C/C++, Python, etc.) are supported by Linux. It also offers many applications that are useful for programming.


