Last updated on 08th Jul 2020| 3963
IBM Maximo is an asset management tool that allows the users to manage the assets form a single system. Using this single system company can have a glance over the full life cycle of their organizational assets, which includes production, communication, infrastructure, transportation, and a lot more.
Maximo is a cloud-based or on-premise technology and can be easily accessed from any device. In this IBM Maximo tutorial, we are going to discuss the major concepts that are associated with Maximo. Without wasting much time, let’s get into the tutorial part.
Maximo Capabilities:
Documented maintenance plans through knowledge-based solution lead to timely problem identification and resolution
- Increase wrench time through the use of advanced scheduling tools
- Clear tracking of responsibilities and asset maintenance strategy leading to reduced asset downtime
- Decreased capital investment through Improved asset useful life by identification of manufacturer related issues and accurate warranty tracking
- Manage contractors/vendors and service providers increase the quality of services rendered
- Stock management for critical spares, linking to maintenance schedules, leading to reduced carrying costs
- Mobile devices support real-time access to assigned work and asset details for improved resolution times
- Facilities service desk to publish available services and provide increased customer satisfaction
IBM Maximo Asset Management is an enterprise asset management (EAM) software solution product produced by IBM. It is a solution that is used to operate, maintain and dispose of enterprise assets. It focuses on the following types of assets.
IBM Maximo Asset Management is an enterprise asset management (EAM) software solution product produced by IBM. It is a solution that is used to operate, maintain and dispose of enterprise assets. It focuses on the following types of assets:
- Plant and production (for example oil, gas, chemicals, mining, manufacturing, pharmaceuticals, food, electronics and power generation)
- Infrastructure (including railways, highways, telecommunications, water and wastewater, and electric and gas distribution networks)
- Transportation (for military, airlines, trucking, shipping, rail, and other use)
- Real estate and facilities (for example, in offices, schools, and hospitals)
EAM is globally known to be critical in asset-intensive industries, i.e., utilities, oil & gas, pharma., rail & transit, heavy manufacturing, and facilities including hospitals, campuses, and hotel.
Maximo Asset Management includes six management modules in an enhanced service-oriented architecture.
- Asset management: Achieve the control you need to more efficiently track and manage asset and location data throughout the asset lifecycle.
- Work management: Manage both planned and unplanned work activities, from initial request through completion and recording of actuals.
- Service management: Define service offerings, establish service level agreements (SLAs), more proactively monitor service level delivery and implement escalation procedures.
- Contract management: Gain complete support for purchase, lease, rental, warranty, labor rate, software, master, blanket and user-defined contracts.
- Inventory management: Know the details of asset-related inventory and its usage including what, when, where, how many and how valuable.
- Procurement management: Support all the phases of enterprise-wide procurement such as direct purchasing and inventory replenishment.
Frame work of IBM Maximo
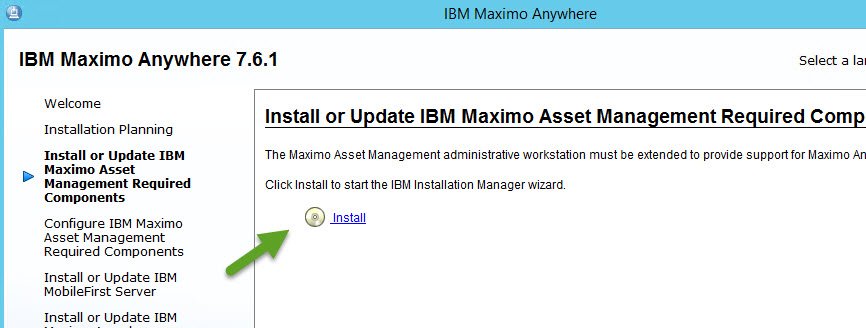
Maximo Anywhere Enablement
Content that must be deployed to the Maximo Asset Management environment to support the Maximo Anywhere Work Manager apps. The required components package includes OSLC object structures, license enablement, and cron task automation.
The following components are deployed when you implement Maximo Anywhere:
IBM Maximo Anywhere platform
A collection of resources that are required for integration and deployment on the Worklight platform. These resources include a Worklight-compatible project and an OSLC adapter. The OSLCadapter manages communications between Worklight Server and the provider application, Maximo Asset Management. Before runtime, the Maximo Anywhere project WAR, the applications, and the OSLC adapter must be deployed to Worklight Server.
Maximo Anywhere Work Manager mobile apps
The Maximo Anywhere Work Execution app and the Maximo Anywhere Work Approval app must be installed on the same computer as the Maximo Anywhere platform. The mobile apps can be configured, tested, and deployed to an emulator or a mobile device.
IBM Worklight Server for Worklight Consumer Edition
A runtime container for the OSLC adapter and server-based application components. Worklight Server includes an administrative console and an app store for publishing mobile apps within the organization. Worklight Server must be deployed to an application server. In a test environment, the same application server can be used to deploy both Maximo Asset Management and Worklight Server.
Pros
- Extensive asset tracking and management. IBM Maximo is extremely capable of handling all sorts of assets so you can track every detail and part of the lifecycle of an asset inside an organization.
- Highly customizable. If the broad array of possibilities inside IBM Maximo still isn’t suited for your specific application, it is possible to customize it to a very high degree so it can fit the needs of your organization.
- Preventive maintenance and services. With IBM Maximo, it is possible to schedule all sorts of preventive maintenance for your equipment, maximizing the uptime of your systems and machinery and minimizing unforeseen events.
Cons
- Hard to implement. A high number of resources and manpower is necessary to implement and upgrade IBM Maximo due to its robustness and number of functionalities.
- Version fragmentation. Due to the challenge imposed by a version upgrade, it is common to find systems relying on legacy versions of Maximo which might become a challenge for the support team.
- Unfriendly UI. The excess of functionalities and services available might become a challenge for a starting user. Although it is possible to customize the UI to fit the exact needs of each user, it is important to map exactly what each user needs.
INSTALLATION
Part 1: Download and installation
First, download Maximo 7.6.1 from Passport Advantage. (See Maximo Asset Management 7.6.1 and Maximo Asset Management Multitenancy 7.6.1, too.) Make sure you extract each download into the same directory.
When finished, it looks something like this:
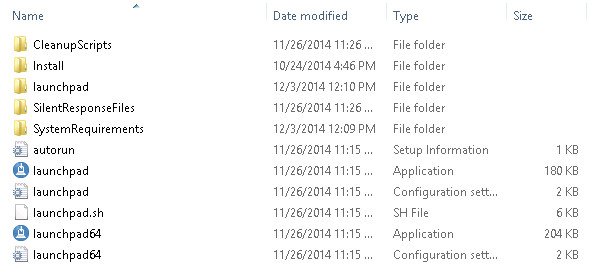
Double-click launchpad64.exe, which will bring up the Welcome screen.
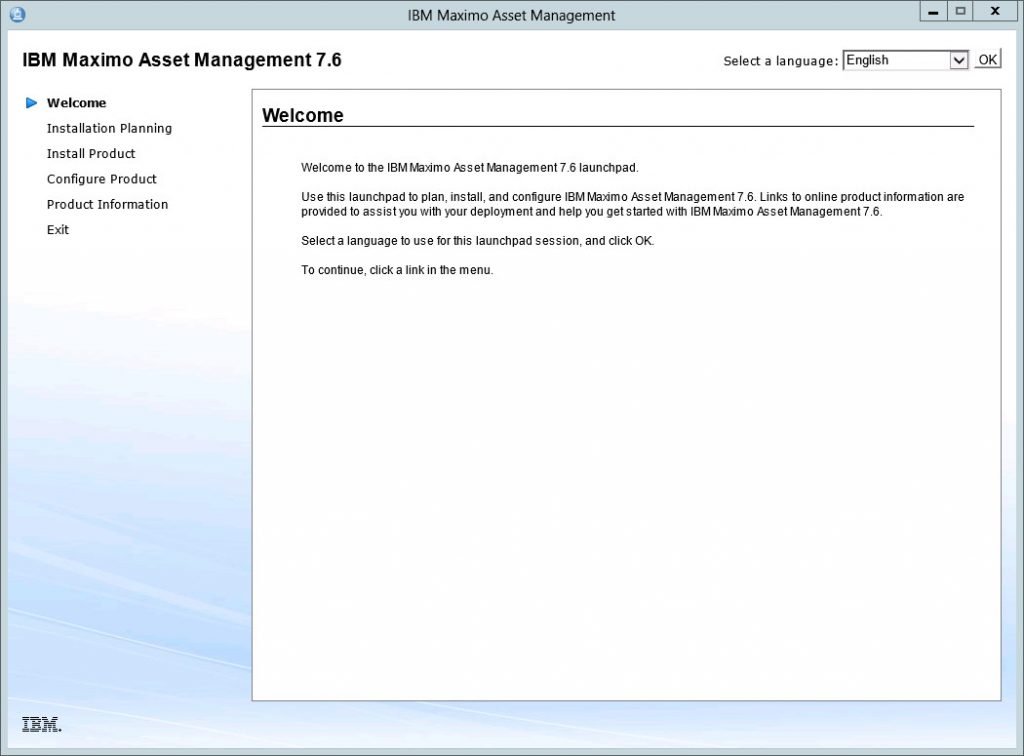
Looking at the left side, click Installation Planning.
Here you can access the installation documentation directly from the IBM website. You need the documentation to install the middleware and Maximo properly. I strongly recommend that you download the documentation.

Learn Hands-On Practical IBM Maximo Certification Course By Expert Trainers
Weekday / Weekend BatchesSee Batch DetailsThe prerequisite verification tool is a command line interface (CLI) tool that helps you ensure that you have the proper OS versions and resources available on your target server. (The product installer performs some of these tests as well.)
On the left, select Install IBM Maximo Asset Management.

This screen is where you select whether install WebSphere and Db2 and Maximo, and from where you launch the installer. Depending on how you choose to install the product, you can download and run the installer from as many as three machines: one each for the WebSphere server, Db2 server, and administrative workstation. You can combine one or more of these installations to a single server. when installing Db2 and WebSphere to the same server, make sure you have the resources available on the server.
From this screen, you can also install a second instance of these products. [I do not cover that option at this time; it is not yet installed!]
Click Optional components.
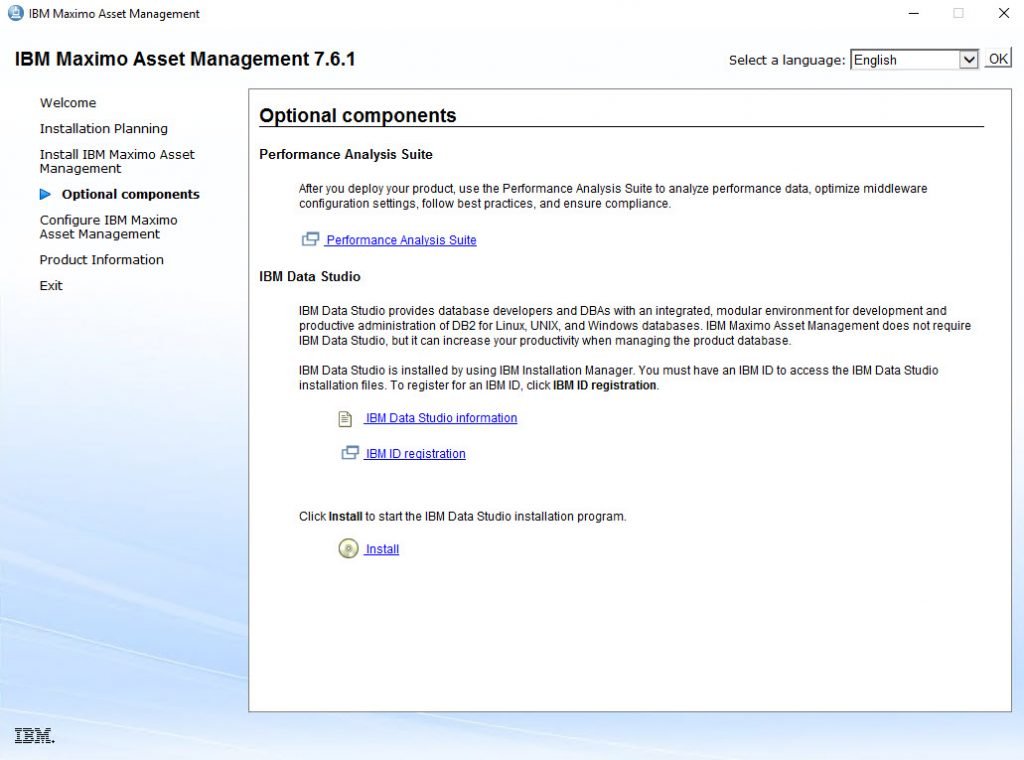
From here, you can install the IBM Data Studio, which is used to manage Db2.
Going back to the Install Product screen, I am installing WebSphere, Db2 and Maximo 7.6.1 on a single Microsoft Windows 2016 server, so I make sure all three items are selected, and click Install IBM Maximo Asset Management components.
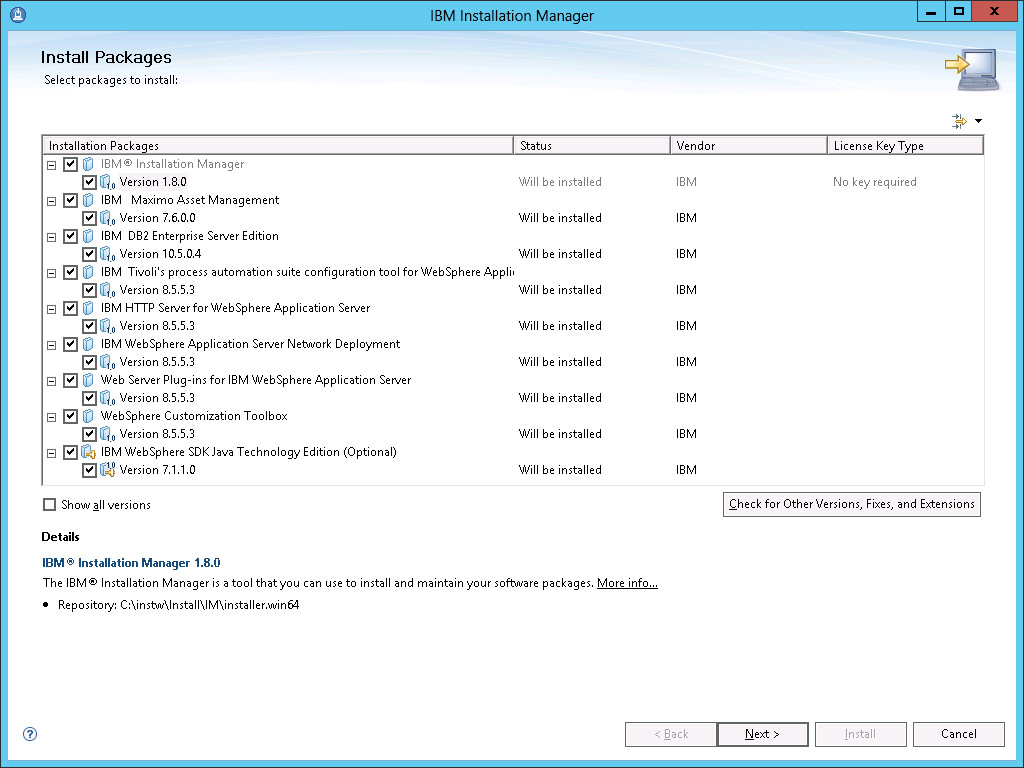
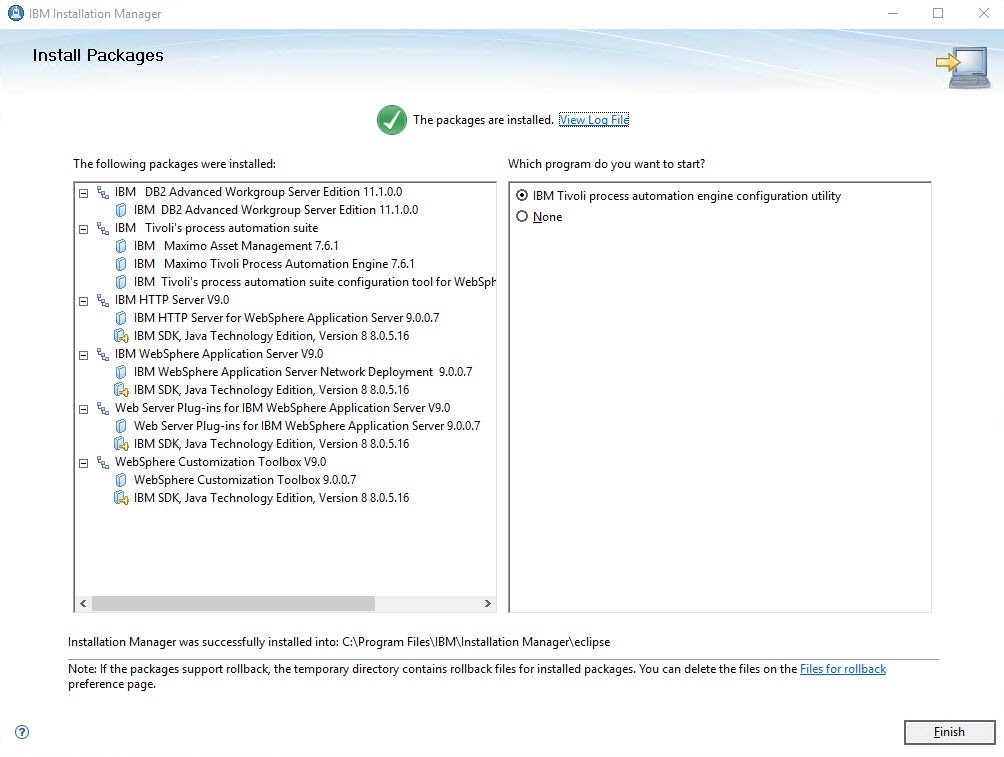
The screen capture shows four packages that will be installed:
1. IBM Installation Manager 1.8.8. After installing itself, Installation Manager installs Maximo, WebSphere and Db2. (Db2 uses its own installer, which we built into an Installation Manager package.)
2. Maximo 7.6.1
3. DB2 11.1
4. WebSphere 9.0.0.7, which includes IBM HTTP Server and the web server plug-in, the customization toolbox and IBM WebSphere Java SDK 1.8. Maximo 7.6.1 requires JDK 1.8.
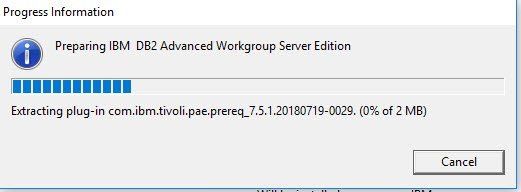
Clicking Next displays a progress bar, the first of many you will see.
Once that is completed, then to the license page.
Accept the terms, and click Next.
Note: My recommendation is to change the directory to (for example) C:\IBM\IMShared.

Get Practical Oriented IBM Maximo Training to Build Your Skills to Next Level
- Instructor-led Sessions
- Real-life Case Studies
- Assignments
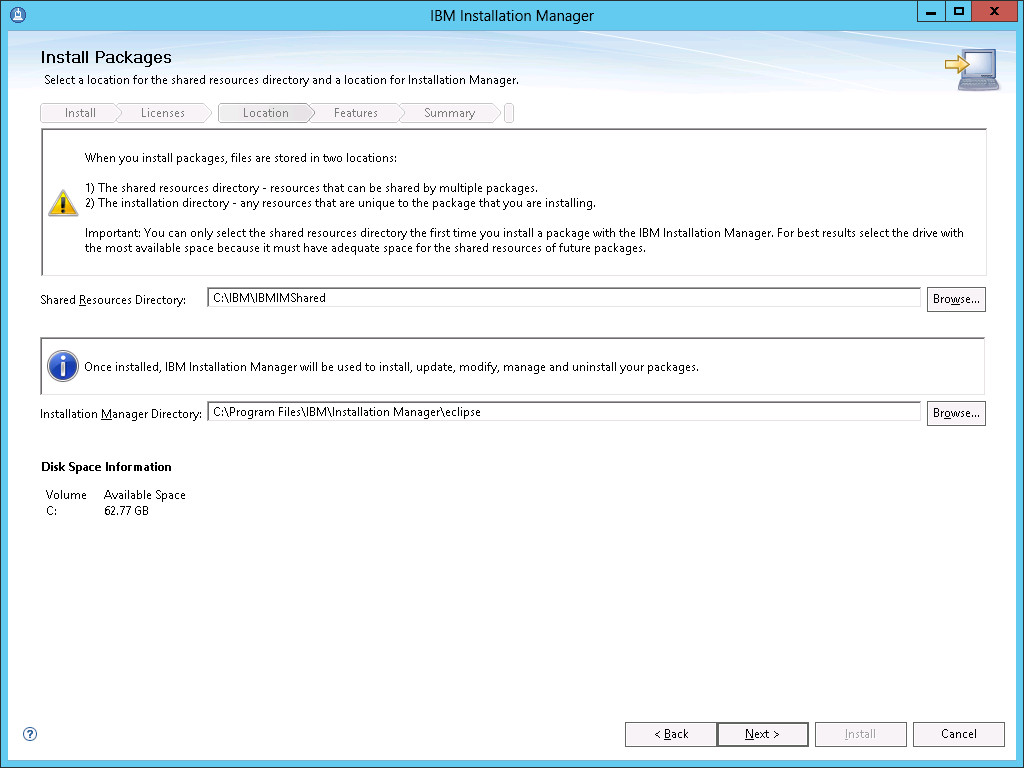
The next screen lets us change where Installation Manager installs. I accept the defaults and click Next.
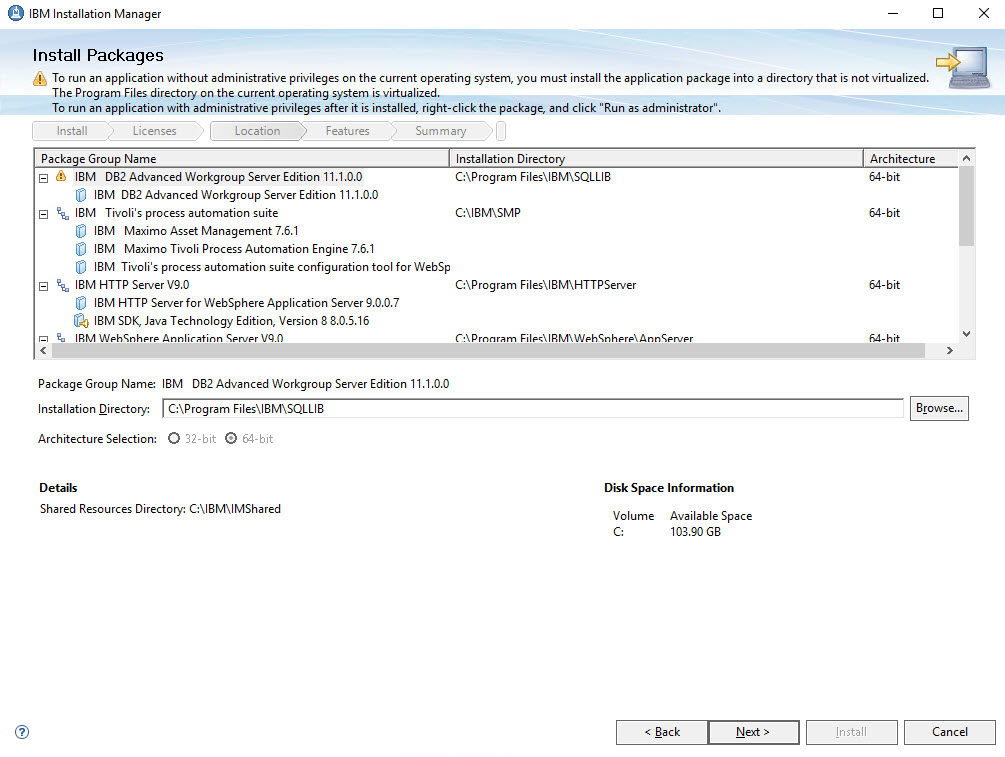
This screen shows, and lets me change, where the products are going to be installed.
Note: My recommendation is to change the directory location so there are no spaces in the file path, for example, C:\IBM\SQLLIB, C:\IBM\WebSphere\AppServer, C:\IBM\HTTPServer, and so on.
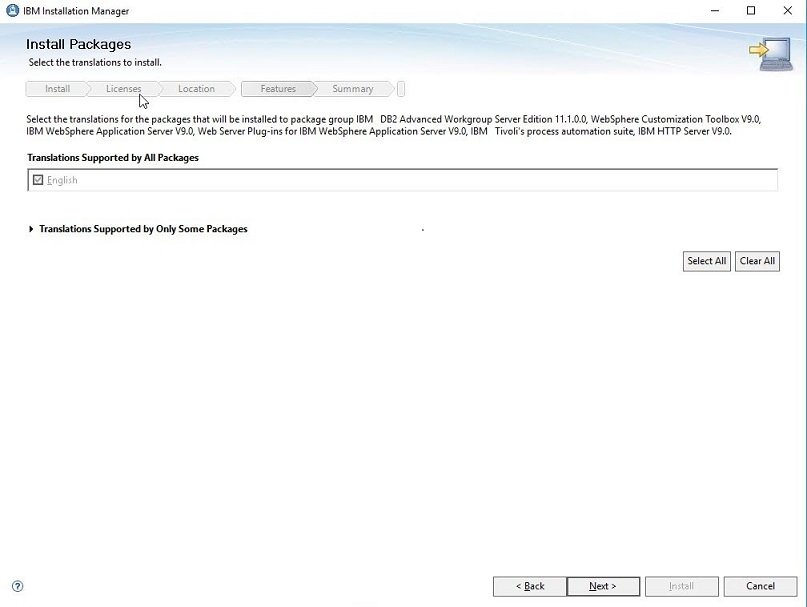
Here we select languages. I am installing to an English language only server, so I click Next.
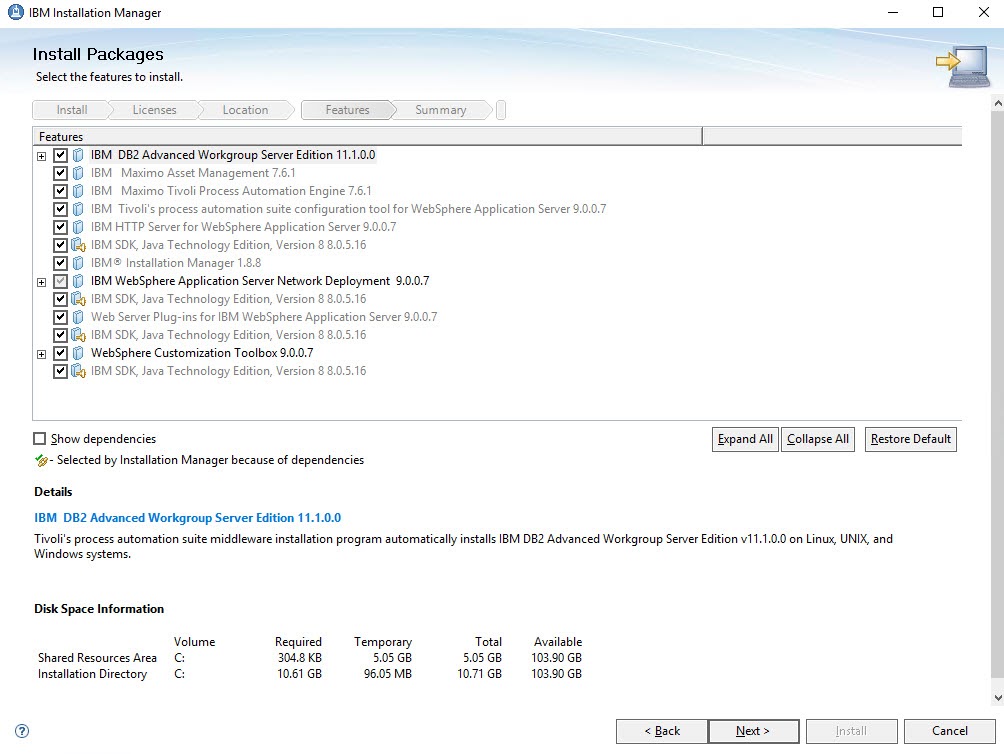
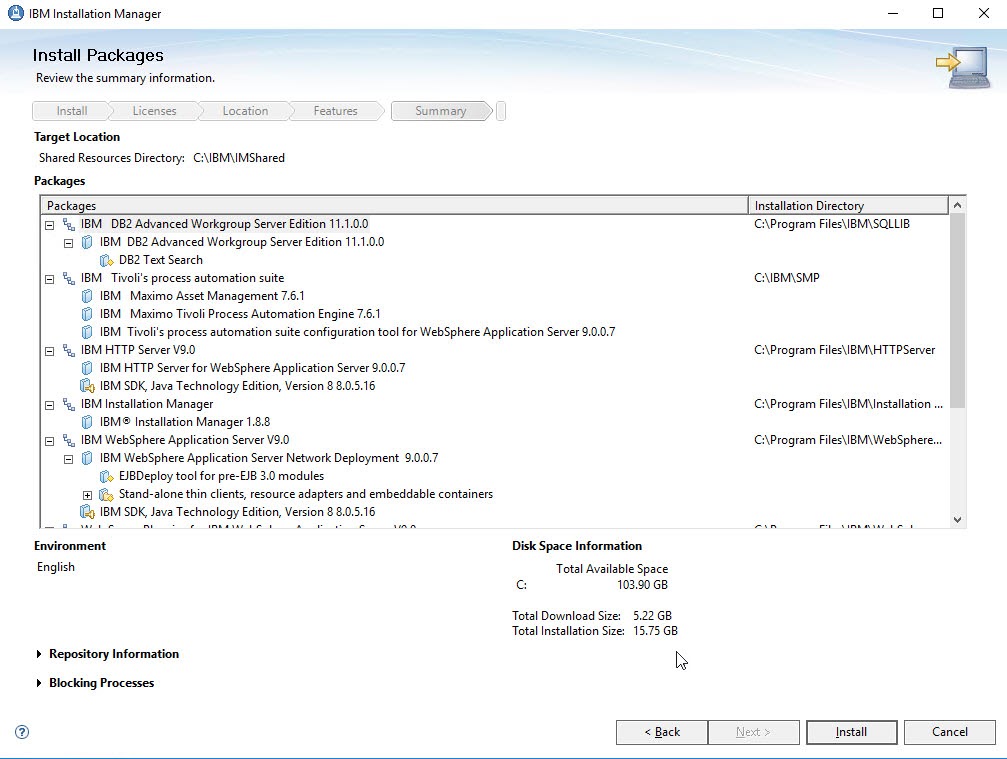
Here is the summary of packages to be installed.
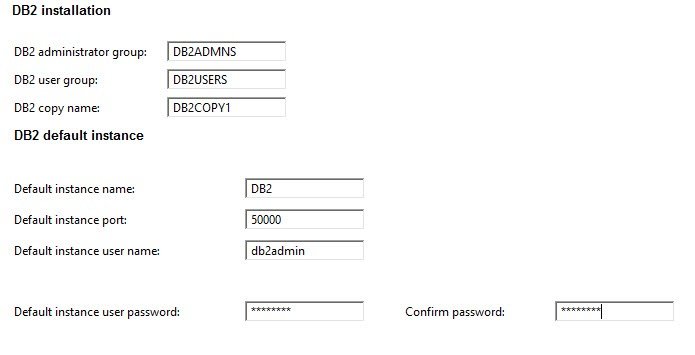
On this page, we complete configuration information for DB2 and WebSphere.
This is a good example to show how Installation Manager works. On the left side, you can select items on the left side to modify. Items that must be entered or modified are shown with an asterisk. Or, click Next to go to the next item to be configured.
The Install button does not become active until all required information has been entered.

In my case, I accept the defaults for IBM HTTP Server, and enter Db2 password information.
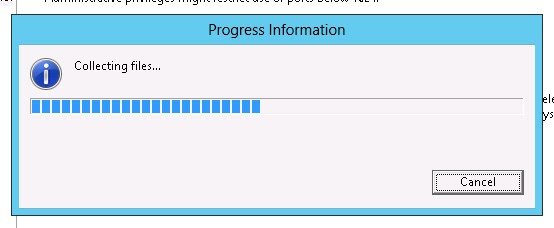
Click Next. The Installation Manager now checks to see that all files are available, and whether there are any blocking processes.
Now the Install button is enabled, so click Install.