Last updated on 07th Jul 2020| 1993
MySQL is an open-source relational database management system, which works on many platforms. It provides multi-user access to support many storage engines.
MySQL has various features that enable us to do many tasks such as comprehensive application development, providing availability, and scalability.
Now, obviously, when you work at an industry level, you can’t do everything on the terminal right? You need some kind of dashboard which makes it easy for you to work with large databases and create models.
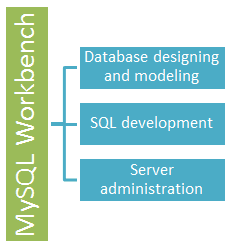
MySQL Workbench and Its Functionalities
MySQL Workbench is a designing or a graphical tool that is used for working with MySQL servers and databases. This tool compatible with the older server 5.x versions and does not support the 4.x server versions.
The functionalities of MySQL Workbench are as follows:
SQL Development: This functionality provides the capability to execute SQL queries, create and manage connections to database servers using the built-in SQL Editor.
This facility in MySQL Workbench provides the functionality that was formerly available in the MySQL Query Browser.
MySQL Workbench now provides extensive facilities for working directly with SQL code. Before working directly with a live server a connection must be created. Once a connection is established it is possible to execute SQL code directly on the server and manipulate the server using SQL code.
The starting point for embarking on SQL Development work is the SQL Development area of the Home screen, which has the following action items:
- Open Connection to start Querying
- Open Connection to start Querying (icon)
- New Connection
- Edit Table Data
- Edit SQL Script
- Manage Connections
- Open Connection to start Querying
Clicking on this action item launches the Connect to Database Wizard. From this wizard, you can select a predefined connection. A new SQL Editor tab is launched where you
Open Connection to start Querying (icon)
If you already have created a connection to a database it will appear in this panel as an icon. Double-clicking the icon will directly launch a SQL Editor tab, and connect you to the database as defined by the connection.
New Connection
Clicking the New Connection action item launches the Manage DB Connections, wizard. This wizard allows you to create a new connection. Note the wizard when launched from here does not display existing connections, it only allows you to create a new connection.
Edit Table Data
This action item allows you to edit table data. When clicked the Edit Table Data wizard is launched. This is a two-stage wizard. The first stage allows you to select a Stored Connection. The second stage allows you to select the Schema and Table you want to edit. Once the wizard is completed a SQL Editor tab is launched which displays a data grid that allows you to interactively edit table data as required.
Edit SQL Script
Clicking this action item launched the Edit SQL Script wizard. This is a two-stage wizard. The first stage allows you to select a Stored Connection. The second stage allows you to select a SQL Script file, and optionally have the script executed after it is opened. Once the wizard is completed a SQL Editor tab will be launched, with the script displayed. If you optionally selected to run the script, the script will run and the results will be displayed.
Manage Connections
Clicking this action item launches the Manage DB Connections, wizard. This wizard also displays Stored Connections, which can be selected to change as required. New connections can also be created by this wizard.
The SQL Development activities can, therefore, be grouped into two broad categories:
- Creating and managing connections. This functionality is primarily managed through the Manage DB Connections dialog.
- Editing, running and manipulating databases through SQL code. This functionality is associated with what is termed the SQL Editor.
Data Modeling
MySQL Workbench provides extensive capabilities for creating and manipulating database models. Some of these capabilities are listed here:
- Create and manipulate a model graphically.
- Reverse engineer a live database to a model.
- Forward engineer a model to a script or live database.
- Create and edit tables and insert data.
This is not an exhaustive list. These, and additional data modeling capabilities, are discussed in the following sections.
The Home screen is the typical starting point for work with data modeling. In the Data Modeling section of the Workspace, you can use the action items there to create and manage models, forward and reverse engineer, and compare and synchronize schemata. These action items are listed below:
- Open an Existing EER Model
- Open an Existing EER Model (icon)
- Create new EER Model
- Create EER Model From Existing Database
- Create EER Model from SQL Script
- Open an Existing EER Model
Clicking this action item launches a file browser – you can then select the model file you wish to load. A new MySQL Model tab will then be created, and your model displayed.
Open an Existing EER Model (icon)
If you have already created one or more model files you can simply double-click the item of the model you wish to load. A new MySQL Model tab will be created, and your model displayed.
Create new EER Model
Clicking this action item will launch a new MySQL Model tab, with a blank model ready for you to work on.
Create EER Model From Existing Database
The purpose of this action item is to allow you to create an EER Model from an existing live database. Clicking this action item launches the Reverse Engineer Database. This is a multi-stage wizard that allows you to select a connection to a live server, and select the schema and objects you wish to reverse engineer into your new model. This is a convenient way to see how an existing database is structured.
Create EER Model from SQL Script
The purpose of this action item is to allow you to create a model from a SQL Create script. Such a script may have been created by hand or maybe as a result of reverse engineering an existing database to generate the script, which may then be modified according to requirements. Clicking this action item launches the Reverse Engineer SQL Script wizard. This is a multi-stage wizard that allows you to select the script you want to create your model from.
Data Modeling (Design): This functionality enables you to create models of your database schema graphically, perform reverse and forward engineer between a schema and a live database, and edit all aspects of your database using the comprehensive Table Editor.
Server Administration: This functionality enables you to administer MySQL server instances by administering users, performing backup and recovery, inspecting audit data, viewing database health, and monitoring the MySQL server performance.
Since version 5.2.6 MySQL Workbench has included functionality for managing server instances. A server instance is created to provide a way of connecting to a server to be managed. The first step then is to create a server instance if none exists, or to work with an existing server instance.
MySQL Workbench also provides functionality to administer and configure a server via these server instances. Thus, the Server Administrator functionality can be broadly grouped into two main areas:
- Creating and managing server instances
- Administration and configuration functions via a server instance
Data Migration: This functionality allows you to migrate from Microsoft SQL Server, Microsoft Access, and other RDBMS tables, objects, and data to MySQL.
MySQL Enterprise Support: This functionality provides support for Enterprise products such as MySQL Enterprise Backup, MySQL Firewall, and MySQL Audit.
Now that you know about MySQL Workbench, let me next tell you the basic requirements and the steps to install MySQL Workbench.
Advantages of Using MySQL
- Data Security.
- On-Demand Scalability.
- High Performance
- Round-the-clock Upto
- Comprehensive Transactional Support.
- Complete Workflow Control.
- Reduced Total Cost of Ownership.
- The Flexibility of Open Source.
MySQL WORKBENCH is a Visual database designing and modeling access tool for MySQL server relational database. It facilitates creation of new physical data models and modification of existing MySQL databases with reverse/forward engineering and change management functions. The purpose of MySQL workbench is to provide the interface to work with databases more easily and in a more structured way.
MySQL Workbench Environment Setup
- Prerequisites
The following requirements should be available in your system to work with MySQL Workbench:
- MySQL Server: You can download it from here.
- MySQL Workbench: You can download it from here.
- Microsoft .NET Framework 4.5.2
- Microsoft Visual C++ Redistributable for Visual Studio 2019
- RAM 4 GB (6 GB recommended)

Enroll in Best MYSQL Training and Get Hired by TOP MNCs
- Instructor-led Sessions
- Real-life Case Studies
- Assignments
Installation
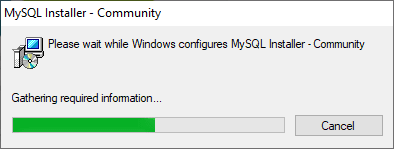
- Step 1: Install the MySQL Community Server. To install MySQL Server, double click the MySQL installer .exe file. After clicking the .exe file, you can see the following screen:
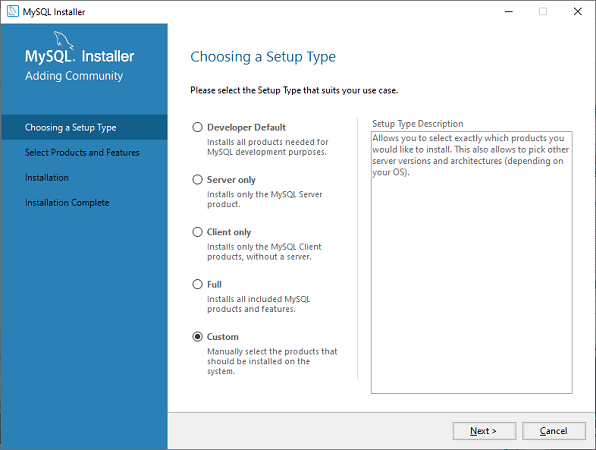
- Step 2: Choose the Setup Type and click on the Next button. There are several types available, and you need to choose the appropriate option to install MySQL product and features. Here, we are going to select a Custom option because there is a need for only MySQL Server and Workbench. If you need more features, you can choose the Full option.
- Step 3: When you click on the Next button, it will give the following screen.
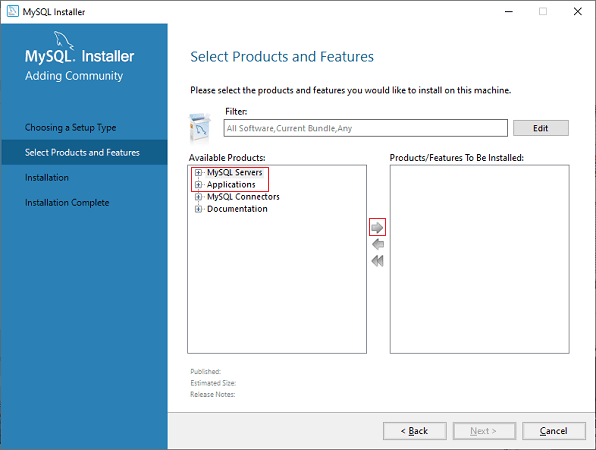
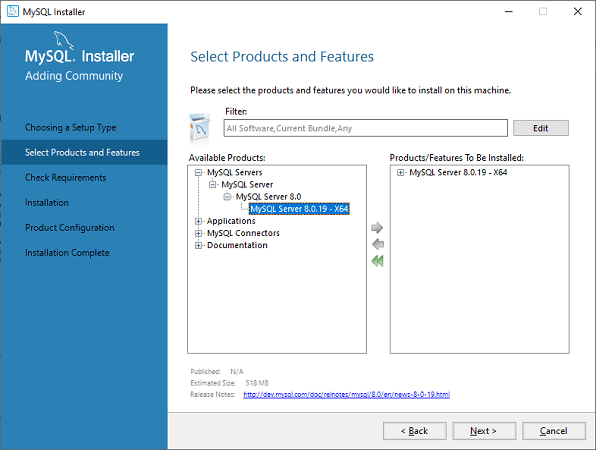
In this screen, go to the MySQL Server section, click the plus (+) icon. Here, you need to choose the MySQL Server and add it to the right side box by clicking on the right arrow symbol.
Now, in the Application section, you need to do the same thing that you had to perform with MySQL Server and click on the Next button. The following screen explains it more clearly.

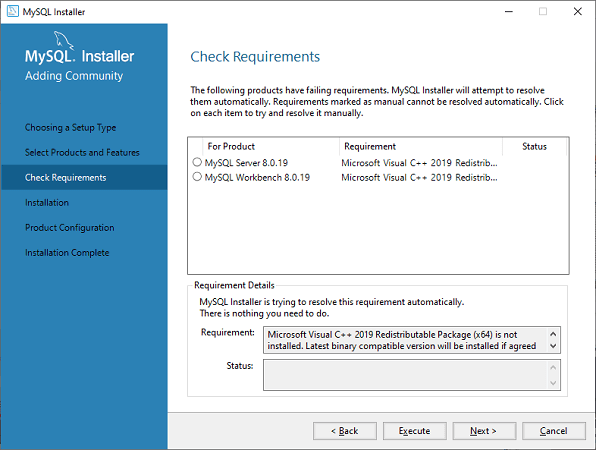
- Step 4: When you click on Next, it will give the following screen. This screen checks all the requirements for installing MySQL Server and Workbench. As soon as you click on the Execute button, it will install all requirements automatically. Now, click on the Next button.
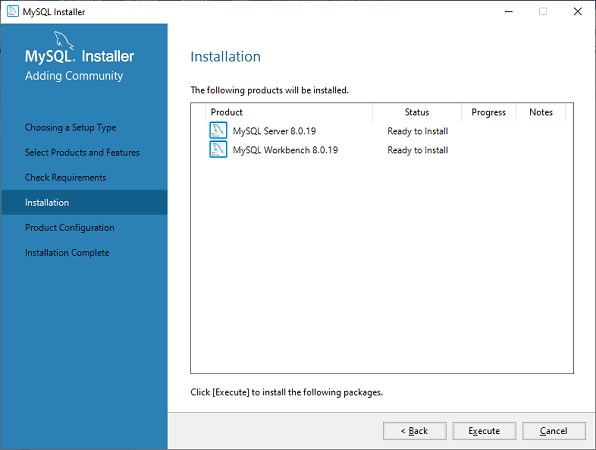
- Step 5: In this screen, click on the Execute button to download and install the MySQL Server and Workbench.
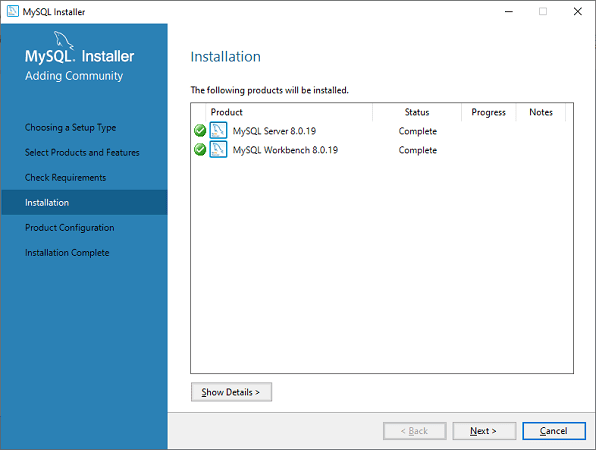
When the downloading and installation is complete, click on Next button.
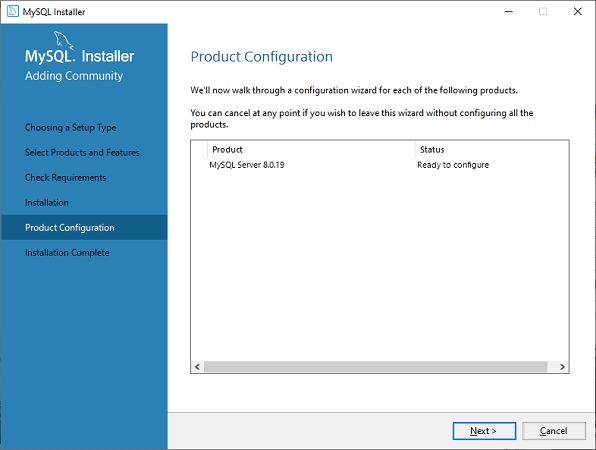
- Step 6: In the next screen, we need to configure the MySQL Server and click on Next button.
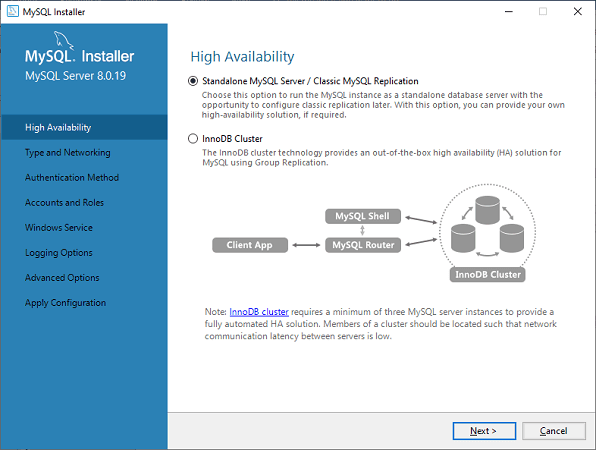
- Step 7: As soon as you will click on the Next button, you can see the screen below. Here, we have to configure the MySQL Server. Now, choose the Standalone MySQL Server/Classic MySQL Replication option and click on Next.
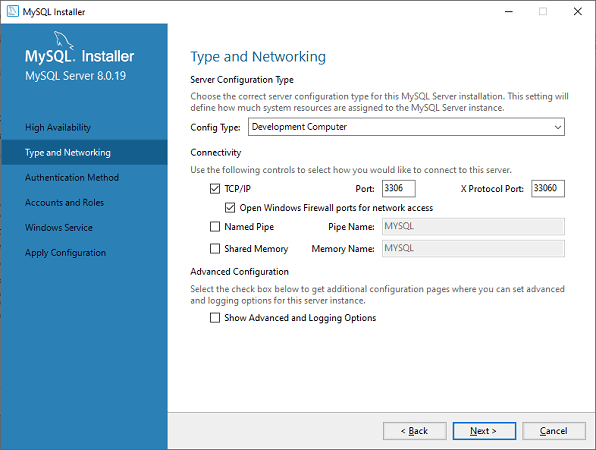
- Step 8: In the next screen, the system will ask you to choose the Config Type and other connectivity options. Here, we are going to select the Config Type as ‘Development Machine’ and Connectivity as TCP/IP, and Port Number is 3306, then click on Next.
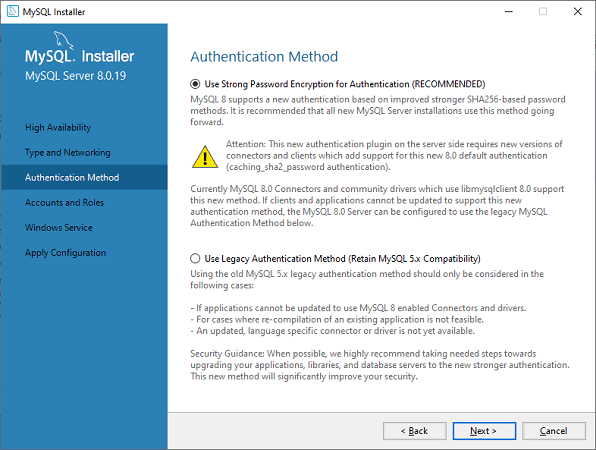
- Step 9: Now, select the Authentication Method and click on Next.
- Step 10: The next screen will ask you to choose the account, username, and password. After filling all the details, click on the Next button.

Get Experts Curated MYSQL Certification Course to Build Your Skills
Weekday / Weekend BatchesSee Batch Details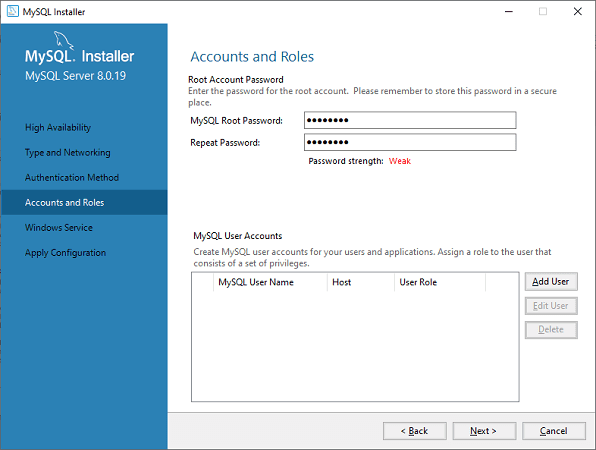
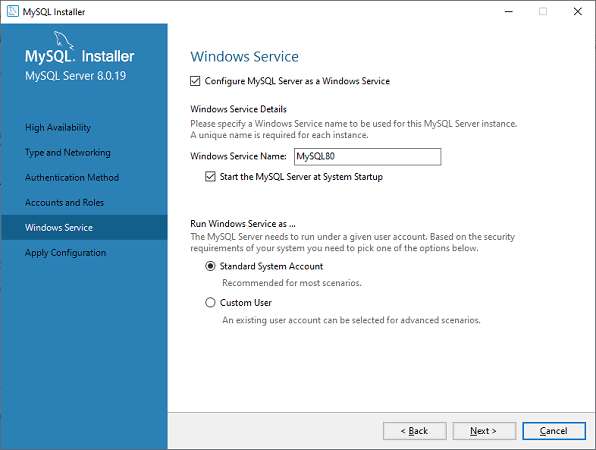
- Step 11: The next screen will ask you to configure the Windows Service. Keep the default setup and click on Next.
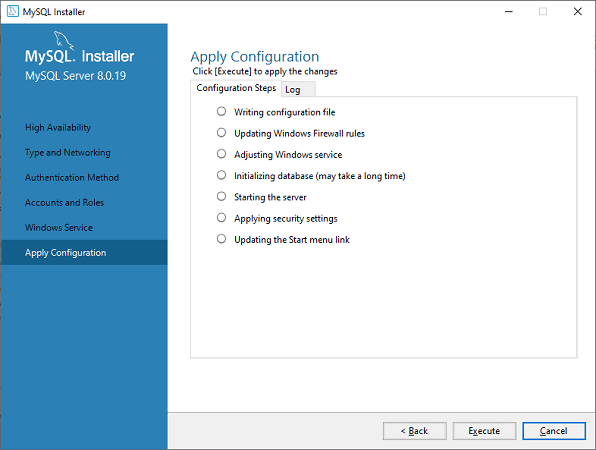
- Step 12: In the next screen, the system will ask you to apply the Server Configuration. For this configuration, click on the Execute button.
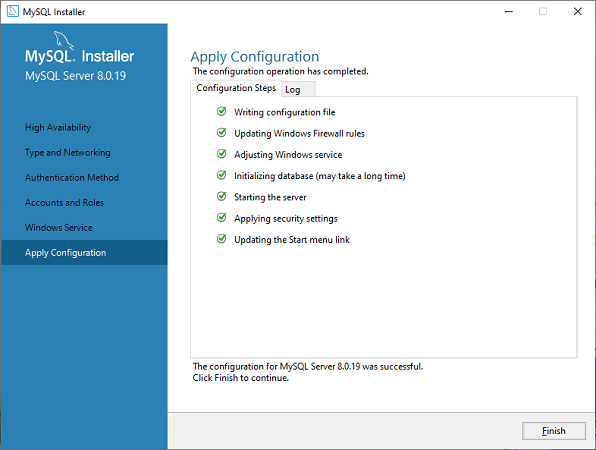
- Step 13: Once the configuration has completed, you will get the screen below. Now, click on the Finish button to continue.
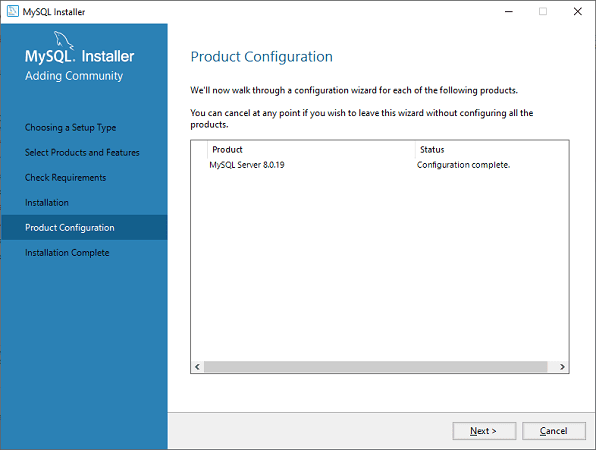
- Step 14: In the next screen, you can see that the Product Configuration is completed. Keep the default setting and click on the Next-> Finish button to complete the MySQL package installation.
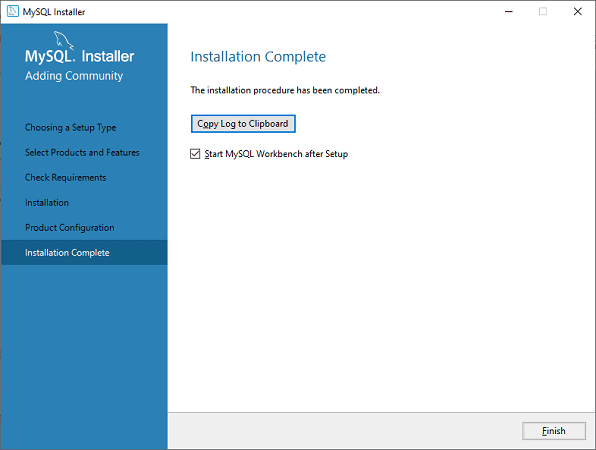
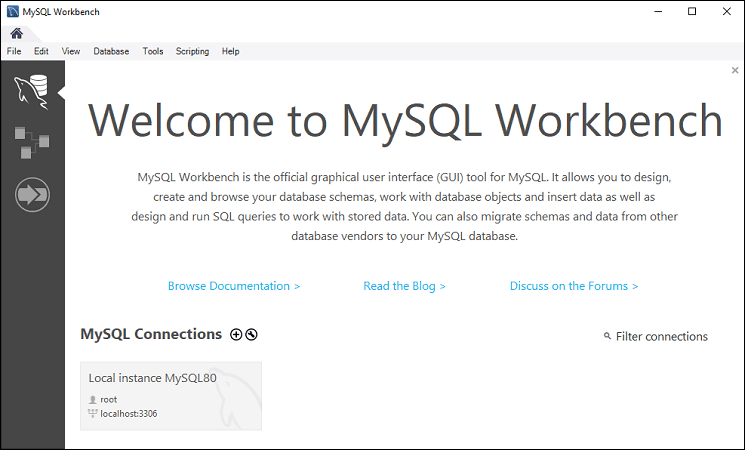
- Step 15: Once you click the Finish button, the MySQL Workbench should be open on your system, as shown in the screen below.
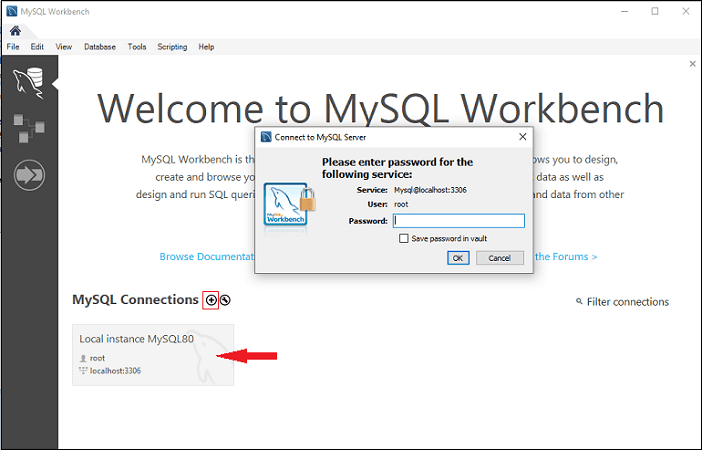
- Step 16: In the above screen, you need to make a connection. To do this, double click the box designated by the red arrow. Here, you will get the popup screen that asks to enter the password created earlier during the installation. After entering the password, you are able to connect with the Server.
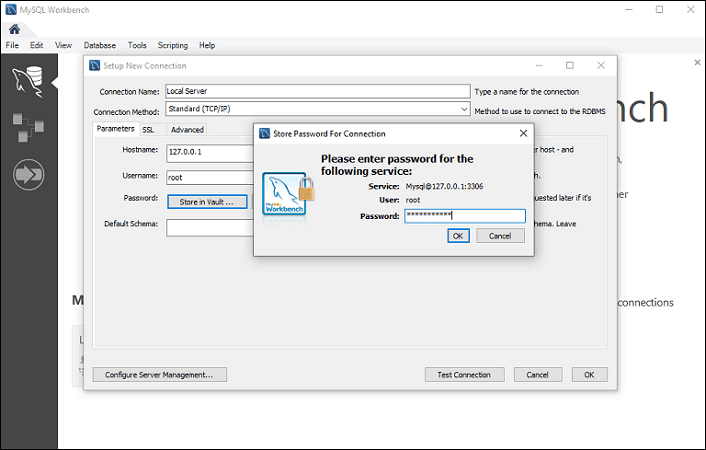
- Step 17: If you do not have a connection, you can create a new connection. To make a connection, click the plus (+) icon or go to the menu bar -> Database -> Connect to Database, the following screen appears. Now, you need to fill all the details. Here, you have to make sure that the entered password should be the same as you have created earlier.
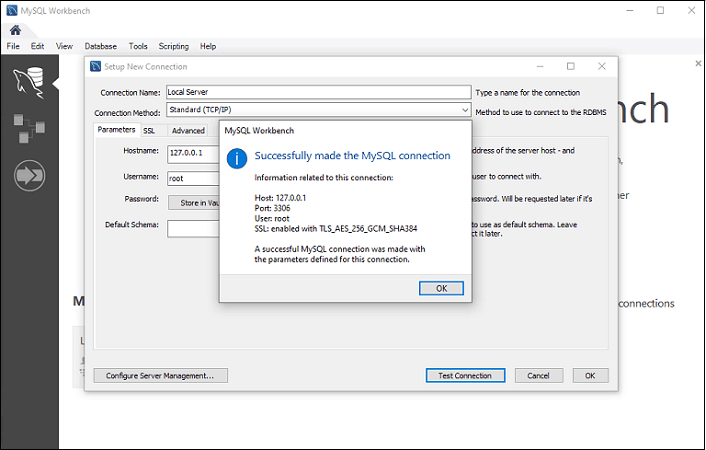
- Step 18: After entering all the details, click on the Test Connection to test the database connectivity. If the connection is successful, you will get the following screen. Now, click on OK->OK button to finish the setup.
- Step 19: Once you have finished all the setup, it will open the MySQL Workbench screen. Now, double click on the newly created connection, you will get the following screen where the SQL command can be executed.