Jenkins is a open source software that allows you for continuous integration of your code. Jenkins can be installed on any server where the project build takes place.
Continuous Integration : Its simply means to integrate coding done by multiple developers and to achieve frequent builds. Its a practice done by teams to remove problems or issues which occurs in build life cycle.
Setup Prerequisite: Assuming Java(1.5+) is already installed and JAVA_HOME and PATH is set in server.
There are two ways to use Jenkins on Windows
- Windows installer
- Using Jenkins .war file
Go to https://jenkins.io/download/ and here you will get a download list with latest LTS version.
Window Installer :
- Click to Windows which will download .zip file which contains jenkins installer .msi file.
- Extract .zip file and run jenkins.msi file
- Give location for installation in my case C:\Program Files (x86)\Jenkins\
- After successful installation it will redirect to http://localhost:8080/ and a screen will prompt and will ask for Initial Admin Password .
For Next step Move to SetUp Section below
Using .war file :
- Click on Generic Java Package(.war) it will download the .war file for jenkins.
- Open command prompt on downloaded folder (in my case I have kept it in D drive as D:\jenkins.war)
- On cmd type java -jar jenkins.war (by default it takes port 8080 for jenkins) else you can opt for other port by java -jar jenkins.war — httpPort=9090 command(use — httpsPort=9090 for any secure port).


- Goto browser & type — http://localhost:8080 (if default port you have used ) else http://localhost:<port> (in case other port used or https in case of secure port) you will be seeing screen asking for Initial Admin Password as in below SetUp Section
For admin credentials you can navigate to location mentioned in screen in my case its ‘C:\Users\Amit Verma\.jenkins\secrets\’ (for .war installation) and for windows installer its ‘C:\Program Files (x86)\Jenkins\secrets’ here you will get a initialAdminPassword.txt file open it & you will get initial admin password here (this is one time password unless you create Admin user as in Step 3) then click Continue
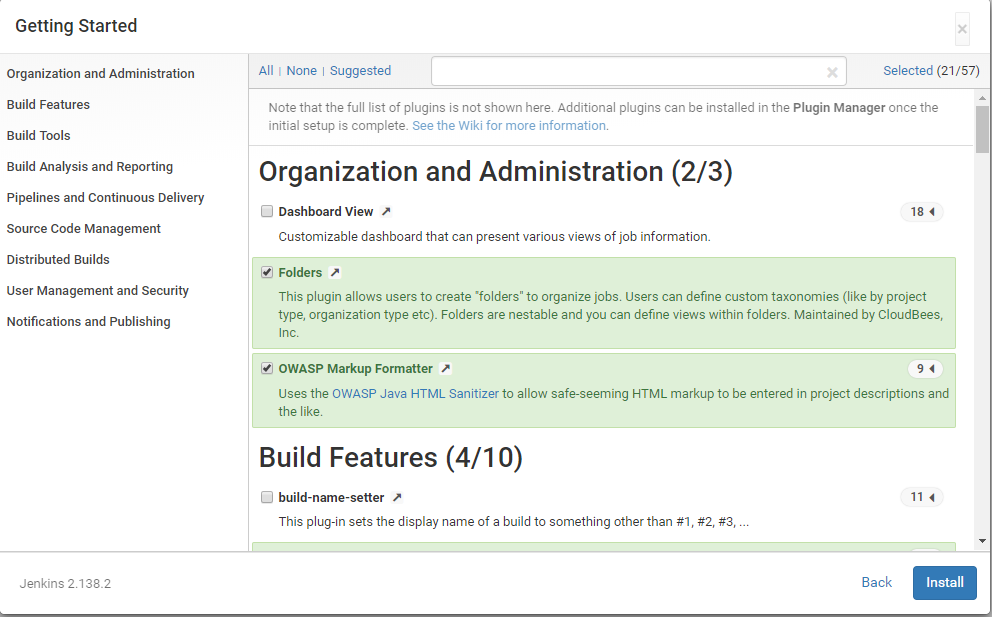
- Screen will appear asking you to customize you Jenkins with plugins. You can opt for installing suggested plugins or you can select plugins which you need.
- On selecting installing suggested plugin it will download all different recommended plugin. On custom selection you have to select the plugins you need based on your requirement as in below screen, whose left panel indicates plugins category. After selection click on Install.
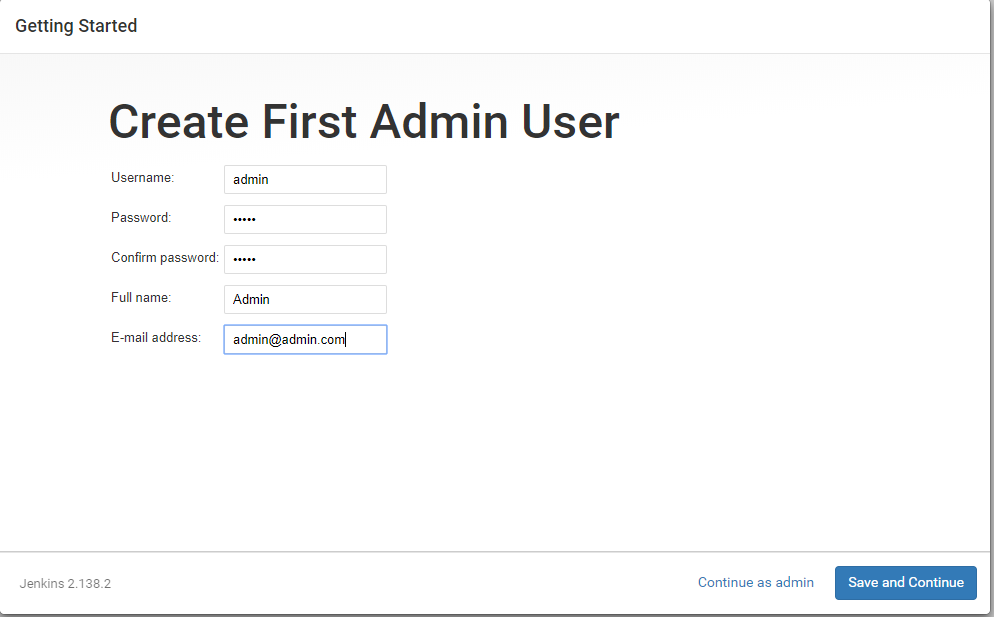
- On successful plugins installation it will ask to create First Admin User. Enter all details and click on Save and Continue.
- Set your Jenkins Url — for running in local machine it can be http://localhost:<port>/ or http://127.0.0.1:<port>/ and for any other server running on some IP it can be http://<IP>:<port>/ if running in secure port use https instead of http.
- Save and Finish, Jenkins is ready for you now you can Start Using Jenkins
- Enter user name and password in prompted screen
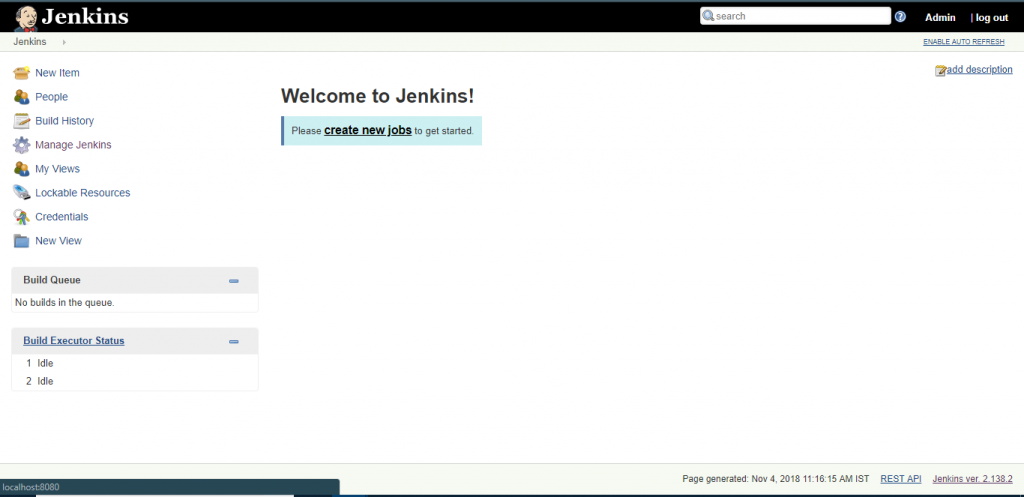
Now you have successfully installed and configured Jenkins. Here you can create Jobs.
Alternative :
There are many alternative present for Jenkins as CI tool. On basis of your requirement and use you can opt for any of them. Popular are listed below. Jenkins is famous because it is open source and due to its flexibility as you can customize it as per you need.
- Atlassian Bamboo
- Atlassian Bitbucket Pipeline
- Circle CI
- Team City
- Gitlab CI
- Travis


