Last updated on 22nd Jun 2020| 3825
What is burp suite?
Burp suite is one of the most popular security testing tool. Burp suite can be used in order to intercept HTTP requests which are going out through web browser.Burp suite falls into the category of proxy servers which means that it sits between the user’s browser and the web server that allows to observe and manipulate all the web traffic that’s being sent back and forward when a particular web application is used. The burp suite can let you test beneath the GUI which allows us to do more technical testing. Burp suite is a vulnerability scanner and it contains different functions such as proxy, intruder, scanner, decoder etc.
Proxy: Proxy is used for intercepting our requests and its proxy functions.Intruder: Intruder contains different attacks which we can perform on a remote website like if you want to perform dictionary attack or brute force attack.Scanner: Scanner is used for scanning particular website and its vulnerability.Decoder: Decoder consist of different kind of functions which we can use in order to decode a particular thing like URL decode.
When to use Burp suite?
- To make sure hackers won’t be able intercept the calls.
Why to use Burp suite?
- To make the app/web more reliable and secure.
- By using this we can check the vulnerability of any websites or applications.
Tools that Make Up Burp Suite:
- Spider Scan:
In the figure above, you will also see passive spider scan results. On the left side, the tree pane shows the host target in black font. In grey highlights, the web address and links are found in the website targeted. On the top right, the pane shows the pages available for navigation by users.
In this case, you can see that there is an available setup.php. This example shows you a potential configuration error that can be exploited by an attacker. When running penetration testing for clients, it is a good idea to gather as much info as you can about the target. In other words, leaving no stone unturned holds true in this case, as it does in this white hat hacking course as well.
- Comparer:
Burp Comparer is one tool that visually compares 2 different data items. Typically, this requirement arises when you want to identify the difference between 2 responses of applications quickly in the context of applications on the web. This tool is used to identify the differences between failed login responses using invalid and valid usernames. It can also be used to identify the difference between 2 requests for applications, 2 received responses in the course of an attack by Burp intruder or for when you want to identify the different parameter requests that give rise to varied behavior
- Decoder:
Burp decoder is a basic tool that transforms raw data in various hashed and encoded forms and transforms data that’s been encoded into a canonical version. With the use of heuristic techniques, it has the capacity of recognizing many different code formats.
- Sequencer:
Burp sequencer is used to analyze the degree of an application session token’s randomness or other items in which the application’s unpredictability is dependent for its security.
- Repeater:
Burp Repeater used for manually reissuing and modifying individual requests of HTTP and making an analysis of the response. This is ideally used together with other tools in Burp Suite. For instance, you can send requests to Repeater from the site map target from the Burp intruder attack results or from browsing history of Burp proxy. You can then adjust the requests manually to probe for vulnerability or to fine tune an attack.
- Intruder:
Burp Intruder is one of the tools that automates customized attacks versus applications on the web.
- Scanner:
Burp scanner is a tool that performs automated security discovery of web application vulnerability. It is created for use by penetrating tests to closely fit with the existing methodology and techniques for performing semi-automated and manual penetration tests of applications on the web.
- Spider:
Burp Spider is a tool for web application mapping. It uses various techniques of intelligence to generate comprehensive inventories of an application’s functionality and content.
- Proxy:
Burp proxy is an HTTP/S interactive proxy server for testing and attacking applications on the web. It operates as the middle-man between the target web server and the end browser. This allowed users to modify, inspect and intercept the raw traffic that passes in either direction.
Burp tool will take time to learn as it is quite complex. You can begin playing around with it after downloading as this will help you get the hang of it after a few trials. For more on developing penetration testing expertise, here is a course you might want to take
Installation
Head over to Portswigger and get the download for Burp Suite Community Edition. You’ll get what is possibly the largest bash script I’ve ever seen in my life. So, in your terminal, migrate to whichever folder it downloaded to an run the following:
- chmod +x burpsuite_community_linux_v<your version here>.sh./burpsuite_community_linux_v<your version here>.sh
That’ll take a moment to run, and when it’s done you’ll have the latest version of Burp Suite installed. I know, it’s surprising.
Initial setup
Open up the program (either by running Burp Suite Community in your terminal or hitting the super/windows key and searching for it). You’ll see a pretty little splash screen, and then this:
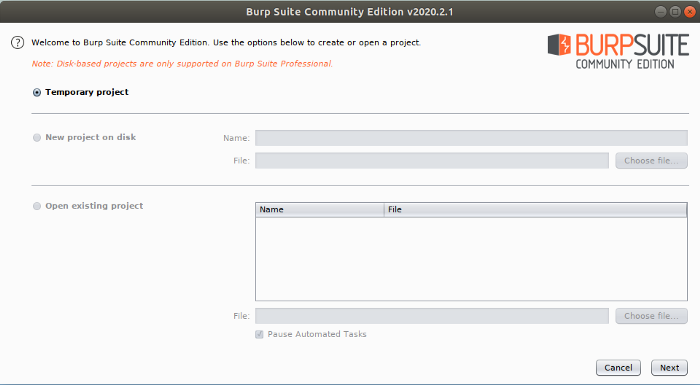
Hit next…
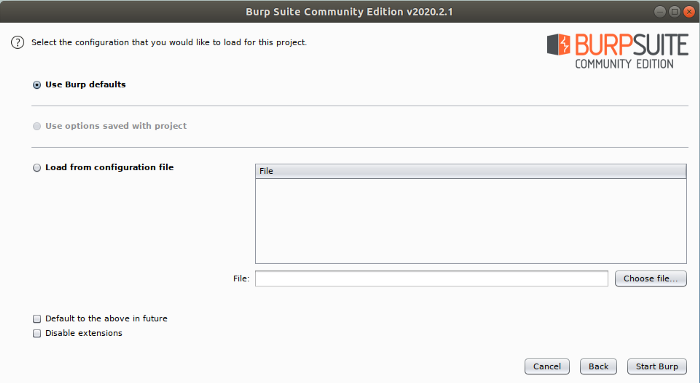
Hit next again…
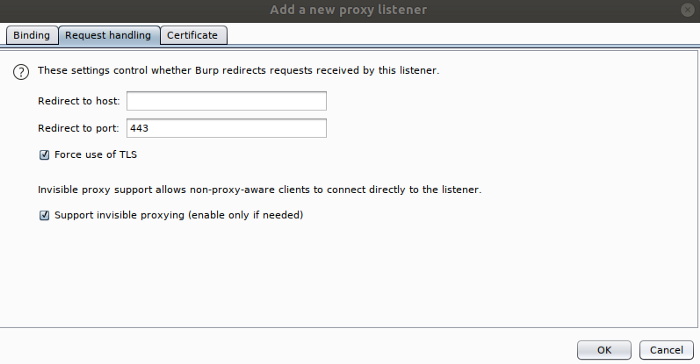
Alright, now we’re in business. Next, you’ll want to set a few of the Proxy options so you can actually use the damn thing. Go to the proxy tab:
Click on the options tab. Here, you can set up the listeners that will essentially allow you to do a Man in the Middle attack on yourself, so you can view/modify/replay traffic in real time. Modify the current entry to allow invisible proxying, and create a new entry on port 8443 for HTTPS traffic, as seen below:
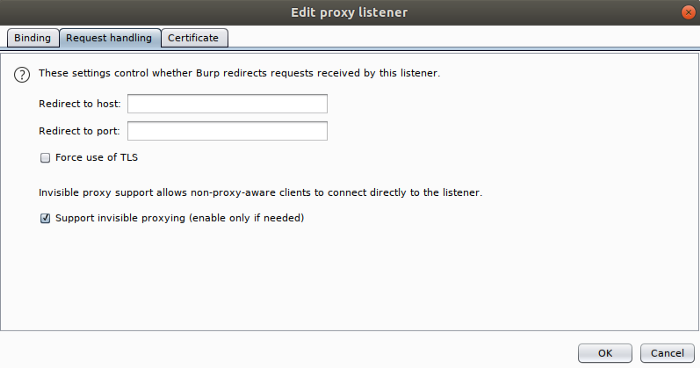
Remember to check off “Force use of TLS” when you create the listener for HTTPS:
Bonus: if you never want to do this again, click the Burp menu (top left of main window) >> User Options >> Save user options and name the file something like burp. json . Now, you can load this template when you start a new project.

Get Hands-On Learning on Burp Suite Training to Master Your Skills
- Instructor-led Sessions
- Real-life Case Studies
- Assignments
Setting up your browser
To make use of Burp, we need some source of traffic. Let’s setup Firefox to be our testing browser. Open up Firefox and go to the preferences page. At the bottom, you’ll see Network Settings:
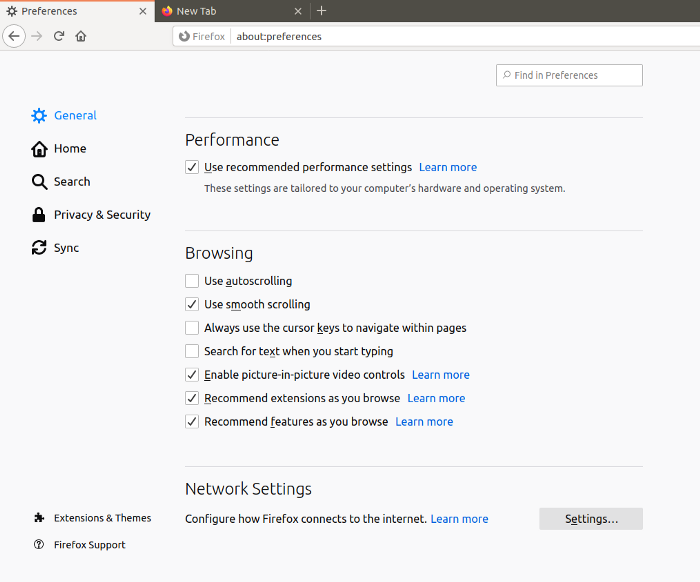
Click on the settings button beside that section, and you’ll see a window with proxy options pop up:
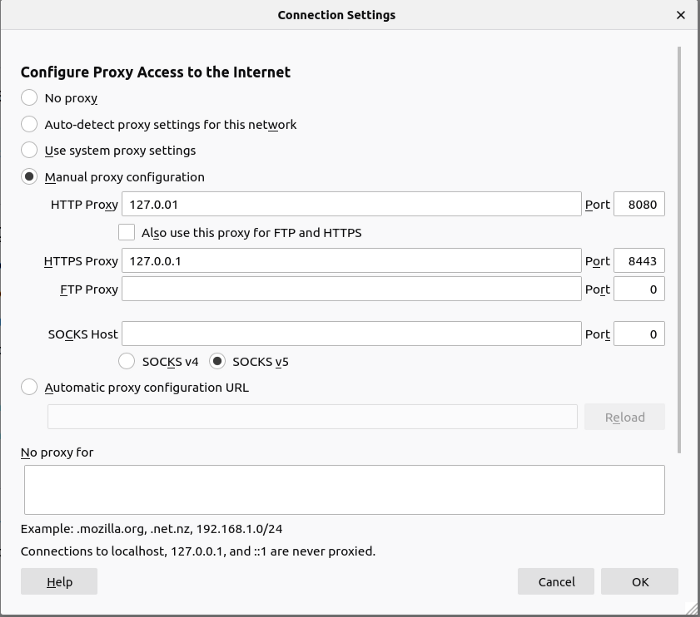
Enter the loopback address for each, since Burp Suite is running locally, and make sure you use the correct port numbers. If you’ve been following this guide exactly, they will be 8080 for HTTP and 8443 for HTTPS.
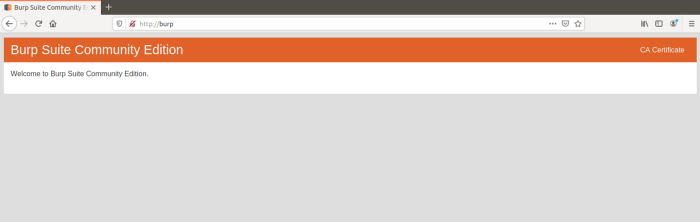
Ok, now you have the means to direct the traffic to Burp Suite. Now, you need to force your browser, who really just wants to be secure, to trust Burp. So, in your browser, navigate to http://burp (exactly). You’ll see this nifty little screen:
Hidden in the top right corner is what we’re after. Click the ‘CA Certificate’ link and save it:
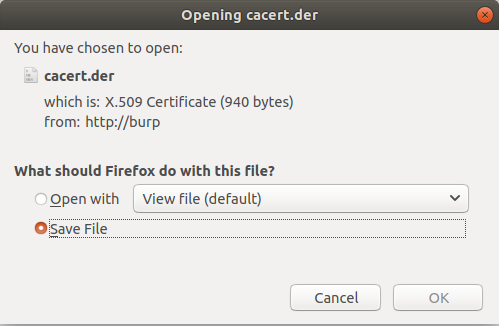
That is the certificate that Burp Suite uses when signing HTTPS traffic. If you were only going to proxy HTTP traffic (good luck), you wouldn’t really need this, but that’s not the world we live in. Next, you’ll need to import this certificate into Firefox’s trusted certificate store. Go back to Preferences, and click on the Privacy & Security tab:
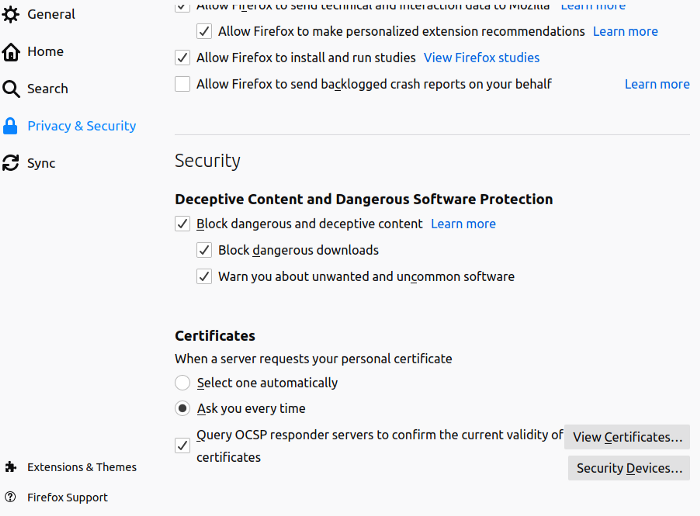
Near the bottom, click on ‘View Certificates’. You’ll see a window listing all of the certificates you currently trust. At the bottom, click Import:

Navigate to the folder where you saved the certificate from earlier and import it. Firefox will ask how you want to use it:
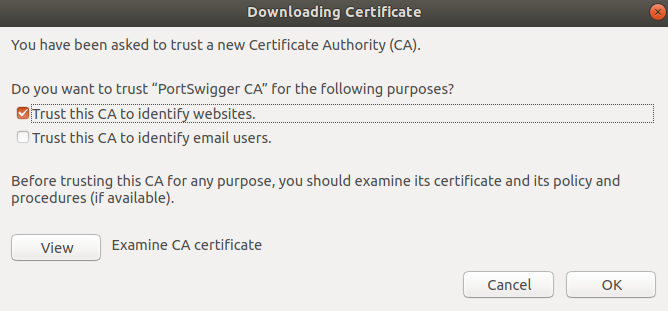
We don’t really need this to identify anything but websites, so for the sake of ‘scurity, just check off the first box. Older versions of Firefox had more options, but I can’t recall what they were and I’m too lazy to look it up. Use your best judgement, security professional.
Looking at some traffic
Now, we could go back to Burp and click on the proxy tab while navigating around the web all willy-nilly and capture everything going to and fro. But what about this project you’re working on where you really just need to see traffic from a certain domain or subdomain?
Easy. Go to the Target tab:
We’re highly advanced, here, so click on the ‘Use advanced scope control’ checkbox. Really, it’s just easier to use I think:
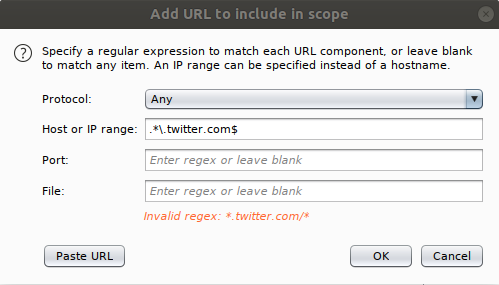
So, pretend we’re wanting to look at Twitter traffic and only want to view traffic from subdomains (like api.twitter.com). You would set a new target scope like so:
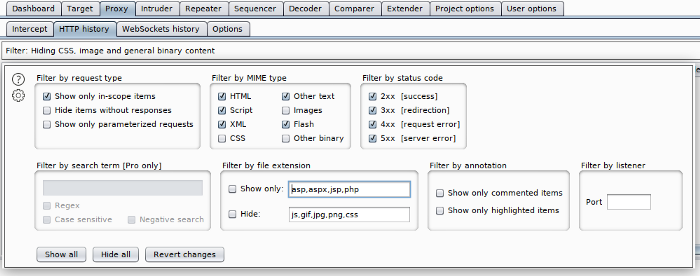
Going back to the proxy tab, you may have to change the filters in the HTTP history to ensure you only see items from your scope. Click on the Filter bar right above the traffic history and make sure ‘Show only in-scope items’ is checked off:
Navigate to Twitter, log in, and click around on stuff. You can now see only the traffic coming from Twitter subdomains (the Repeater tab is shown below):
Conclusion :
“Burp Suite and Nexpose/Metasploit Pro currently provide the most value to the independent security consultant in terms of discovered vulnerabilities, ease of use, licensing flexibility, and range of functionality”.Hope you have found all the details that you were looking for, in this article.