Last updated on 03rd Feb 2022| 2462
- Introduction to Ionic Native
- Crowd
- Requirements
- Ionic 5 Angular Native Storage Example
- Introduce or Update Ionic CLI
- Update NativeStorage in AppModule
- Step by step instructions to Use Native Storage in Ionic
- Ionic Native Storage Methods
- Test Ionic App
- What We’ll Build
- Make an App
- Synopsis
- Conclusion
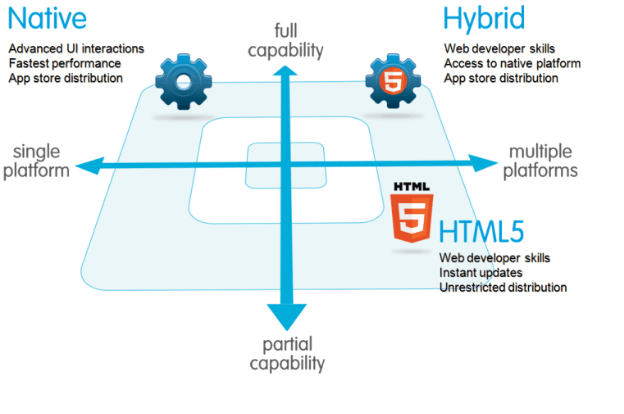
- Ionic is open source system utilized for creating portable applications. It gives apparatuses and administrations to building Mobile UI with local look and feel.
- Ionic system needs local covering to have the option to run on cell phones.
- This is an initial instructional exercise, which covers the fundamentals of the Ionic Open Source Framework and discloses how to manage its different parts and sub-parts.
- Since Ionic is based on top of AngularJS and Apache Cordova, you should have fundamental information about these innovations. You additionally should be acquainted with HTML, CSS and JavaScript, to see all the data gave.
- Ionic Native is an arranged arrangement of coverings for Cordova modules that make it simple to add local gadget usefulness to any Ionic application with Capacitor or Cordova.
- Ionic Native wraps module callbacks in a Promise or Observable, giving a typical point of interaction to all modules and making it simple to utilize modules with Angular change recognition.
- Ionic Native likewise works in Capacitor projects. It’s essential to specify that these Cordova modules are submitted and kept up with by the Ionic people group.
- The accompanying presents clarify how on utilize Ionic Native modules to add local elements to an Ionic application, for example, Camera access, Push notices, Geolocation, Ad Mob, from there, the sky is the limit.
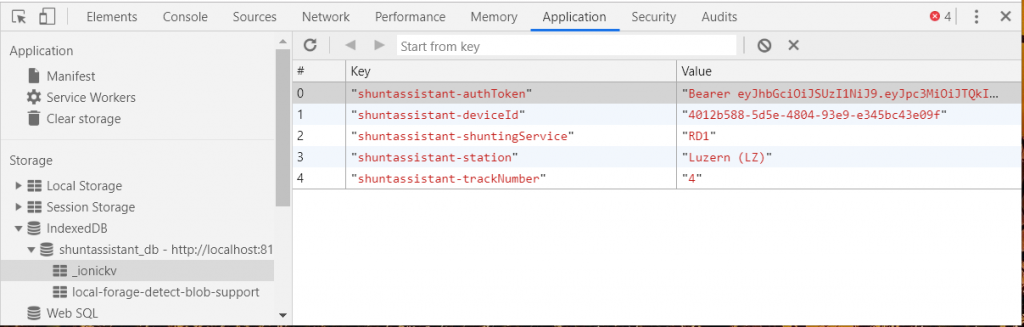
- A local stockpiling bundle is great for saving different kinds of data on the client gadget, and this data comprises of a client profile, application settings, meetings, and some more. Fret not; local stockpiling module covers all.
- Obviously, ionic’s WebView memory is utilized to store gadget data; this data doesn’t disappear regardless of whether the client clears the reserve and shuts the application.
- This instructional exercise will disclose how to involve Native stockpiling in the Ionic 5 application and save the information in key-esteem pair as a JSON object.
- You need to recollect local portable applications use SQLite information bases for capacity, though PWA (moderate web applications) don’t need local stockpiling whenever utilized on the client’s program. All things considered, you might go with IndexedDB or localStorage for capacity.
- npm introduce – g @ionic/cli
- Make Ionic Angular Project
- import { NgModule } from ‘@angular/core’;
- import { BrowserModule } from ‘@angular/platform-browser’;
- import { RouteReuseStrategy } from ‘@angular/router’;
- import { IonicModule, IonicRouteStrategy } from ‘@ionic/angular’;
- import { AppComponent } from ‘./app.component’;
- import { AppRoutingModule } from ‘./app-routing.module’;
- <'ion-content [fullscreen]="true">
- <'ion-button color="danger" expand="block" (click)="setData()">Set Data
- <'ion-button color="success" expand="block" (click)="getData()">Get Data
- <'ion-button color="tertiary" expand="block" (click)="getAllData()">Get All Data
- <'ion-button color="warning" expand="block" (click)="removeData()">Remove Key
- <'ion-button color="dark" expand="block" (click)="clearData()">Clear
- <'/ion-content>
- ionic cordova stage add ios
- ionic cordova stage add android
- BashCOPY
- ionic cordova construct ios
- Instructor-led Sessions
- Real-life Case Studies
- Assignments
- ionic cordova assemble android
- BashCOPY
- ionic cordova run ios – l
- ionic cordova run android – l
- One Angular-put together codebase that runs with respect to the web, iOS, and Android utilizing Ionic Framework UI parts.
- Conveyed as a local iOS and Android portable application utilizing Capacitor, Ionic’s true local application runtime.
- Photograph Gallery usefulness controlled by the Capacitor Camera, Filesystem, and Storage APIs.
- Find the total application code referred to in this guide on GitHub.
- Download and introduce these immediately to guarantee an ideal Ionic advancement experience:
- Node.js for connecting with the Ionic environment. Download the LTS adaptation here.
- A code supervisor for… composing code! We love Visual Studio Code.
- Windows clients: for the best Ionic experience, we suggest the inherent order line (cmd) or the Powershell CLI, running in Administrator mode.
- Macintosh/Linux clients, practically any terminal will work. Introduce Ionic Tooling
- To open a terminal in Visual Studio Code, go to Terminal – > New Terminal.
- $ npm introduce – g @ionic/cli local run cordova-res
- The – g choice means introduce worldwide. Whenever bundles are introduced around the world, EACCES consent mistakes can happen.
- Consider setting up npm to work internationally without raised consents. See Resolving Permission Errors for more data.
- $ ionic beginning photograph exhibition tabs – – type=angular – – capacitor
- $ cd photograph exhibition
- Next we’ll have to introduce the important Capacitor modules to make the application’s local usefulness work:
- import { defineCustomElements } from ‘@ionic/pwa-components/loader’;
- // Call the component loader after the stage has been bootstrapped
- defineCustomElements(window);
- Run the App
- Run this order straightaway:
- $ ionic serve
- There are three tabs. Click on the Tab2 tab. It’s a fresh start, otherwise known as the ideal spot to change into a Photo Gallery. The Ionic CLI includes Live Reload, so when you make changes and save them, the application is refreshed right away!
- Open the photograph exhibition application organizer in your code editorial manager of decision, then, at that point, explore to/src/application/tab2/tab2.page.html.
Introduction to Ionic Native :-
Crowd :-
This instructional exercise is made for JavaScript designers that are new to versatile turn of events. It gives straightforward, straightforward clarifications with valuable working models.
We will go through the greater part of the Ionic Framework so you can likewise involve this as a kind of perspective for your undertakings.
This instructional exercise is planned to make you agreeable in getting everything rolling with the Ionic Open Source Framework and its different capacities.
Requirements :-

Develop Your Skills with Ionic Framework Certification Training
Weekday / Weekend BatchesSee Batch DetailsIonic 5 Angular Native Storage Example :-
Stage 1: Install or Update Ionic CLI
Stage 2: Create New Ionic Angular Project
Stage 3: Install Native Storage Plugin
Stage 4: Update NativeStorage in AppModule
Stage 5: How to Use Native Storage in Ionic
Stage 6: Ionic Native Storage Methods
Stage 7: Test Ionic App
Introduce or Update Ionic CLI :-
Ensure the most recent adaptation of the Ionic CLI is appropriately introduced. The Ionic CLI device can be added all around the world with npm on your framework:
You can use underneath order to make another functioning Ionic Angular application: ionic beginning local stockpiling demo clear.
Update NativeStorage in AppModule :-
Then, Import NativeStorage module from the from ‘@ionic-local/local stockpiling/ngx’ in AppModule document. Update code in app.module.ts document:
Step by step instructions to Use Native Storage in Ionic :-
To get to the capacity techniques, we first import the NativeStorage module significantly at the highest point of your ionic page, from there on infuse the NativeStorage inside the constructor() strategy.We tell you the best way to utilize local stockpiling on the Home page. Be that as it may, you might utilize it on any page or part.
Ionic Native Storage Methods :-
In this progression, we will tell you the best way to Set, Get, Get All, Remove and Clear information or data in Ionic local stockpiling.
Make a few buttons utilizing the particle button quality and tie them to click occasions, and pass the custom techniques according to the related undertaking. Update app.component.html document:
Test Ionic App :-
To run an application on the emulator, you expect to add the stage:
# iOS
# Android
From that point, set up the runnable form:
# iOS

Get JOB Oriented Ionic Framework Training for Beginners By MNC Experts
# Android
In the end, start the application on the gadget:
# iOS
# Android
What We’ll Build :-
We’ll make a Photo Gallery application that offers the capacity to take photographs with your gadget’s camera, show them in a network, and store them forever on the gadget.
Features include:
Download Required Tools :
Order line interface/terminal (CLI):
Run the accompanying in the order line terminal to introduce the Ionic CLI (ionic), local run, used to run local pairs on gadgets and test systems/emulators, and cordova-res, used to create local application symbols and sprinkle screens:
Note :
Duplicate Note :
Make an App :-
Then, make an Ionic Angular application that utilizes the “Tabs” starter format and adds Capacitor for local usefulness:
Duplicate
This starter project comes total with three pre-fabricated pages and best practices for Ionic turn of events. With normal structure hinders currently set up, we can add more elements without any problem!
Then, change into the application organizer:
Duplicate
Then, import @ionic/pwa-components by altering src/main.ts.
Duplicate
That is it! Presently for the great part – how about we see the application in real life.
Duplicate
Also presto! Your Ionic application is currently running in an internet browser. The majority of your application can be fabricated and tried squarely in the program, extraordinarily expanding advancement and testing speed.
Photograph Gallery!!!
Duplicate
particle header addresses the top route and toolbar, with “Tab 2” as the title (there are two of them because of iOS Collapsible Large Title support).
Synopsis :-
In the last investigation, we would say Ionic local stockpiling is best by its valuable and convenient techniques as well as in view of its inconspicuous troubleshooting that should be possible even on programs.
Thus, we have closed the Ionic local stockpiling instructional exercise and grasped the capacity techniques like Set, Get, Get All, Remove and Clear. We trust it will help you comprehended the nearby local stockpiling idea in ionic.
Conclusion :-
Ionic is a great technology that lets you make a production-ready app much faster compared to traditional native app development. The big advantage of this approach is that instead of using Java/Swift/Objective-C you can use standard web development technologies, i.e. HTML, CSS, JavaScript/TypeScript, and Angular. There is a small drawback in terms of performance — a native app feels more responsive on older devices — but on any recent smartphone the difference is negligible.