
Last updated on 07th Jun 2020| 2623
What is Actions class in Selenium?
Let us start by taking a look at the information shown by intellisense for the Actions class. You can see this by hovering over Actions class in any IDE, a pop up menu should open up as shown below.
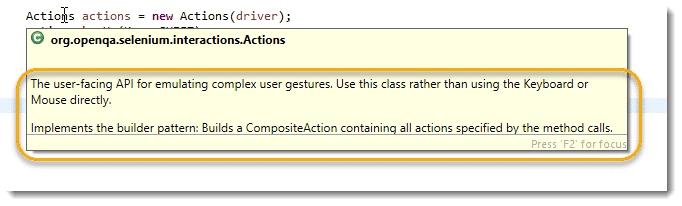
The user-facing API for emulating complex user gestures. Use this class rather than using the Keyboard or Mouse directly.
Implements the builder pattern: Builds a CompositeAction containing all actions specified by the method calls.
The class description clearly states that we can perform complex user interaction using the Actions class.
Also, an important thing to bring here is that there is one other class which is called Action Class and it is different from Actions class. Because maybe you have noticed the top blue line in the above screenshot, the build method returns Action class. But then what is Action class and how does it different with Actions Class. Let’s have a look.
Actions class Methods/Commands in Selenium
Actions class provides various methods that return an actions object unless specified explicitly. Basically, all the methods of actions class can be divided into two categories:
- Mouse based actions methods
- Keyboard-based actions methods
Let us see the first mouse-based actions class commands.
Mouse based Actions Methods/Commands in Selenium
There are almost eight important different mouse actions that can be performed by using methods of actions class. They are as follows:
1. click()
The click() method is used to left-click at the current mouse location. This method does not know where or on which element it is clicking. It just clicks on the current point of location.
To perform a composite action, the click() method can also be used in combination with some other methods like moveToElement(), or moveByOffset(). It is also used to perform an action independently.
The general form of click() method is given below:
Method:
- click() : Actions
The syntax to call click() method of actions class is as follows:
Syntax:
- actions.click();
The syntax for the click method in combination with another method to make composite action is as follows:
- actions.moveToElement(element).click().perform();
The click() method does not take any parameter. It returns a self-reference.
2. click(WebElement)
This method is used to left mouse click directly in the middle of specified web element. The general form of this method is given below:
Method:
- click(WebElement element) : Actions
Syntax:
- actions.click(element);
The above syntax is equivalent to
- actions.moveToElement(element).click();.
This method takes an input parameter as an instance (variable) of WebElement on which click action has to be performed. It returns an Actions instance.
For example:
- WebElement one = driver.findElement(By.id(“one”));
- Actions actions = new Actions(driver);
- // Click on one.
- actions.click(one);
- actions.build.perform();
- doubleClick()
The doubleClick() method is used to perform a double-clicking at the current location of the mouse cursor. The general form of doubleClick() method is:
Method:
- doubleClick() : Actions
The syntax to call DoubleClick() method is given below:
Syntax:
- actions.moveToElement(element).doubleClick().perform();
It does not take any input parameters and returns an actions class instance. In the preceding syntax, the moveToElement(element) method has been used to move mouse cursor to the location of element and double-clicked on the element.
4. doubleClick(WebElement element)
This method is used to perform a double-clicking in the middle of the given element. It is an overloaded version of doubleClick() method. The general form is given below:
Method:
- doubleClick(WebElement element) : Actions
The syntax to call doubleClick(WebElement element) is as follows:
Syntax:
- actions.doubleClick(element).perform();
This method accepts an input parameter as target web element that has to be double-clicked. It returns an actions class instance.
5. contextClick()
The contextClick() method is used to perform a right-click at the current mouse location. This method is also called right-click method. The general form is as follows:
Method:
- contextClick() : Actions
The syntax to call contextClick() method is as follows:
Syntax:
- actions.moveToElement(element).contextClick().perform();
The preceding method does not accept any input parameter and returns Actions instance.
In the preceding syntax, the cursor will first move to the specified location of web element and then right-click on it.
For example:
- WebElement two = driver.findElement(By.id(“two”));
- Actions actions = new Actions(driver);
- actions.moveToElement(two).contextClick().perform();
In this example, the cursor will move to the location of element “two” and then perform right-click operation.

Get Certification Oriented Selenium WebDriver Course with In-Depth Practical
Weekday / Weekend BatchesSee Batch Details6. contextClick(WebElement element)
This method is overloaded version of contextClick() method that is used to perform a right-click on the given web element. First, it moves the cursor to the location of web element and then performs right-click on the element. The general form of this method is:
Method:
- contextClick(WebElement element) : Actions
The general syntax to call contextClick() method is given below:
Syntax:
- actions.contextClick(two).perform();
It takes an input parameter as an instance of WebElement that has to be right-clicked and returns an actions class.
7. moveToElement(WebElement)
The moveToElement() method is used to move the mouse cursor to the center of a specified element on the web page. The web element is also scrolled into view.
Method:
- moveToElement(WebElement element) : Actions
The general syntax to call moveToElement() is as follows:
Syntax:
- actions.moveToElement(element).perform();
This method accepts an input parameter as the target web element where the mouse cursor has to be moved.
8. moveToElement(WebElement, int, int )
This method is used to move the mouse cursor from the top-left corner of the web element to an offset position on the web page. The element is scrolled into view and its location is calculated using getBoundingClientRect.
Method:
- moveToElement(WebElement element, int xOffset, int yOffset) : Actions
The general syntax to call this method is as follows:
Syntax:
- actions.moveToElement(element, 524, 280).build().perform();
In the above code, xOffset is an input parameter that represents the amount of offset to be moved along the x-axis. If x is a positive value, the mouse cursor will move to the right. The negative value of x is used to move the mouse cursor to the left.
yOffset is an input parameter that represents the amount of offset to be moved along the y-axis. The positive value of y moves the mouse cursor down along the y-axis whereas, the negative value of y moves the cursor towards the top along the y-axis.
If the xOffset and yOffset values are provided such that they move the cursor out of the document, MoveTargetOutOfBounds exception is thrown.
9. moveByOffset(int, int)
This method is used to move the mouse cursor from its current position (0, 0) to another point on the web page. When the web page is loaded, generally, the coordinate of the initial position of mouse cursor would be (0, 0) unless the mouse has not been moved.
Method:
- moveByOffset(int xOffset, int yOffset) : Actions
Syntax:
- actions.moveByOffset(50, 60).build.perform();
10. clickAndHold()
The clickAndHold() method is used to left-clicking on an element and holds it without releasing the left button of the mouse (i.e. without releasing at the current mouse location). This method is generally useful when performing drag and drop operations.
Method:
- clickAndHold() : Actions
Syntax:
- action.clickAndHold().moveByOffset(300, 200).perform();
In the above syntax, the mouse cursor will click at the current location, move to the location (300, 200) by holding it.
11. clickAndHold(WebElement)
This method is used to left-click and hold web element at the current position of the cursor. It is generally used to move an element by clicking and holding from current position to another position.
Method:
- clickAndHold(WebElement element) : Actions
This method is equivalent to
- actions.moveToElement(element).clickAndHold();.
Syntax:
- actions.clickAndHold(element).moveByOffset(120, 0).perform();
The preceding method takes an input parameter as a WebElement that has to be clicked and held. It returns actions class instance.
In the above syntax, we have provided a web element to the clickAndHold() method that will be clicked and move to the location by holding it.
12. release()
The release() method is used to release or to drop an element from the mouse. It can release the left mouse button on a web element.
Method:
- release() : Actions
Syntax:
- actions.clickAndHold(element).moveByOffset(120, 0).release().perform();
The above method does accept any input parameter and returns the actions class instance.
You will get undefined behavior if you attempt to call release() method without calling clickAndHold() method first.
13. release(WebElement)
This method is generally used to release currently held web element in the middle of another web element. Thus, we will not have to calculate the offset of target web element from the held web element.
Method:
- release(WebElement element) : Actions
Syntax:
- actions.clickAndHold(element1).release(element2).perform();
This method takes an input parameter as the target web element where the held web element has to be dropped. The return type of this method is an instance of actions class.

Enroll in Advanced Selenium WebDriver Training By Certified Experts
- Instructor-led Sessions
- Real-life Case Studies
- Assignments
14. dragAndDrop(WebElement, WebElement)
The dragAndDrop() method is used to drag an element on to the location of another target element and drop it. We need to pass source element and target element to dragAndDrop() method of actions class where the source element will be dragged and dropped.
Method:
- dragAndDrop(WebElement source, WebElement target) : Actions
The syntax to call dragAndDrop() method in the following way:
Syntax:
- actions.dragAndDrop(src, trg).perform();
The dragAndDrop() method takes two input parameters as source element and target element. The return type of this method is the actions class.
In the preceding syntax, the source and target web elements are identified by their IDs.
15. dragAndDropBy(WebElement, int, int)
The dragAndDropBy() method is used to drag a web element on to the location of given offset and drop it.
Method
- dragAndDropBy(WebElement element, int xOffset, int yOffset) : Actions
Syntax:
- actions.dragAndDropBy(dragMe, 300, 200 ).perform();
This method takes three input parameters as target WebElement to be dragged, xOffset parameter, and yOffset parameter.
In the above syntax, dragMe is a web element that is identified by its id and the element dragMe is dragged 300 horizontally and 200 vertically.
Keyboard based Actions Commands in Selenium
Until now in the previous section, we have seen all the mouse actions. Now, we will look at some of the keyboard actions in the actions class. Basically, there are three different keyboard actions available in the actions class. They are keyUp, keyDown, and sendKeys actions. So, let’s see in some detail about them.
1. keyDown()
The keyDown() method is used to perform the action of pressing and holding a key. The keys can be Shift, Ctrl, and Alt keys.
Method:
- keyDown(Keys key): Actions
It accepts an input parameter as either Keys.SHIFT, Keys.ALT or Keys.CONTROL. If the passed key is none of those, IllegalArgumentException is thrown.
2. keyUp()
The keyUp() method is used to release a key that has been already pressed using keyDown() method. The syntax of keyUp() method is as follows:
Method:
- keyUp(Keys key): Actions
You will get undefined behavior if you try to use this method on an unpressed key.
There are also two overloaded methods of keyDown() and keyUp(). They are as follows:
- keyDown(WebElement element, Keys key)
- keyUp(WebElement element, Keys key)
Both methods are used to execute an action directly on the web element.
3. sendKeys(CharSequence)
The sendKeys() method is used to type in alphanumeric and special character keys into the WebElement such as textarea, textbox, and so on. The syntax of sendKeys() method is as follows:
Method:
- sendKeys(CharSequence keysToSend) : Actions
The preceding method is different from sendKeys(CharSequence…) method of WebElement. If the passed keys is null, IllegalArgumentException is thrown.
The overloaded method of sendKeys() method is sendKeys(WebElement target, CharSequence keyToSend). It is equivalent to calling
- actions.click(element).sendKeys(keysToSend).
How to Use Actions class in Selenium?
Let’s understand the working of Actions class with a simple example:
Manually, it is done by pressing the Shift key and then typing the text which needs to be entered in Uppercase keeping Shift key pressed and then releasing the Shift key. In short Shift + Alphabet Key are pressed together.
Now, to emulate the same action through automation script, Actions class method is used:
1.Import package:
Actions class & Action class reside in org.openqa.selenium.Interactions package of WebDriver API. To consume these, import their packages:
- import org.openqa.selenium.interactions.Actions;
- import org.openqa.selenium.interactions.Action;
2. Instantiate Actions class:
Actions class object is needed to invoke to use its methods. So, let’s instantiate Actions class, and as the Class signature says, it needs the WebDriver object to initiate its class.
- Actions actions = new Actions(webdriver object);
3. Generate actions sequence: Complex action is a sequence of multiple actions like in this case sequence of steps are:
- Pressing Shift Key
- Sending desired text
- Releasing Shift key
For these actions, Actions class provides methods like:
- Pressing Shift Key : Actions Class Method => keyDown
- Sending desired text : Actions Class Method => sendKeys
- Releasing Shift key : Actions Class Method => keyUp
The keyDown method performs a modifier key press after focusing on an element, whereas keyUp method releases a modifier key pressed.
A modifier key is a key that modifies the action of another key when the two are pressed together like Shift, Control & Alt.
Generate a sequence of these actions but these actions are performed on a webElement. So, let’s find the web-element and generate the sequence:
- WebElement element = driver.findElement(By strategy to identify element);
- actions.keyDown(element, Keys.SHIFT);
- actions.sendKeys(“TextToBeConvertAndSendInUpperCase”);
- actions.keyUp(Keys.SHIFT);
An important thing to note here is that, if you hover over any action class method, you will notice that it returns the Actions class object.

This is the beauty of the builder pattern. Which means that all actions can be clubbed together as below:
actions.keyDown(element, Keys.SHIFT).sendKeys(“TextToBeConvertAndSendInUpperCase”).keyUp(Keys.SHIFT);
4. Build the actions sequence:
Now, build this sequence using the build() method of Actions class and get the composite action. Build method generates a composite action containing all actions so far which are ready to be performed.
- Action action = actions.build();
Notice that the build method returns the object type of Action. It is basically representing Composite Action which we built from a sequence of multiple actions. So, the second part of the Actions class description will get clear now, i.e. Actions class implements the builder pattern i.e. it Builds a CompositeAction containing all actions specified by the method calls.
5. Perform actions sequence: And finally, perform the actions sequence using perform() method of Action Interface.
action.perform();And this is done, once the execution passes this point, you will notice the action on the browser.