
What are LookML Projects and the Developer Mode | How to Create LookML Projects?
Last updated on 03rd Jan 2022, Blog, General
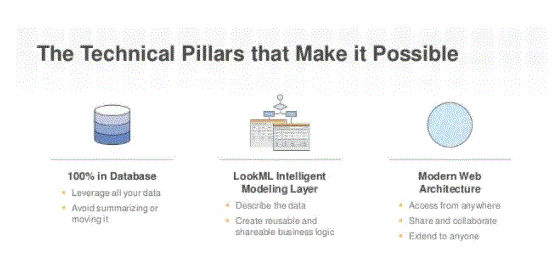
It is a collection of LookML Files. LookML files describe the relation and interpretation among database tables. Looker uses git for version control. It ensures data model collaboration among the developers.
- Introduction to LookML project
- Switching In and Out of Development Mode
- LookML project files
- Navigating to files
- Creating files
- Uploading files
- Development Mode and Production Mode
- Switching in and out of Development Mode with enhanced navigation
- Understanding model and view files
- Conclusion
Introduction to LookML project:
Lookml projects:
Projects are usually created during Looker setup. Each project represents a repository. It is a collection of LookML files. LookML files describe relationships and interpretations between database tables. Uses Looker for version control. It ensures data model collaboration between developers.
Project files:
The Looker project generates a set of generator files. It can be used as a template for building the project.
Each project lists its files in the following categories:
Project Manifest – Lists the names of the various project files within it. Here you can import other files into your current project.
docs – Documentation files are written in Github-flavoured Markdown.
Model – This defines the EXPLORE option and JOIN.
View – This matches a database table or derived table.
Dashboard – The LookML Dashboard defines the data and layout for the dashboard.
data – Data files are JSON files that specify custom maps.

- Using the Shortcut Ctrl+Shift+D
- Clicking on Develop on the Menu and pushing the Development Mode On/Off button.
- The Explore section of LookaML and Looker is loaded with the development version.
- A development mode bar appears at the top of the window in purple.
- Use shortcut Ctrl+Shift+DM
- Click Exit Development Mode on the purple banner.
- Click on the Development Mode On/Off button.
- version control
Switching In and Out of Development Mode:
The Looker data model exists in two states: production mode and development mode:
Production mode:
In production mode, users explore Looker data. It enables the analysis and creation of content for business users. See, ML files are considered read-only in this mode.
Development Mode (Dev or Developer Mode)
If you want to change your LookML, enter it in development mode. This mode provides private access to a different vision of the data model. Once done, you can merge the project with Production.
Development mode can be turned on and off in any number of ways:
While you are still in development mode, you will see the following changes:
To exit development mode, one has to:
Lookers is integrated with the IDE***. It enables private copy editing in LookML files in development mode. *** can be used to commit and push changes to production. Looker automatically manages the *** workflow for these changes.
- Model files with extension .model.lkml
- View files with extension .view.lkml
- Dashboard files with extension .dashboard.lookml
- extension .topojson or .geojson or .json . data files with
- Extension .md . document files with
- Project manifest files that are always named manifest. lkml
- Local string files with extension .strings.json
- Extension .explore.lkml . explore files with
- extension .lkml . data test files with
- Extension .lkml . refinement files with
- Other files with any of the file extensions not listed above.
LookML project files:
The Looker project is a collection of LookML files that tell Looker how to connect to your database, how to query your data, and how to control the behaviour of the user interface.
Accessing project files:
To view the LookML file for a project, click the Develop menu and select the project name. The projects you see in the Develop menu depend on the following:
Your Permissions: To view a project, you must have development permission for at least one model in the project.
Your current mode: You may see additional entries on the Develop menu when you are in development mode versus production mode. For example, if you’ve created a new project in development mode that you haven’t yet put into production, it will appear in the project menu only when you’re in development mode.
Project file type:
A LookML project can contain the following types of files. If your project is not enabled for folders in the IDE, all project files have extensions, although the extensions are hidden in the IDE list.
Click on the link to get more information about file types:
When you create a new project you can automatically generate a model file and view files based on your database. For existing projects, you can create new files manually, as described in the Creating files section on this page.
- If the project contains a document file named readme.md, the IDE will open that file.
- If there is no readme.md document file, the IDE will open the first alphabetical document file.
- If there is no document file in the project, the IDE will open the first alphabetical model file.
- If there is no model file in the project, the IDE will open the first charset file of any type.
- To open a separate project file, click on the file name in the side panel of the Looker IDE.
Navigating to files:
When you open a LookML project, the Looker IDE opens the project in one of the LookML files in that project:
- Navigate to your project files.
- Choose where you want to create the file:
- To create a file inside a folder, click the folder’s menu
- To create a file at the root level of the project, click the + at the top of the file browser in the Looker IDE.
- Warning
- Project manifest files can only be created with the + icon at the top of the file browser in the Looker IDE, and only if the project does not already contain a manifest file. This is because a project can have only one manifest file, and the manifest file must be located at the root level of the project’s directory structure.
- Explore Files
- data test files
- refinement files
- any other file that you are using to hold the lookml elements
- In the Create File pop-up, enter a name for the new file.
- To create an Explore file, be sure to include the .explore extension at the end of the file name. Looker will add .lkml at the end if missing. For example, you can enter either flight.explore or flight.explore.lkml, and the file name will be flight.explore.lkml.
- For all other normal LookML files, you do not need to include the file extension, as the .lkml will be automatically appended to the end of the file name. For example, if you enter flight_data_tests, the file name will be flight_data_tests.lkml.
- Click Create. The new file will be displayed where you created it. If necessary, you can easily move it to another folder.
Creating files:
To create a LookML file in a project using the IDE:
Select the type of LookML file you want to create. Use the Generic LookML file type option for the following types of files:

Develop Your Skills with Advanced Looker Certification Training
Weekday / Weekend BatchesSee Batch Details- Navigate to your project files.
- Drag the file from your computer into the Looker IDE. The file will be displayed at the root of your directory structure.
- You can move to another folder.
Uploading files:
You may also want to upload files from your computer to your project, such as JSON data files, or LookML files you create locally. For these cases, you can use the drag-and-drop function to add files to your project:
Warning
Once you’ve uploaded the file, be sure to use the include parameter if you want to reference the file or elements from the file in other LookML files in your project. See the included parameter documentation page for more details.
- Production Mode is the production version of Looker. Everyone who uses Looker instances in production mode accesses their projects in the same state. Project files in this mode are read-only.
- Use production mode when you’re exploring data in Looker for your own analysis or to create saved content (looks and dashboards) for other users.
- Development Mode is often referred to as Dev Mode.
- Switching in and out of development mode
- You can turn development mode on and off in any of these ways:
- Use the keyboard shortcut Control-Shift-D (Mac) or Ctrl+Shift+D (Windows).
- Enable the Development Mode toggle in the Develop menu:
- If your administrator has enabled the Advanced Navigation Lab feature, the development mode toggle is located in the newly advanced left navigation panel.
- While in development mode, you will see the following changes:
- The Explore sections of LookaML and Looker are full of your development version of the model.
- At the top of the screen is a development mode banner:
- To exit development mode, you can use any of these methods:
- Use the keyboard shortcuts Ctrl-Shift-D (Windows) or Control+Shift+D (Mac).
- Click on Exit Development Mode in the banner.
- Open the development menu and disable the development mode toggle
Development Mode and Production Mode:
Your Looker data model exists in two states: production mode and development mode.
Production mode:
Development mode
Development mode allows you to make changes to LookML files and preview how they will affect the content on your instance. Changes you make to LookML files in development mode do not affect the production environment until they are pushed to the production environment. (If you’re familiar with ***, development mode uses a different branch.)
In development mode, you can view the effects of your changes to project files in the Explore area of Looker. Once you’re happy with your changes, you can save them and merge them into production, where they’ll then be viewable by everyone:
Warning
- Use the keyboard shortcut Control-Shift-D (Mac) or Ctrl+Shift+D (Windows).
- Select the Development Mode toggle in the newly upgraded left navigation panel:
- To exit development mode, you can use any of these methods:
- Use the keyboard shortcut Control-Shift-D (Mac) or Ctrl+Shift+D (Windows).
- Open the left navigation panel and select the Development Mode toggle.
- Select Exit Development Mode in the banner at the top of the screen:
Switching in and out of Development Mode with enhanced navigation:
If your administrator has enabled the Advanced Navigation Lab feature, you can use one of the following methods to enable development mode:
Version control:
Looker’s IDE is integrated with for version control. It enables you to edit a private copy of LookML files in development mode. Looker automatically manages the workflow for committing, pulling and pushing changes. You can use the Action Panel or Buttons of the Looker IDE to access the commands:
For details on using Looker’s version control, see the Using Version Control and Deploying documentation page. For details on setting up Looker’s version control, see the Installation and Testing of Connections Documentation page.
- A model file specifies a database connection and the set of explorers that use that connection. A model file explores itself and also defines their relationships with other views.
- An Explore is a starting place to query your data. In SQL terms, an EXPLAIN is the FROM clause of a query. The Explore you define in the model is viewed by your users when they view Looker’s Explore menu. (See How the Project Works in the Looker Documentation page for more details on Explore.)
- In other words, the model file is where you define which data tables should be used (as in the included views) and how they should be linked together if necessary.
- Within the curly braces of explore, { } , you define a parameter for explore . You can use the join parameter to join other views to explore in the model file.
- Above we see an explorer called inventory_item in the model file, as well as its included view. This LookML definition causes inventory items to appear in the Explore menu, and combines the products and distribution_centres data from inventory_items.
- For more specific information about LookML structures in a model file, see the LookML term and concepts documentation page.
- Most LookML developers start with one or more model files that are automatically created when a LookML project is generated from a set of tables in the database.
Alternatively, a Looker developer in development mode can create a blank model file in the following ways:
- Using the Create Model File option to create a file using the Looker IDE (see the Creating Files section on the LookML Project File Documentation page for the procedure).
- Using the drag-and-drop feature to upload a file from your computer (see the Uploading Files section on the LookML Project Files Documentation page for the procedure). Be sure to use the file extension .model.lkml for the file you are uploading.
- Most LookML developers start with one or more view files that are automatically created when a LookML project is generated from a set of tables in the database.
- However, there are several ways a Looker developer can add view files to a LookML project in development mode:
Understanding model and view files:
This page provides an overview of model and view files, which are key components of most Looker projects. Other types of project files are described on the Understanding Other Project Files documentation page. For information about accessing a project’s files, see the Accessing and Editing Project Information Documentation page.
Model files:
Warning
Explore is usually defined in a model file. However, sometimes you need a separate Explore file for the derived table, or to extend or refine Explore across all models.
Structure and general syntax
Creating model files:
Creating scene files
Conclusion:
This article has provided a comprehensive guide on Looker ML and its importance for any organisation. It also provided a brief description of Looker and its features. In addition, this Looker also provides insight on the fundamentals in ML and 5 easy steps you can follow to learn it. Overall, Looker ML offers an innovative approach when dealing with any type of data. By collaborating together with Looker, it helps you tailor models to your business needs to collect valuable customer insights. If you want to integrate data into your desired database/destination, Hevo Data is the right choice for you! This will help in simplifying the ETL and management process of both data sources and data destinations.