Last updated on 03rd Jun 2025| 10756
- Introduction to Salesforce Data Loader
- Purpose and Benefits of Data Loader
- Installing and Setting Up Data Loader
- Importing Data with Data Loader
- Exporting Data from Salesforce
- Updating and Deleting Records
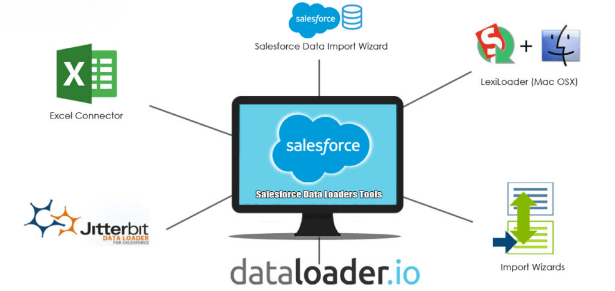
- Data Loader vs Data Import Wizard
- Automating Data Loader Operations
Introduction to Salesforce Data Loader
Salesforce Data Loader is a powerful data management tool designed to handle bulk data operations efficiently within the Salesforce platform. It enables users to perform a wide range of data tasks, including inserting new records, updating existing ones, upserting (a combination of insert and update), deleting records, and exporting large volumes of data. By leveraging Salesforce’s APIs, Data Loader facilitates complex data operations that would be difficult or time-consuming to execute manually. This tool is particularly essential for activities such as data migration where large datasets are transferred from other systems into Salesforce, as well as data cleansing, where outdated or incorrect information is updated or removed to maintain data accuracy, often covered during Salesforce Training. Additionally, Data Loader plays a key role in integration projects by enabling smooth data exchanges between Salesforce and external applications. Administrators, developers, and data analysts frequently use Data Loader due to its robustness and flexibility. It supports processing millions of records at once, which is crucial for organizations managing substantial datasets. Moreover, Data Loader can be automated through command-line execution, allowing scheduled or recurring data operations without manual intervention. This automation saves time and reduces errors, improving overall operational efficiency. In summary, Salesforce Data Loader is an indispensable tool that empowers organizations to manage their Salesforce data effectively, ensuring data quality and supporting business processes through streamlined bulk data operations.
Do You Want to Learn More About Salesforce? Get Info From Our Salesforce Training Today!
Purpose and Benefits of Data Loader
The purpose of Data Loader in Salesforce is to provide a powerful and flexible tool for managing large volumes of data efficiently and accurately. It is designed to handle complex data operations such as inserting, updating, deleting, and exporting records in bulk. This capability is essential for organizations that need to maintain data integrity, perform mass data migrations, or conduct regular data maintenance tasks without relying on manual entry, which can be time-consuming and error-prone. One of the key benefits of Data Loader is its ability to process millions of records in a single operation, far exceeding the limits of other tools like the Data Import Wizard, and it can be used in conjunction with a Future Method in Salesforce for asynchronous processing. This makes it ideal for enterprises with substantial data management needs, including large-scale data uploads, system integrations, and data cleanup efforts. Additionally, Data Loader supports automation through command-line interfaces, allowing organizations to schedule repetitive tasks such as data imports or exports.
This automation improves efficiency by reducing manual workload and minimizing the risk of human error. The tool’s support for exporting data also facilitates backups, audits, and comprehensive reporting by enabling users to extract data in a convenient CSV format. Moreover, Data Loader’s detailed error logging helps users quickly identify and resolve issues during data operations. Overall, Data Loader enhances data accuracy, operational efficiency, and scalability within Salesforce, making it an indispensable tool for administrators, developers, and business analysts alike.
Installing and Setting Up Data Loader
- Download Data Loader: Begin by downloading the latest version of Data Loader from Salesforce’s official website or through the Salesforce Setup menu under Data Management. Choose the version compatible with your operating system (Windows or Mac).
- Install the Application: Run the installation file and follow the on-screen prompts to install Data Loader on your local machine. Accept the license agreement and select the desired installation location.
- Verify Java Installation: Data Loader requires Java to run. Ensure that Java Runtime Environment (JRE) or Java Development Kit (JDK) is installed on your computer. If not, download and install the appropriate version from the Oracle website.
- Launch Data Loader: After installation, open the Data Loader application, as referenced in the Guide to Salesforce Campaign.
- Configure Salesforce Login Credentials: Enter your Salesforce username, password, and security token to connect Data Loader to your Salesforce org. If using a sandbox, ensure to select the correct environment.
- Set Up Data Mapping: Prepare mapping files to define how CSV file columns correspond to Salesforce object fields. You can create, save, and reuse these mappings for consistent data operations.
- Test Connection and Perform Trial Runs: Before running large operations, test the connection by performing small imports or exports to verify everything is working smoothly. Check logs for any errors or warnings.
- Prepare Your CSV File: Ensure your data is clean, properly formatted, and saved as a CSV file. Include all necessary fields and remove duplicates or invalid data to avoid import errors.
- Launch Data Loader and Select ‘Insert’: Open the Data Loader application and choose the “Insert” operation if you’re adding new records. For updating existing records, select “Update” or “Upsert” accordingly.
- Log In to Salesforce: Enter your Salesforce credentials, including username, password, and security token, as demonstrated during Salesforce Training.
- Select the Salesforce Object: Choose the Salesforce object (e.g., Account, Contact, or custom object) where the data will be imported. This step ensures that records are mapped to the correct place in Salesforce.
- Map CSV Fields to Salesforce Fields: Map columns in your CSV file to the corresponding Salesforce fields. Use the auto-match feature or manually map fields. Save the mapping file for future imports to save time.
- Start the Import Process: Review your settings and start the import. Data Loader will begin processing the records, displaying progress and any errors encountered during the operation.
- Review Success and Error Logs: After completion, review the success and error files generated by Data Loader. These logs help verify which records were imported successfully and identify any errors to fix for reprocessing.
- Prepare the CSV File: For both updates and deletions, your CSV must include the Salesforce Record ID of each record you want to modify or delete. For updates, include the fields you wish to change along with the IDs.
- Launch Data Loader and Choose Operation: Open Data Loader and select “Update” if you’re modifying existing records, or “Delete” if you’re removing them. Ensure you select the appropriate operation for your task.
- Log In to Salesforce: Enter your Salesforce login credentials (username, password, and security token), and choose the right environment (production or sandbox).
- Select the Target Object: Choose the correct Salesforce object (such as Account, Contact, or a custom object) to ensure your operation affects the intended data set, and make sure your Salesforce Security Token is correctly configured for access.
- Map Fields (for Update): For update operations, map the fields in your CSV to Salesforce fields. Ensure the ID field is correctly mapped so Salesforce knows which records to update.
- Run the Operation: Start the update or delete process. Data Loader will process each row and apply changes or delete the specified records accordingly.
- Review Success and Error Logs: After completion, examine the success and error files. They confirm which records were updated or deleted and highlight any that failed, helping you troubleshoot issues efficiently.
Would You Like to Know More About Salesforce? Sign Up For Our Salesforce Training Now!
Importing Data with Data Loader

Exporting Data from Salesforce
Exporting data with Data Loader enables users to efficiently retrieve and save Salesforce records locally in CSV format for various purposes such as backups, audits, and detailed reporting. To perform an export, users open Data Loader and select either the Export or Export All option. The Export option retrieves only active records, while Export All includes all records, even those in the recycle bin or archived. Next, users choose the specific Salesforce object from which they want to export data, such as Accounts, Contacts, or custom objects. After selecting the object, the user can pick the fields they want to include in the export file, which can be managed effectively using Standard Controllers in Salesforce. Data Loader also allows the application of filters via SOQL queries to limit the exported records to only those that meet certain criteria, making the process more targeted and efficient. Once these selections are made, users specify the location on their local machine where the exported CSV file will be saved. Data Loader then extracts the data and generates the CSV file, which can be opened and analyzed using spreadsheet software. An important feature of Data Loader is its detailed logging. Any errors encountered during the export process are recorded in log files, enabling users to quickly identify and resolve issues. This robust export functionality makes Data Loader a reliable tool for managing Salesforce data outside the platform.
To Earn Your Salesforce Certification, Gain Insights From Leading Data Science Experts And Advance Your Career With ACTE’s Salesforce Training Today!
Updating and Deleting Records
Data Loader vs Data Import Wizard
While both Data Loader and Data Import Wizard are valuable tools for managing data in Salesforce, they differ significantly in their capabilities and use cases. Data Loader is designed for large-scale data operations, capable of processing up to 5 million records in a single operation. This makes it ideal for organizations dealing with massive data volumes or needing to perform complex tasks such as insertions, updates, deletions, and exports. In contrast, Data Import Wizard is built for simpler, smaller-scale imports, with a limit of 50,000 records per operation. It offers a more intuitive, user-friendly interface that guides users through the import process step-by-step, making it suitable for non-technical users who perform occasional manual imports, as outlined in the Guide to Salesforce Data Validation Rules. One of the key advantages of Data Loader is its support for delete and export operations, which are not available in Data Import Wizard. This allows users to not only bring data into Salesforce but also manage and extract data efficiently. Additionally, Data Loader supports command-line automation, enabling scheduled and repetitive data tasks without manual intervention. This feature is particularly useful for ongoing data maintenance, backups, or integrations. Overall, Data Loader is the preferred choice for complex, high-volume data management needs, while Data Import Wizard is better suited for smaller, straightforward import tasks where ease of use is a priority. Understanding these differences helps organizations choose the right tool for their specific data operation requirements.
Go Through These Salesforce Interview Questions and Answers to Excel in Your Upcoming Interview.
Automating Data Loader Operations
Data Loader supports automation through command-line operations, making it a powerful tool for scheduling and automating repetitive data tasks within Salesforce. To automate Data Loader processes, users first need to prepare several key files: a CSV file containing the data to be imported or exported, a mapping file that defines how CSV columns correspond to Salesforce fields, and configuration files that specify settings such as login credentials and operation types. Once these files are set up, automation can be achieved by creating batch scripts (e.g., .bat files on Windows) or shell scripts on Unix-based systems. These scripts execute Data Loader commands in the background without requiring manual intervention, a process often covered in Salesforce Training. Users can define parameters such as operation type (insert, update, upsert, delete, export), file paths, and error handling preferences within the configuration files. To schedule these scripts to run automatically at designated times, tools like Windows Task Scheduler or cron jobs on Linux/Mac systems are used. Scheduling enables organizations to perform data imports, exports, updates, or backups during off-hours, reducing the risk of system downtime or performance impacts during business hours. This approach streamlines routine data management tasks, minimizes human error, and improves overall operational efficiency. By automating Data Loader operations, organizations can maintain data accuracy and consistency in Salesforce without the need for continuous manual effort, allowing teams to focus on more strategic initiatives.