Last updated on 09th Jun 2020| 3286
AWS Workspace is a managed desktop service offered by AWS. In this blog, you will learn more about AWS WorkSpaces. You will learn what Amazon’s WorkSpaces are, how to use them, and what benefits they provide.
AWS WorkSpace is Amazon’s managed desktop service. In this Amazon WorkSpaces tutorial, we are going to learn what Amazon AWS WorkSpaces are. We are going to learn how to use them, and what benefits they provide, we will look into Amazon workSpaces download and more.
Following topics are discussed in this blog:
- What is Amazon WorkSpaces?
- Amazon WorkSpace Benefits
- Amazon WorkSpace Features
- Hands-On
- Creating an Amazon WorkSpace
- Downloading and connecting Amazon WorkSpace
- Deleting an Amazon WorkSpace
What is Amazon WorkSpaces?
The basic idea behind Amazon WorkSpaces is to access your desktop from anywhere, at any time, from any device.
AWS WorkSpaces enable you to create virtual, cloud-based desktops which can be of Microsoft Windows or Amazon Linux for your users. These desktops are also known as WorkSpaces. You need not install hardware or complex software which is a huge benefit and also cuts costs. Also, you can add or remove multiple users as you like and they can access these WorkSpaces with any device.
Amazon WorkSpaces Benefits
There are eight benefits provided by Amazon WorkSpaces:
- Simplify desktop delivery
- Reduce costs
- Control your desktop resources
- Keep your data secure
- Offer flexible desktop OS deployment
- Deliver desktops to multiple devices
- Centrally manage and scale your global desktop deployment
- Use your existing directory
Let us discuss all these benefits one by one.
Simplify Desktop Delivery
- AWS WorkSpaces eliminate the need to manage all hardware and software components of your desktop, and also you don’t need to create any complex Virtual Desktop Infrastructure (VDI)
- You don’t need to be aware of your desktop’s life cycle. It is automatically provisioned and deployed when you create one. It is maintained by Amazon and Amazon takes care of recycling the desktop for further use when you delete your account.
Reduce Costs
- You do not need to buy desktops or laptops whenever you need more; you can just use the on-demand service provided by WorkSpaces to access cloud desktops
- These desktops provide Compute, Storage, Memory, and Databases resources as per users’ performance needs.
Control Your Desktop Resources
- You can choose from a range of CPU, Memory, and Solid-state Storage resources that Amazon WorkSpaces provide to reduce the unnecessary buying of hardware to meet your requirements.
- There is an option to dynamically modify the resources you use; it will help reduce costs.
Keep Your Data Secure
- The user data is not stored on a local device which helps eliminate the risk of stealing user data for unauthorized access.
- AWS WorkSpaces have a dedicated Virtual Private Network (VPC) which provides each user with encrypted and secure access to store volumes in the AWS cloud.
- Key Management Services (KMS) can also be deployed. It provides a public key file and a private key file. You can only access it with the private key file.
Offer Flexible Desktop OS Deployment
- Operating systems provided by AWS WorkSpaces Windows 7, Windows 10, and Amazon Linux. The desktop experience of these operating systems can be achieved through any device.
- You can also use your own laptop with Windows 7 or 10 and use your personal license to run them on WorkSpaces. This allows you to get your default settings.
Deliver Desktops to Multiple Devices
- The supported devices for Amazon WorkSpaces are Windows and Mac computers, Chromebooks, Fire tablets, iPads, and Android tablets. Also, accessing through Chrome and Firefox browsers are possible.
- Once your WorkSpace has been deployed for your use, you can just download the client and access it from the device of your choice.

Learn Practical Oriented AWS Certification Course from Real Time Experts
Weekday / Weekend BatchesSee Batch DetailsCentrally Manage and Scale Your Global Desktop Deployment
- To offer a high-performance cloud desktop, AWS WorkSpaces are available in 12 AWS Regions.
- Your team can work from anywhere in the world, and you can access and manage all of it through your AWS Console. You can also deploy hundreds of thousands of WorkSpaces from the console.
- As the number of your team changes, you can provision or de-provision desktops quickly.
Use Your Existing Directory
- The existing corporate directory including the Microsoft Active Directory can be integrated with the WorkSpace in a secure manner.
- Multi-factor authentication tools are offered to provide all authorized users access to company resources.
Amazon WorkSpaces Features
Features Amazon WorkSpaces provide are:
- Functionality
- Amazon WorkSpaces Bundles
- Allowing to bring your own licenses
- Easy provisioning
- Persistent Storage
Functionality
- If you manage either traditional desktops or an on-site solution for a Virtual Desktop Infrastructure (VDI), it requires a huge investment of capital, and it is difficult to deploy and manage.
- Using a virtual desktop via cloud eliminates the upfront costs and the need for managing the desktop, because all of these will be taken care of by Amazon. It will be cost-effective, user-friendly and broadly accessible desktop experience for your users.
Amazon WorkSpaces Bundles
- To start off with WorkSpaces, choose a bundle that offers different hardware and software options, and launch the number of WorkSpaces you require. After the WorkSpaces are provisioned, you will receive a mail to proceed further by connecting them.
- You can also create a custom image of your WorkSpace and create your own installed software bundle.
- Pre-installed software bundles are Microsoft Office and Trend Micro Worry-Free Business Security Services, and you can choose from Value plus, Standard plus, Performance plus, Power plus, PowerPro plus, Graphics plus, or GraphicsPro plus bundles.
Allowing to bring your own licenses
- You can bring your own Windows desktop licenses to WorkSpace and run them on the hardware dedicated to you.
- If you bring your own license, then a 16 percent reduction will be applicable for every WorkSpace. But for that your organization should be running at least 200 WorkSpaces in a given AWS region every month.
Easy provisioning
- It is very easy to provision desktops in AWS WorkSpaces just need to choose bundles that best suit your requirements and then launch one or more desktops.
- When you no longer need a WorkSpace, you can easily delete it.
Persistent Storage
- A varying amount of persistent storage will be provided according to the bundle you have selected. The data that users store on their volume provided by WorkSpace is backed up to Amazon S3, so it provides reliability.
- They can mount Amazon WorkDocs Drive to WorkSpaces, thus all the content in the WorkDocs Drive will be available for the users to use.
Creating an Amazon WorkSpace
Step 1 − Create and configure the VPC. (This we will discuss in detail in the VPC chapter.)
Step 2 − Create an AD Directory using the following steps.
- Use the following link to open Amazon WorkSpace Console https://console.aws.amazon.com/workspaces/
- Select Directories, then Setup Directory in the navigation panel.
- A new page will open. Select Create Simple AD button, then fill the required details.
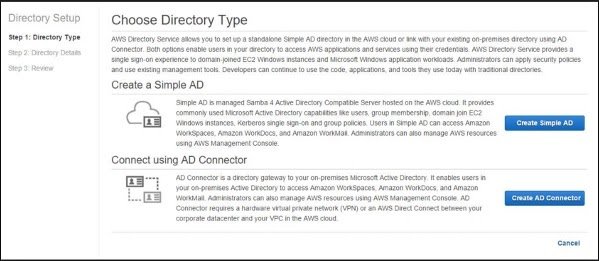
In VPC section, fill the VPC details and select Next step.
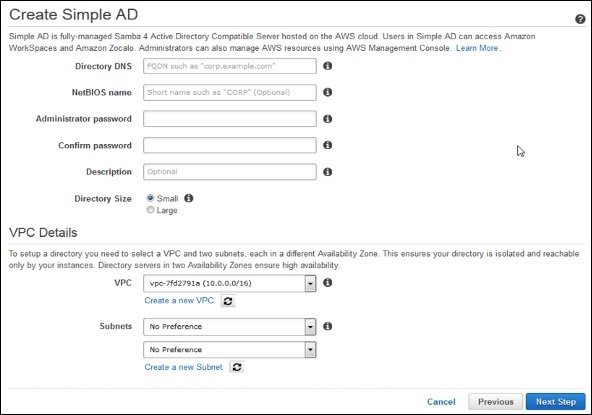
A review page will open to review the information. Make changes if incorrect, then click the Create Simple AD button.

Step 3 − Create a WorkSpace using the following steps.
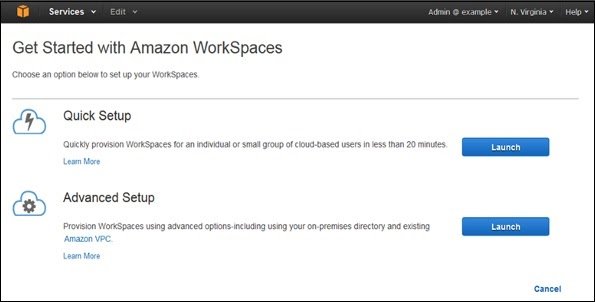
Use the following link to open Amazon WorkSpace Consolehttps://console.aws.amazon.com/workspaces/
Select Workspaces and then launch WorkSpaces option in the navigation panel.
Select the cloud directory. Enable/disable WorkDocs for all users in this directory, then click the Yes, Next button.
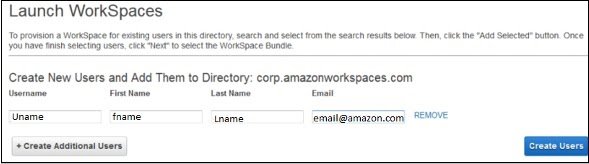
A new page will open. Fill the details for the new user and select the Create Users button. Once the user is added to the WorkSpace list, select Next.
Enter the number of bundles needed in the value field of WorkSpaces Bundles page, then select Next.
A review page will open. Check the details and make changes if required. Select Launch WorkSpaces.
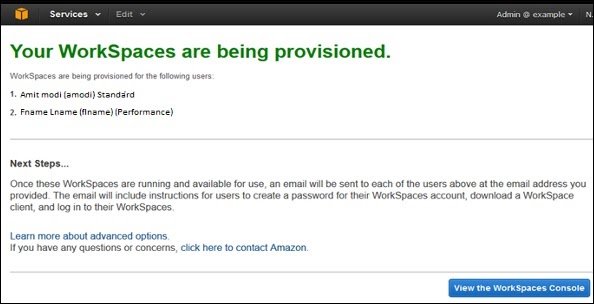
There will be a message to confirm the account, after which we can use WorkSpaces.
Step 4 − Test your WorkSpaces using the following steps.

Get On-Demand AWS Training to Build Your Skills & Advance Your Career
- Instructor-led Sessions
- Real-life Case Studies
- Assignments
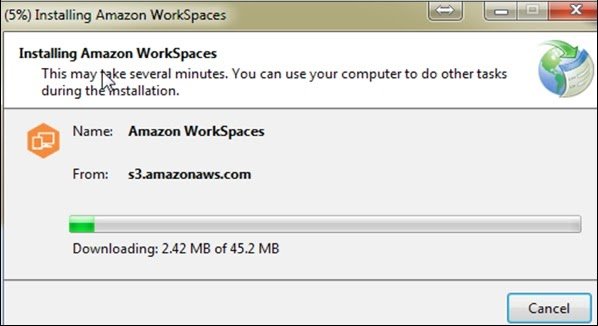
Download and install the Amazon WorkSpaces client application using the following link − https://clients.amazonworkspaces.com/.
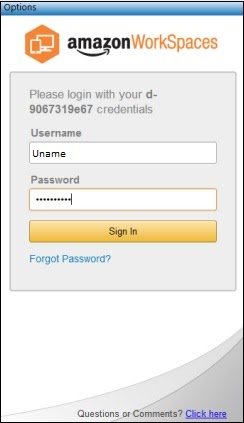
Run the application. For the first time, we need to enter the registration code received in email and click Register.
Connect to the WorkSpace by entering the user name and password for the user. Select Sign In.
Now WorkSpace desktop is displayed. Open this link http://aws.amazon.com/workspaces/on THE web browser. Navigate and verify that the page can be viewed.
A message saying “Congratulations! Your Amazon WorkSpaces cloud directory has been created, and your first WorkSpace is working correctly and has Internet access” will be received.
Amazon WorkSpaces Features
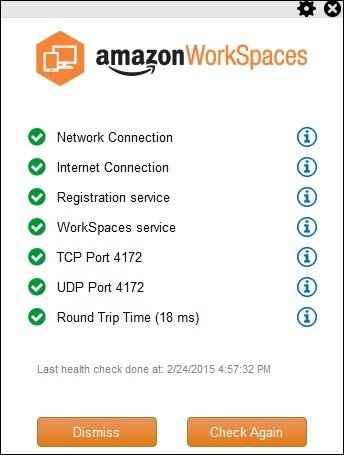
Network Health Check-Up
This AWS WorkSpaces feature verifies if the network and Internet connections are working, checks if WorkSpaces and their associated registration services are accessible, checks if the port 4172 is open for UDP and TCP access or not.
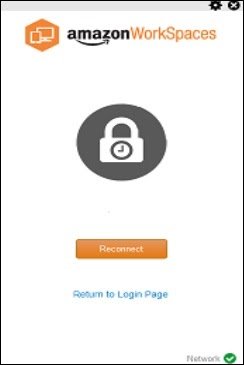
Client Reconnect
This AWS WorkSpaces feature allows the users to access to their WorkSpace without entering their credentials every time when they disconnect. The application installed at the client’s device saves an access token in a secure store, which is valid for 12 hours and uses to authenticate the right user. Users click on the Reconnect button on the application to get access on their WorkSpace. Users can disable this feature any time.
Auto Resume Session
This AWS WorkSpaces feature allows the client to resume a session that was disconnected due to any reason in network connectivity within 20 minutes (by default and can be extended for 4 hours). Users can disable this feature any time in group policy section.
Console Search
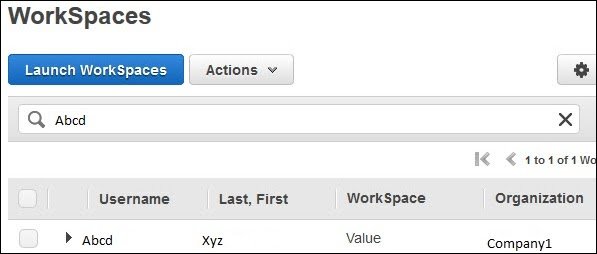
This feature allows Administrators to search for WorkSpaces by their user name, bundle type, or directory.