Last updated on 22nd Feb 2025| 5185
- What is a Raspberry Pi?
- Conditions for Forming a Relationship
- How to Use Node.js to Connect a Raspberry Pi to the Cloud?
- Why Use Node.js with Raspberry Pi for Cloud Integration?
- Step-by-Step Guide to Using Node.js to Connect Raspberry Pi to the Cloud
- How Raspberry Can Be Linked to Other Cloud Platforms?
- Conclusion
Linking a Raspberry Pi to the internet is a crucial step for enabling remote access, cloud computing, IoT projects, or browsing the web. There are several methods to establish a network connection, depending on your needs and setup. Whether you prefer a wired or wireless connection, the Raspberry Pi offers flexible options to get online. Here , we’ll explore different ways to connect a Raspberry Pi to the internet, ensuring that Cloud Computing Course can interact with other devices, access web-based services, and run network-enabled applications.
Learn the fundamentals of Cloud Computing with this Cloud Computing Online Course .
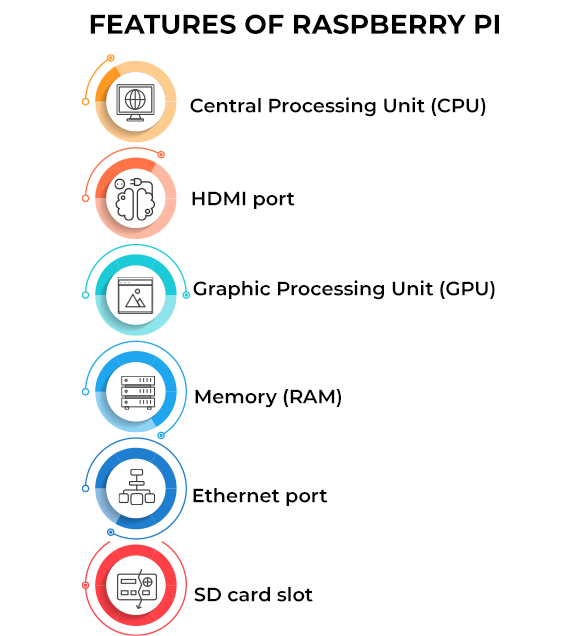
What is a Raspberry Pi?
The Raspberry Pi’s versatility extends to various fields, including automation, robotics, and home security. With its compact size, it is ideal for projects where space is limited. Connecting the Raspberry Pi to the cloud opens up possibilities for IoT (Internet of Things) devices, enabling seamless integration across networks. Additionally, cloud connectivity allows for real-time data analysis and remote device management, making it a powerful tool for both hobbyists and professionals. Whether it’s controlling smart devices or running data-intensive applications, the Raspberry Pi’s cloud capabilities enhance its already impressive functionality.
Conditions for Forming a Relationship
It’s crucial to make sure you have all the necessary setups in place before starting the thrilling process of connecting your Raspberry Pi to the Cloud Deployment Models in order to establish a reliable, secure, and effective connection. This procedure creates countless opportunities for remote monitoring, data management across devices, and Internet of Things (IoT) initiatives. The essential requirements for a successful cloud integration with your Raspberry Pi are listed below.
- Stable Internet Connection A dependable and steady internet connection is the cornerstone of any cloud-based connection. Your Raspberry Pi won’t be able to effectively communicate with cloud services without this. Usually, the Pi connects over Ethernet or Wi-Fi, but if you’re transferring a lot of data or using real-time services, ensure the signal is strong enough to support continuous data exchange.
- Cloud Service Account The next stage is to choose the cloud platform that works best for your project and register for an account. There are several choices, ranging from specialist platforms like ThingSpeak or Blynk for Internet of Things apps to well-known cloud service providers like Amazon Web Services (AWS), Google Cloud, and Microsoft Azure.
- Essential Software (e.g., Node.js) Your Raspberry Pi needs the appropriate software stack in order to communicate with the cloud. Node.js is one of the most important pieces of software since it offers a robust runtime environment for JavaScript-based applications. Because Node.js is very scalable and allows asynchronous processes, it is frequently used for cloud communications and is ideal for Internet of Things projects.
- Secure Authentication and Authorization When transferring data to the cloud, security is essential. When connecting your Raspberry Pi to cloud services, be sure to set up appropriate authentication methods, such as security certificates, access tokens, or API keys. This guarantees that your cloud environment can only be accessed by authorized people and devices.
- Cloud Storage and Data Management You will require a cloud storage solution when your Raspberry Pi transmits data to the cloud. This could include everything from basic file storage to intricate databases or data lakes, depending on the specifics of your project. Although most cloud platforms come with built-in data management tools in A Complete Citrix Certification Path, you might also want to think about how you’ll organize, retrieve, and evaluate your data when it’s in the cloud.
- Monitoring and Maintenance Tools Having monitoring and maintenance tools in place is crucial once your Raspberry Pi is linked to the cloud. These applications can be used to monitor cloud resource utilization, keep tabs on the condition of your Raspberry Pi, and identify possible problems before they become serious.
- Basic Knowledge of Networking Protocols It is essential to comprehend the fundamental networking protocols utilized in cloud communication. MQTT (Message Queuing Telemetry Transport), HTTP/HTTPS, and WebSockets are frequently used for data transmission in cloud-based IoT projects. Every protocol has advantages. For example, MQTT is a lightweight and effective messaging protocol, whereas HTTP/HTTPS is more common for web-based services.
- Cross-platform compatibility: Node.js is a fantastic option for cloud-based and Internet of Things applications since it can run on multiple platforms, including the Raspberry Pi.
- Applications involving real-time data: Like sensor readings or remote device monitoring, are best suited for asynchronous and event-driven systems.
- Huge library ecosystem: The Node Package Manager (npm) offers thousands of modules that facilitate simple communication between the Raspberry Pi’s hardware peripherals and the cloud.
- Step 1: Setting Up the Raspberry Pi: Make sure your Raspberry Pi is completely configured before you begin, with the Raspbian operating system loaded and an Ethernet or Wi-Fi connection to the internet.
- Install Raspbian OS: The official Raspberry Pi Imagery can be used to install Raspbian OS if you haven’t already.
- Establish an Internet Connection: Verify that your Raspberry Pi is linked to the internet. You can use an Ethernet wire or connect to your Wi-Fi network to accomplish this.
- Step 2: Installing Node.js: Installing Node.js on your Raspberry Pi is a prerequisite for using it. Here’s how to accomplish that:
- sudo apt update
- sudo apt upgrade
- Step : 1 Install Node.js: Use the following commands to install the most recent version of Node.js:
- sudo -E bash -sudo apt install -y nodejs | curl -sL
- https://deb.nodesource.com/setup_16.x
- Step 2: Verify Node.js Installation: Once installed, you can check the version of Node.js and npm (Node Package Manager) by running:
- node -v
- npm -v
- Step 3: Setting up Cloud APIs or SDKs:
- AWS: JavaScript AWS SDK
- Cloud by Google: Cloud SDK
- Microsoft Azure: JavaScript Azure SDK
- Install aws-sdk with npm
- Step 4: Writing the Node.js Script to Establish a Cloud ConnectionThis is a simple example of writing a Node.js script to transport data from your Raspberry Pi to an AWS IoT cloud service.
- mkdir raspberry-pi-cloud
- cd raspberry-pi-cloud
- npm init -y
- nano index.js
- const AWS = require(‘aws-sdk’);
- const iotdata = new AWS.IotData({ endpoint: ‘your-iot-endpoint.amazonaws.com’ });
- const params = {
- topic: ‘sensor/data’,
- payload: JSON.stringify({ temperature: 22.5, humidity: 60 }),
- qos: 0
- };
- iotdata.publish(params, function(err, data) {
- if (err) {
- console.log(‘Error sending data:’, err);
- } else {
- console.log(‘Data sent successfully:’, data);
- }
- });
- AWS IoT is used to publish data to a specific topic.
- The payload contains sensor data (temperature and humidity).
- Make sure to replace your-iot-endpoint.amazonaws.com with your actual IoT endpoint from AWS.
- node index.js
- Step 5: Managing Data from the Cloud: After delivering data to the cloud successfully, you might wish to handle it in more complex ways, including storing it in a database, analyzing it in real time, or using cloud functions to respond to certain events. Sensor readings, for instance, can be stored in AWS DynamoDB. Data may be automatically processed as it comes in with Google Cloud Functions. When data is received, certain actions can be triggered via AWS Lambda or Azure Functions. To store or process data as it enters the cloud, you can make changes to your Node.js script. Data may be automatically processed as it comes in with Google Cloud Functions. When data is received, certain actions can be triggered via AWS Lambda or Azure Functions. To store or process data as it enters the cloud, you can make changes to your Node.js script.
- Step 6: Ensuring Security and Authentication: Devices connecting to cloud services’ networks must authenticate securely. Make sure to: Give your Raspberry Pi permissions using IAM roles (Identity and Access Management).Use SSL/TLS encryption to protect your data communication. To authenticate API queries, use access tokens or API keys Microsoft Azure Portal.For example, you could set up X.509 certificates for AWS IoT to safely authenticate your Raspberry Pi.
- const AWS = require(‘aws-sdk’);
- const iotData = new AWS.IotData({ endpoint: ‘your-iot-endpoint.amazonaws.com’ });
- const params = {
- topic: ‘raspberry/sensor/data’,
- payload: JSON.stringify({ temperature: 22.5, humidity: 60 }),
- qos: 0
- };
- iotData.publish(params, (err, data) => {
- if (err) console.log(‘Error:’, err);
- else console.log(‘Success:’, data);
- });
- const { IoTClient } = require(‘@google-cloud/iot’);
- const client = new IoTClient();
- async function sendData() {
- const request = {
- name: ‘projects/your-project-id/locations/us-central1/registries/your-registry-
- id/devices/your-device-id’,
- payload: Buffer.from(JSON.stringify({ temperature: 22.5, humidity: 60 }))
- };
- const [response] = await client.sendCommandToDevice(request);
- console.log(‘Message sent:’, response);
- }
- sendData();
- const { Client, Message } = require(‘azure-iot-device’);
- const { Mqtt } = require(‘azure-iot-device-mqtt’);
- const connectionString = ‘your-device-connection-string’;
- const client = Client.fromConnectionString(connectionString, Mqtt);
- function sendData() {
- const message = new Message(JSON.stringify({ temperature: 22.5, humidity: 60 }));
- client.sendEvent(message, (err) => {
- if (err) {
- console.log(‘Error sending message:’, err);
- } else {
- console.log(‘Message sent successfully’);
- }
- });
- }
- sendData();
Learn how to manage and deploy cloud services by joining this Cloud Computing Online Course today.
How to Use Node.js to Connect a Raspberry Pi to the Cloud ?
Node.js has emerged as the preferred platform for creating scalable and effective network applications, and it opens up amazing possibilities for cloud connectivity when combined with the Raspberry Pi. Node.js makes it possible for your Raspberry Pi and cloud services to communicate seamlessly, whether you’re working on an IoT project, remote monitoring. A Complete Citrix Certification Path. We’ll demonstrate how to connect your Raspberry Pi to the cloud using Node.js in this blog post so you can take full advantage of this potent combo.
What is Node.js?Developers can run JavaScript on the server side with Node.js, an open-source JavaScript runtime based on Chrome’s V8 engine. It is renowned for its event-driven, non-blocking architecture, which makes it perfect for creating scalable, quick applications—especially those involving real-time communication. It is a flexible option for both front-end and back-end development because Cloud Computing Course makes use of JavaScript. Node.js can manage the backend functionality for cloud-based apps on a Raspberry Pi, taking care of things like data transmission and reception, device monitoring, and cloud service interaction.
Why Use Node.js with Raspberry Pi for Cloud Integration?

Step-by-Step Guide to Using Node.js to Connect Raspberry Pi to the Cloud
Looking to master Cloud Computing? Sign up for ACTE’s Cloud Computing Master Program Training Course and begin your journey today!
Update your Raspberry Pi:
Software Development Kits (SDKs) are provided by the majority of cloud platforms to facilitate Microsoft Azure Analysis Services interfaces. For instance:
These SDKs can be installed with npm. For example, to install the AWS SDK for JavaScript if you wish to work with AWS, execute the following command:
As an alternative, you can install the Google Cloud client library by running npm install @google-cloud/storage for Google Cloud.
Initialize npm:
Create a new Node.js file (index.js) for your script:
Example script to send data to AWS IoT :
In this script:
Run the script:
This script will send the sensor data to AWS IoT, and you should see the response in the console.

How Raspberry Can Be Linked to Other Cloud Platforms ?
Connecting a Raspberry Pi to cloud platforms like AWS Network Load Balancer, Google Cloud, and Microsoft Azure enables advanced features such as automated control, remote monitoring, and real-time data processing. Each platform provides unique tools to facilitate the integration: AWS: Use AWS IoT Core for secure connectivity and services like AWS Lambda and DynamoDB for real-time data processing and storage.
Example code for AWS IoT Core:Google Cloud: Google Cloud IoT Core offers easy connectivity with Google Cloud Pub/Sub for real-time data processing.
Example code for sending data:Preparing for Cloud Computing interviews? Visit our blog for the best Cloud Computing Interview Questions and Answers!
Azure: Azure IoT Hub enables bi-directional communication and integrates well with other Microsoft services.
Example code to send data:Each platform is suitable depending on your project’s needs: AWS excels in large-scale IoT, Google Cloud is strong for data analytics and AI, and Azure is ideal for seamless enterprise integration.
Conclusion
A Raspberry Pi’s capabilities are increased when it is connected to the cloud, becoming a potent center for remote monitoring, real-time data interchange, and access to cloud-based resources. Real-time data transmission is made possible by this integration, which is essential for applications where data flow is constant, such as the Internet of Things and smart home systems. Remote management and monitoring of Raspberry Pi devices is made possible by cloud services like AWS, Google Cloud, and Azure, which do away with the necessity for on-site assistance. Additionally, Cloud Computing Course provide robust resources that enhance the capabilities of the Raspberry Pi, such as databases, analytics tools, and machine learning models. Node.js makes it easier to connect the Raspberry Pi to the cloud and allows for smooth integration with a variety of platforms, each of which has its own special capabilities, such as security, real-time analytics, and artificial intelligence tools. In the end, cloud connection improves the Raspberry Pi’s performance by permitting real-time insights, remote management, and larger-scale data processing, opening up countless opportunities for industrial, smart home, and Internet of Things applications.