Last updated on 07th Mar 2025| 5601
- Overview of Azure Portal
- Key Features and Navigation
- Managing Virtual Machines in Azure Portal
- Resource Groups and Resource Management
- Monitoring and Alerts in Azure Portal
- Integrating with Azure CLI and PowerShell
- Security and Access Control
- Best Practices for Efficient Use
- Conclusion
Overview of Azure Portal
The Azure Portal is a web-based, unified console provided by Microsoft Azure to manage and monitor Azure resources and services. It is the primary interface for interacting with Azure, offering an easy-to-use, customizable dashboard where you can control your entire cloud infrastructure. The portal provides a central location for various tasks, from creating and configuring resources, managing virtual machines (VMs), setting up monitoring and alerts, and handling security and access controls.
Designed to be user-friendly, the Microsoft Azure Training is accessible via a browser. It can be customized to meet the needs of different users, from developers and IT administrators to business owners and data analysts. The portal has a flexible, responsive interface to help users manage resources on demand, ensuring that tasks such as creating, monitoring, and managing Azure services are as efficient and streamlined as possible.
Key Features and Navigation
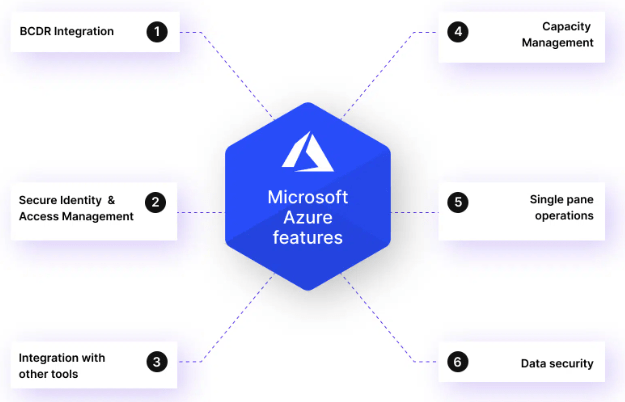
The Azure Portal has several key features that simplify resource management, monitoring, and analysis. Here are some of the most significant aspects of the portal:
1. DashboardThe Azure Portal offers a customizable dashboard where users can view their resources and services. You can pin frequently accessed services and resources to the Understanding Private Cloud Computing for quick access. The dashboard is a great way to keep track of your environment’s status, including system health, recent activity, and other important data points.
2. Search BarThe search bar at the top of the portal allows you to locate any resource, service, or feature in Azure. You can search for specific virtual machines, storage accounts, resource groups, and even specific Azure services like Azure Functions and Azure Databases. The search bar provides a powerful, time-saving tool for navigating the portal.
The “All Services” section is a comprehensive list of all Azure services available within the portal. The services are organized into categories such as Compute, Storage, Networking, and Databases, making it easy for users to navigate the portal and find the services they need for their projects.
4. Resource GroupsA resource group is a container for all Azure resources and helps manage and organize them. In the portal, users can create new resource groups, access and manage existing ones, and move resources between different resource groups.
5. Azure MarketplaceAzure Marketplace is a store with a wide range of applications, services, and virtual machine images provided by Microsoft and third-party vendors. You can browse and deploy various services and solutions that integrate with Azure SSO to Secure and Scalable Authentication, making finding tools for your cloud environment easier.
6. Cloud ShellAzure Cloud Shell is an integrated command-line interface (CLI) for managing Azure resources directly from the portal. It provides access to Azure PowerShell and the Azure CLI, allowing users to execute command scripts and automate tasks without installing and configuring tools on local machines.
Learn how to manage and deploy Azure services by joining this Microsoft Azure Training today.
Managing Virtual Machines in Azure Portal
Virtual machines (VMs) are one of the most widely used resources in the Azure cloud platform. Managing VMs in the Azure Portal is intuitive and straightforward. Here are some of the key tasks you can perform related to virtual machines:
1. Creating Virtual MachinesUsing the Create a Resource option in the Azure portal, you can quickly create VMs. The portal allows you to select the OS, configuration settings, and resource allocation for your virtual machine. Users can also choose from several VM sizes, ranging from small instances for testing to large instances for production workloads. To create a VM:
- Navigate to the Azure Portal’s Virtual Machines section.
- Click + Add to begin creating a new VM.
- Follow the steps in the wizard to configure the VM’s name, resource group, region, size, and disk options. 2. Managing Virtual Machine Settings
- Starting and Stopping VMs: You can start, stop, or restart a virtual machine by selecting the VM from the list and choosing the appropriate action.
- Scaling: You can resize VMs to adjust to changing workloads by choosing a size under the Size option.
- Networking: You can configure networking options, including Cloud Deployment Models, subnets, and public IP addresses for your VM.
- Disks: The portal allows you to attach new disks, manage existing disks, or resize them for more storage capacity. 3. Monitoring Virtual Machines
- CPU usage: Tracks how much processing power the VM is consuming.
- Disk I/O: Monitor the input/output operations of attached disks.
- Network Traffic: Measure the network throughput to understand data transfer usage. 4. Backup and Recovery
- Apply Tags: Key-value pairs will enable you to organize and categorize resources for billing or Microsoft Azure Training .
- Access Control: You can assign role-based access control (RBAC) roles to a resource group to define who can access the resources. 3. Moving Resources Between Resource Groups
Once a VM is created, you can manage various settings through the Azure Portal:
The Azure Portal also offers built-in monitoring tools for tracking the performance of virtual machines. You can monitor:
Azure provides automatic backup services for virtual machines. You can configure Azure Backup to back up the state of your VMs and recover them in case of failure. This is essential for disaster recovery planning and data protection.
Unlock your potential in Microsoft Azure with this Microsoft Azure Training.
Resource Groups and Resource Management
1. What is a Resource Group?A resource group is a logical container for resources deployed on Azure. It enables you to organize and manage resources related to a particular project or application. Using resource groups makes it easier to apply access control policies and manage resource lifecycles.
2. Managing Resource GroupsIn the Azure Portal, users can create, delete, and organize resources within a resource group. You can view a resource group’s resources and quickly navigate between them. Resource groups also allow you to:
Sometimes, resources need to be moved between resource groups. Azure Portal allows you to move resources without downtime, which is helpful in organizational restructuring or optimizing resource management.

Monitoring and Alerts in Azure Portal
Azure provides robust monitoring and alerting features that help users stay informed about the health and status of their resources. Here are some key features of monitoring and alerts:
1. Azure MonitorAzure Monitor is a comprehensive solution for monitoring the health, performance, and availability of Azure resources. It provides real-time metrics and logs to help identify issues. You can view performance data such as CPU usage, Guide to Azure Site Recovery , and disk performance for VMs, databases, and other services.
2. AlertsAlerts in the Azure Portal can be configured to notify users of important events or thresholds being met. You can set up alerts based on performance metrics (e.g., CPU usage over 80%) or other system behaviors. Alerts can be configured to trigger actions such as sending emails, invoking webhooks, or initiating an Azure Logic App workflow.
3. Log AnalyticsAzure Log Analytics allows you to query logs for detailed information about your resources. You can filter logs by resource, time, and event type to investigate potential issues and gain deeper insights into your environment.
Looking to master Cloud Computing? Sign up for ACTE’s Cloud Computing Master Program Training Course and begin your journey today!
Integrating with Azure CLI and PowerShell
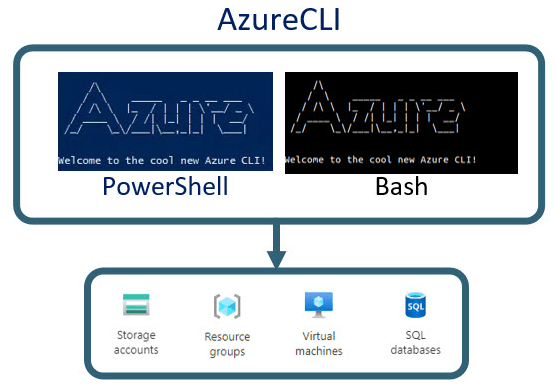
Azure CLI and Azure PowerShell are command-line tools for managing and automating tasks in Azure. They are powerful alternatives to the Azure Portal for users who prefer scripting or automation.
1. Azure CLIThe Azure Command-Line Interface (CLI) is a cross-platform tool that enables users to interact with Azure resources using commands. Azure CLI is beneficial for automating repetitive tasks and for DevOps workflows. It’s easy to integrate with scripting tools such as Bash or PowerShell, and it provides a consistent interface across different platforms, including Windows, macOS, and Azure Availability Sets vs Zones. Users can open a terminal or Cloud Shell in the Azure Portal to launch the Azure CLI.
2. Azure PowerShellAzure PowerShell provides a set of cmdlets to manage Azure resources through PowerShell scripts. It allows users to manage and automate tasks across multiple Azure services. PowerShell is a great tool for administrators who want to automate resource creation and management, integrate with other automation tools, or run scripts on a schedule.
3. Integration with Azure PortalCloud Shell provides a browser-based interface to Azure CLI and PowerShell, so you can run both Azure CLI and PowerShell commands directly from the Azure Portal without needing to install or configure them on your local machine.
Security and Access Control
Security and access control are critical aspects of managing Azure resources. Azure provides multiple ways to enforce security policies and ensure only authorized users can access your resources.
1. Role-Based Access Control (RBAC)Azure uses Role-Based Access Control (RBAC) to manage who can access and perform actions on resources. You assign roles to users, groups, and applications through RBAC at various scopes, such as subscription, resource group, or individual resource level. Typical roles include Owner, Contributor, and Reader.
2. Azure Active Directory (Azure AD)Azure AD is Microsoft’s cloud-based identity and access management service. It enables users to authenticate and authorize access to Azure Powershell For Efficient Cloud Management. Through Azure AD, you can configure multifactor authentication (MFA) and conditional access policies and integrate them with on-premises Active Directory.
3. Network SecurityAzure provides multiple layers of network security, including Network Security Groups (NSGs) and Azure Firewall. NSGs can control inbound and outbound traffic to resources, while Azure Firewall provides more granular security policies for managing network traffic.
Boost your chances in Microsoft Azure interviews by checking out our blog on Microsoft Azure Interview Questions and Answers!
Best Practices for Efficient Use
1. Organize Resources with Resource GroupsUsing resource groups effectively can simplify resource management. Group related resources together based on projects, departments, or environments. This makes applying policies, monitoring usage, and ensuring consistency easier.
2. Automate Repetitive TasksAutomate repetitive tasks, utilize the Azure Log Analytics for Monitoring and Diagnosis, PowerShell, and Azure Automation. Automation reduces the chances of human error, increases efficiency, and allows for scalability in managing resources.
3. Monitor RegularlyTake advantage of Azure Monitor and alerts to monitor your resources’ health proactively. Set up alerts for performance metrics, errors, or unusual activity to prevent issues before they become critical.
4. Secure Your ResourcesImplement strong security policies using RBAC and Azure AD to control resource access. Regularly audit your access control settings and enforce least privilege principles.
5. Cost ManagementUse the Azure Portal’s Cost Management and Billing features to monitor and optimize your spending. Set up budgets and alerts to track costs and ensure that your usage aligns with your budgetary goals.
Conclusion
The Azure Portal is an essential tool for managing and monitoring Azure resources. Its robust features, from managing virtual machines and storage accounts to configuring monitoring, alerts, and security policies, help users stay on top of their cloud infrastructure. By understanding how to navigate the portal, leveraging tools like Azure CLI and Microsoft Azure Training , and adhering to best practices, organizations can ensure that their Azure environment is secure, efficient, and optimized for performance.